Nissan 370Z Forum  

DIY - Side Blinker Black Out

Hey guys I never posted how I blacked out my side blinkers so why not now. This was a very simple mod and it looks so good! Ok so Removal:

Go Back   Nissan 370Z Forum > Nissan 370Z Tech Area > DIY Section (Do-It-Yourself)


Like Tree5Likes
  • 2 Post By Dallaz
  • 1 Post By xxAGAVExx
  • 2 Post By kuyo

Reply
 
LinkBack Thread Tools Display Modes
Old 11-14-2011, 02:19 AM   #1 (permalink)
A True Z Fanatic
 
Dallaz's Avatar
 
Join Date: Jun 2011
Location: North Dallas
Posts: 1,272
Drives: 09MontereyBlu370z6MT
Rep Power: 16
Dallaz is a splendid one to beholdDallaz is a splendid one to beholdDallaz is a splendid one to beholdDallaz is a splendid one to beholdDallaz is a splendid one to beholdDallaz is a splendid one to beholdDallaz is a splendid one to behold
Default DIY - Side Blinker Black Out

Hey guys I never posted how I blacked out my side blinkers so why not now. This was a very simple mod and it looks so good!

Ok so Removal:
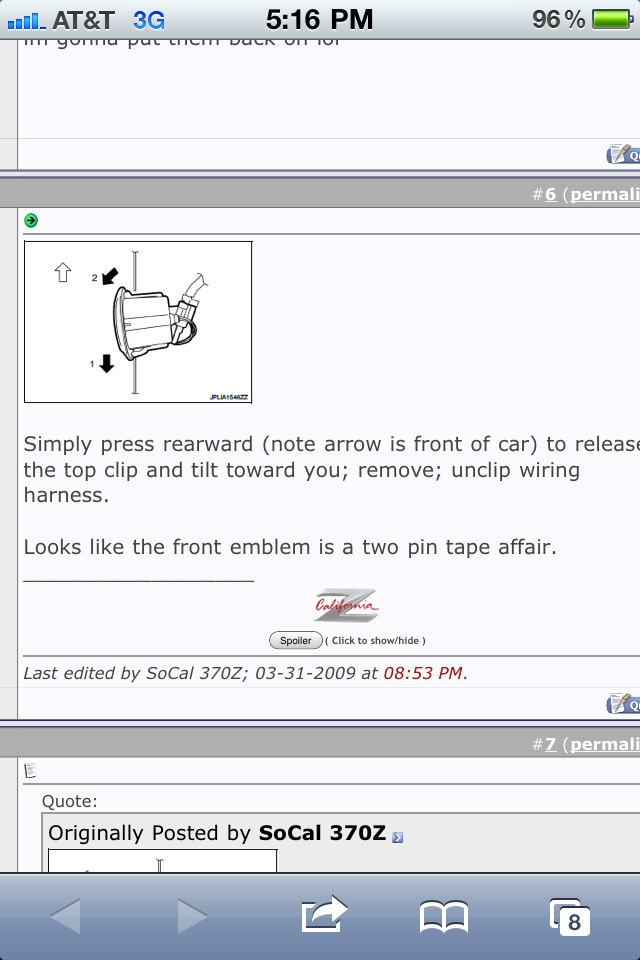
I didnt take any pictures of removal but it is VERY straight forward. All you have to do is pull on the blinker towards the back of the car and then pull outwards and it pops right out. then disconnect the wire from the blinker with a simple pinch and you will want to tape the wire to the car because it wants to pull itself inside the fender. There was quite a bit of dust around the circle area that the blinker covers so I went ahead and cleaned that before reinstalling them. I forget where I found this but here is a diagram showing how to remove it. This is a screenshot from my iPhone, so it's not the best.


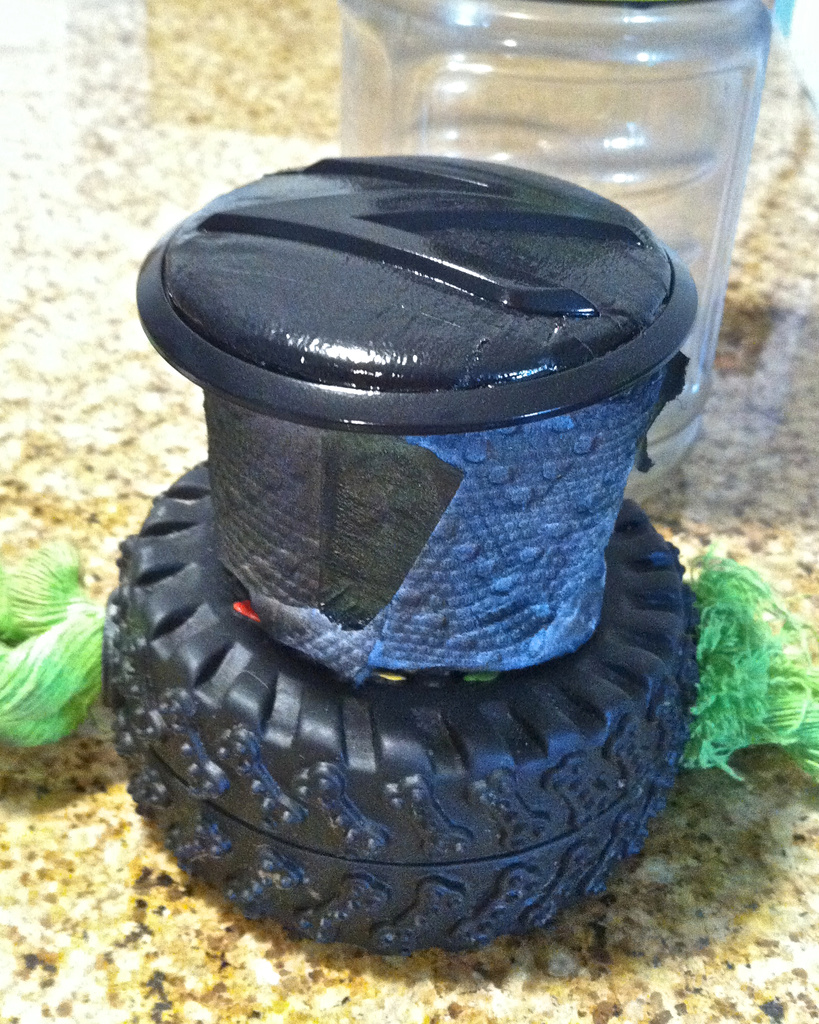
Ok so then I took everything inside and got to work. First things first, I used 3M masking tape (suppose any will do though), Krylon Fusion spray paint (gloss black), Krylon clear coat (spray can as well), a razor (the thin one in the pic is a good choice since you will be making precision cuts), paper towel (to wrap the back side of the blinker to avoid overspray on the wiring harness dealy wop).... I think thats it. All Items on this list can be purchased at walmart. The one thing I didnt do was use a primer but its coming up on 4 months and the paint is holding up great, and not much debris will hit the sides while driving so there is less chance of chips in the paint anyway.

The first step is to clean the blinker to get any dirt, dust, etc that may keep the paint from sticking well, off of the area that you will be painting. I may have used rubbing alcohol or nail polish remover or something... I forget.

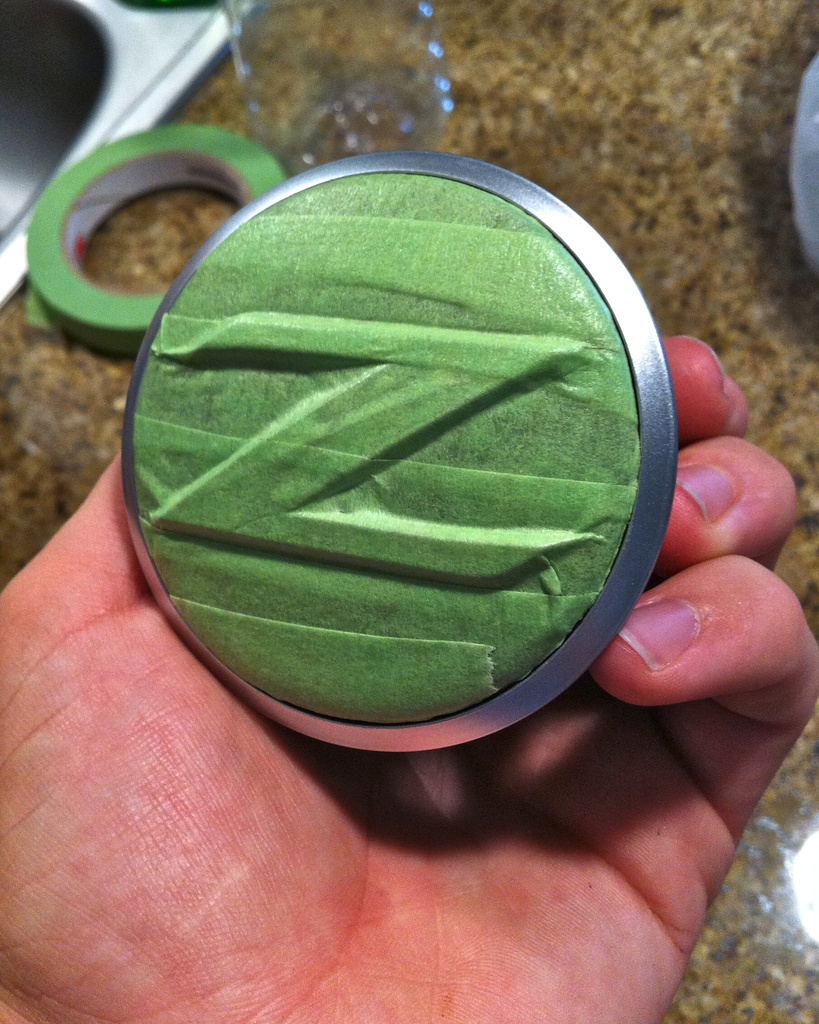
Then tape off the blinker. I applied one strip at a time and pressed it into the creases (blinkers edge, and around the Z emblem) using my finger nails as I applied each strip. Then comes the Razor. I started by cutting the tape around the edge and working on the Z part afterwards.
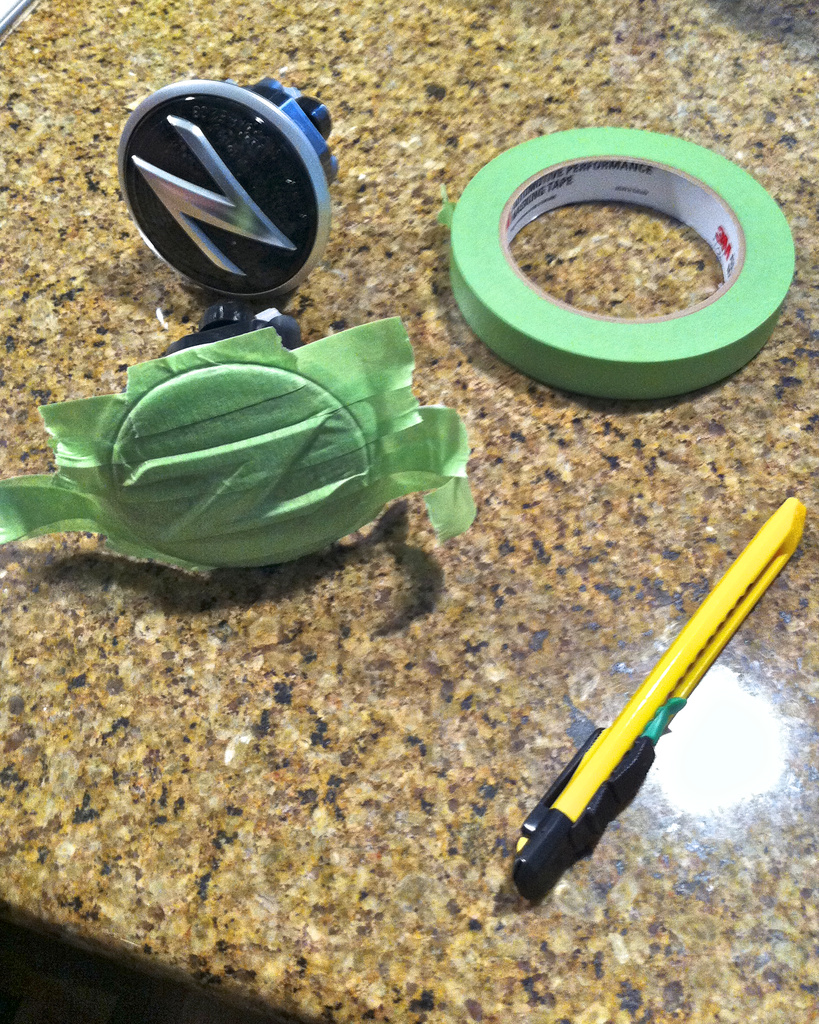


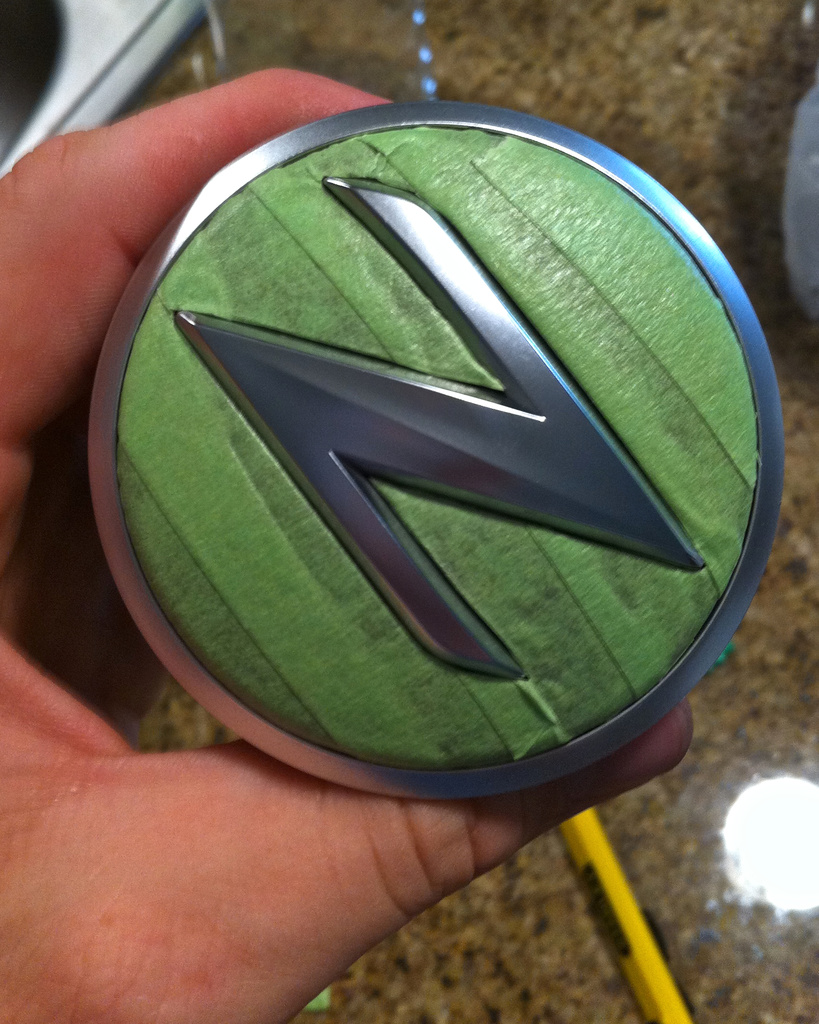
Then cut out the Z. just take your time, this is very simple but it would be easy to rush and accidentally slice the edge of the Z which would leave a scratch mark that would show through the paint afterwards. By the way I did no sanding on these.


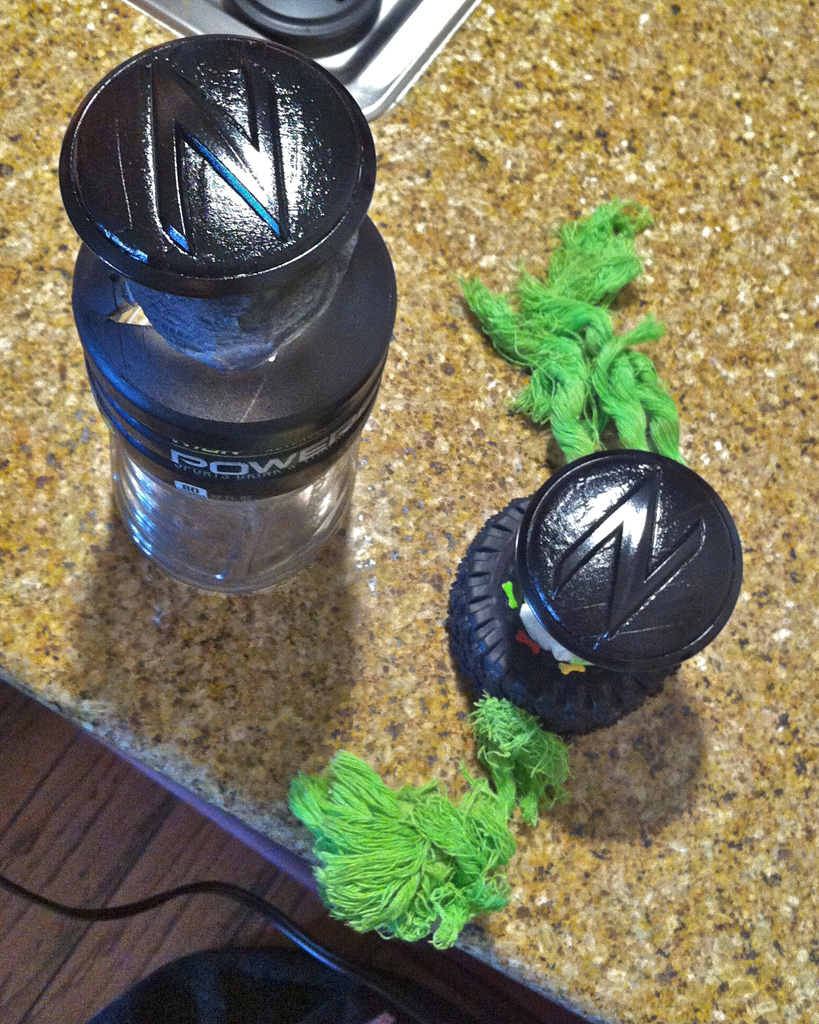
Next it's time to paint! I didnt take any photos of the process but I just took all of the stuff out to the patio and had a bunch of newspaper layed out and propped the blinkers upright using one of my dogs toys and a powerade bottle that I chopped the top off of (basically the first 2 things I saw, had to use the razor on the bottle though). Then I did 3 base coats of the gloss black and 3 coats of the clear coat, not waiting very long in between because it was very hot out and I figured it would dry quick.

Here is a shot right after painting and brought back inside


Alternate view showing my Genius (lol) paper towel idea


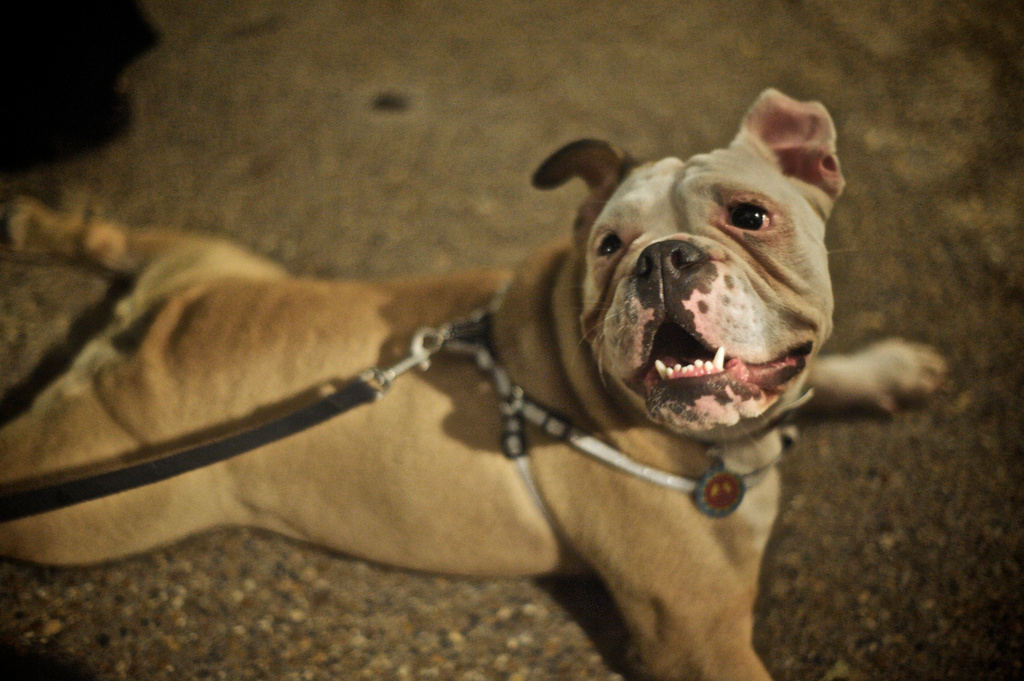
If anyone was curious here's the pup. Her name is Juno and she's right at 2 years now, this shot was taken Halloween 2010. She's a cutie!


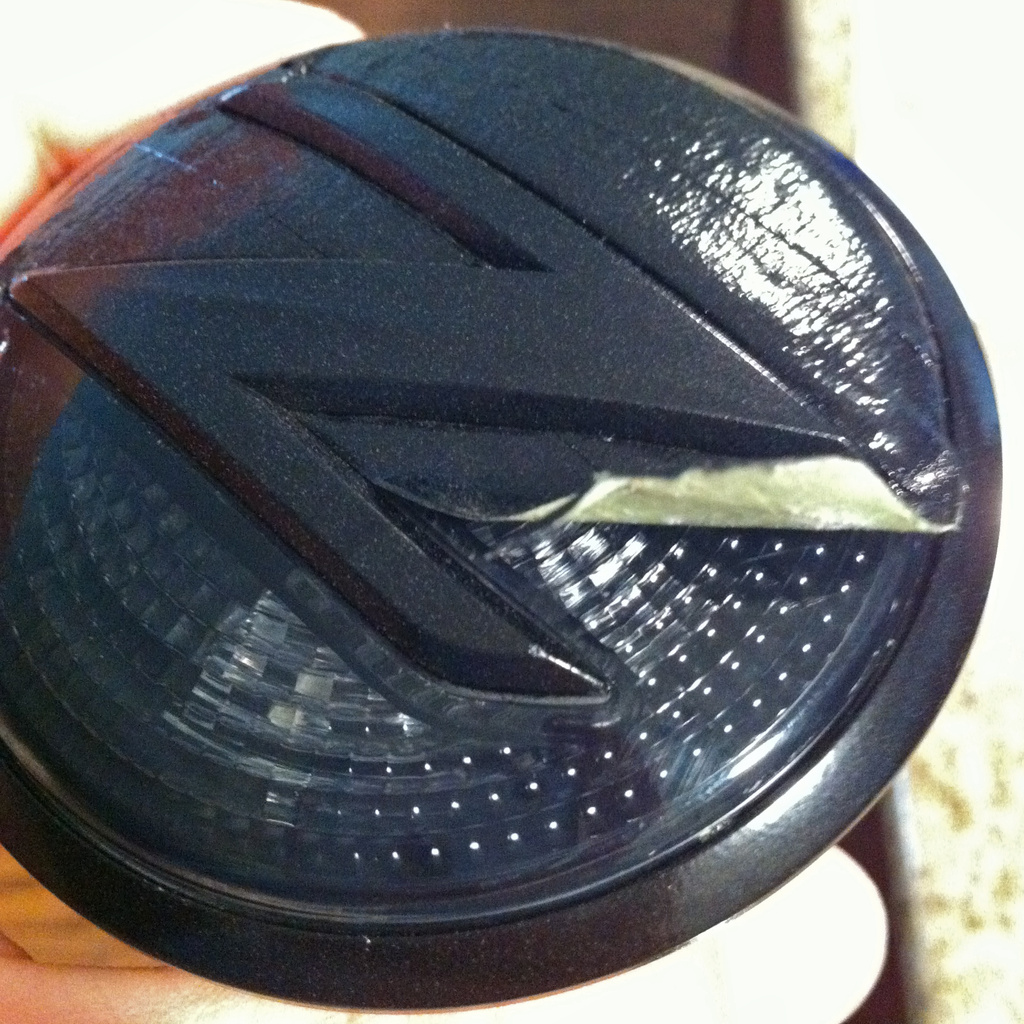
All thats left after letting them dry is peeling the tape off. I used the razor to get it started and then just pulled it off slowly and when going around the Z I was pulling away from it. The white speckles all over is a combination of the crappy iPhone sensor's sensitivity making the photo look grainy and the clear coat settling on top of the base coat. It says on the can this is normal and that the cloudy appearance goes away shortly, and it did.


2 views of the finished product before reinstallation.

#1
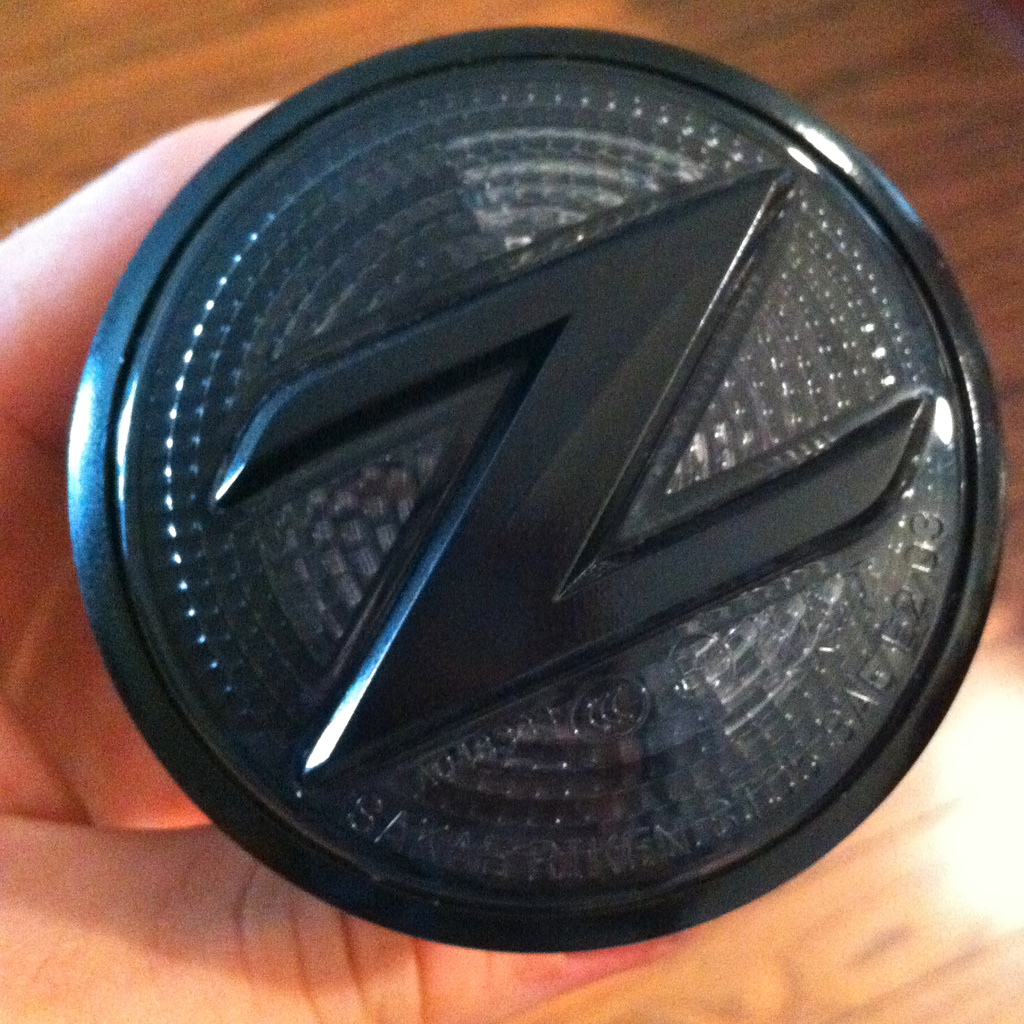


#2
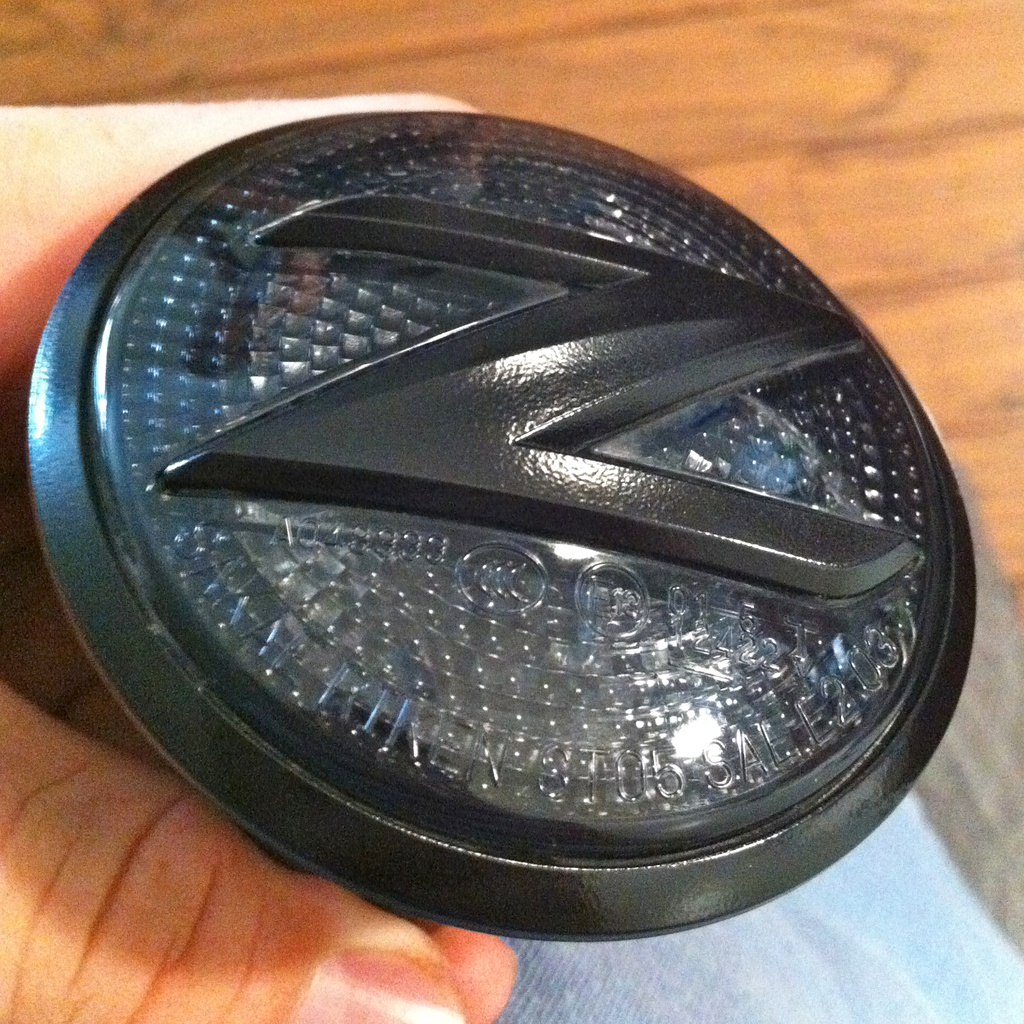

^^ Once again I did no sanding, but the slight texture you see on the Z's paint is invisible when viewing from anything past a few inches. Not noticeable what so ever.

last photo as I was taking them back down to install. In this photo you get to see the slight overspray since I did a second rate masking job on the back of these things, but it will never be seen so O'well. One more thing to note is that each blinker has a label so you know which side it goes and you don't have to mark anything. I believe it was just an L and an R on the back of each. And there you have it.
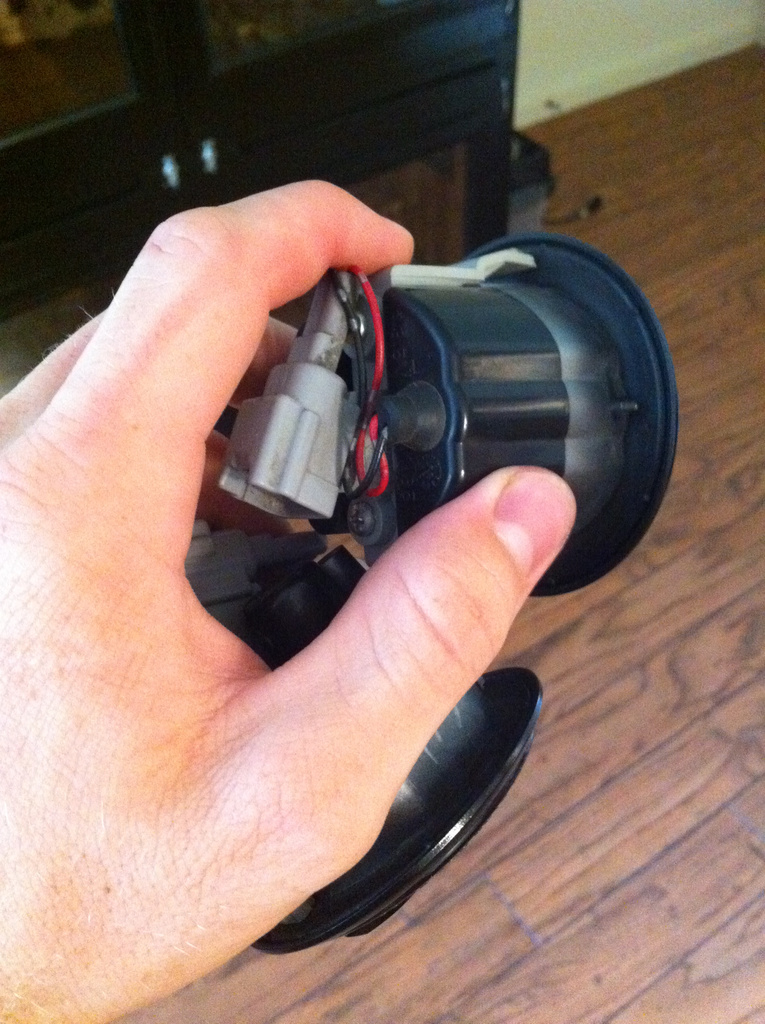


just pop the wiring back in the little attachment on the back of the blinkers and put them back in place. Who would have thought more time and effort would be put into a DIY than the actual process itself! Time to get some sleep!
xxAGAVExx and SterlingDrive like this.
__________________
AeroJacket Lip Kit | GTR switch | NISMO S-Knob | Blacked-Out-EVERYTHING| 5% Tint | Carbon Fangs/Upper Trim | VOSSEN CV3's | Painted Headlights | CF Diffuser

Dallaz is offline   Reply With Quote
Old 11-14-2011, 02:36 AM   #2 (permalink)
Administrator
 
Trips's Avatar
 
Join Date: May 2009
Location: Disneyland, Ca
Posts: 8,732
Drives: 🔰
Rep Power: 10
Trips has a reputation beyond reputeTrips has a reputation beyond reputeTrips has a reputation beyond reputeTrips has a reputation beyond reputeTrips has a reputation beyond reputeTrips has a reputation beyond reputeTrips has a reputation beyond reputeTrips has a reputation beyond reputeTrips has a reputation beyond reputeTrips has a reputation beyond reputeTrips has a reputation beyond repute
Default

Thank You for the DiY

This can be used for others wanting to do the same.
__________________


http://www.the370z.com/payments.php
Trips is offline   Reply With Quote
Old 08-31-2012, 01:01 PM   #3 (permalink)
Enthusiast Member
 
Plasmite's Avatar
 
Join Date: Aug 2012
Location: Canada
Posts: 259
Drives: '12 M6 Panty Peeler
Rep Power: 13
Plasmite is on a distinguished road
Default

Done Thanks for the DIY, looks awesome with MB colour
__________________
WISHLIST
Plasmite is offline   Reply With Quote
Old 09-02-2012, 09:57 PM   #4 (permalink)
rhd
Enthusiast Member
 
rhd's Avatar
 
Join Date: Feb 2012
Location: In the shop
Posts: 281
Drives: Women Crazy
Rep Power: 13
rhd will become famous soon enoughrhd will become famous soon enough
Default

Nice!
rhd is offline   Reply With Quote
Old 09-03-2012, 12:40 AM   #5 (permalink)
Base Member
 
anhdat503's Avatar
 
Join Date: Jul 2012
Location: Portland Oregon
Posts: 216
Drives: 12 Nissan 370z NismO
Rep Power: 13
anhdat503 is on a distinguished road
Default

look good
anhdat503 is offline   Reply With Quote
Old 03-29-2014, 08:05 PM   #6 (permalink)
Base Member
 
Join Date: Apr 2012
Location: NW Houston
Posts: 124
Drives: 370 Nismo
Rep Power: 13
kuyo is on a distinguished road
Default

thx
kuyo is offline   Reply With Quote
Old 03-29-2014, 09:32 PM   #7 (permalink)
Enthusiast Member
 
kazman's Avatar
 
Join Date: Nov 2011
Location: AR
Posts: 347
Drives: 12' 370z, 06 Eclipse
Rep Power: 14
kazman will become famous soon enoughkazman will become famous soon enough
Default

Subscribed for later. Thanks for the diy! Rep'd
kazman is offline   Reply With Quote
Old 03-29-2014, 11:05 PM   #8 (permalink)
A True Z Fanatic
 
xxAGAVExx's Avatar
 
Join Date: Nov 2012
Location: Tampa
Posts: 1,036
Drives: 09 370Z BLK M6
Rep Power: 53925
xxAGAVExx has a reputation beyond reputexxAGAVExx has a reputation beyond reputexxAGAVExx has a reputation beyond reputexxAGAVExx has a reputation beyond reputexxAGAVExx has a reputation beyond reputexxAGAVExx has a reputation beyond reputexxAGAVExx has a reputation beyond reputexxAGAVExx has a reputation beyond reputexxAGAVExx has a reputation beyond reputexxAGAVExx has a reputation beyond reputexxAGAVExx has a reputation beyond repute
Default

Nice DIY, I think I found a project for next weekend


Sent from my iPhone using Tapatalk
kazman likes this.
__________________
l 09/6MT l BP Twin Turbo Kit l E-85 w/Fuel Return l FI 18" Res CF CBE l Powertrix Ultra-Lite Coilovers l Wavetrac LSD | Lots of SPL and Carbon Fiber |
xxAGAVExx is offline   Reply With Quote
Old 03-30-2014, 06:55 PM   #9 (permalink)
Base Member
 
Join Date: Apr 2012
Location: NW Houston
Posts: 124
Drives: 370 Nismo
Rep Power: 13
kuyo is on a distinguished road
Default

gave it a try...sorry 4 the dirty car; flower sperm(pollen) is so heavy in the air right now,,car looks yellow in some spots


kazman and SterlingDrive like this.

Last edited by kuyo; 03-30-2014 at 06:57 PM.
kuyo is offline   Reply With Quote
Old 05-01-2014, 06:06 AM   #10 (permalink)
Base Member
 
qickdraw's Avatar
 
Join Date: Jun 2012
Location: australia
Posts: 76
Drives: '12 370z
Rep Power: 13
qickdraw is a jewel in the roughqickdraw is a jewel in the roughqickdraw is a jewel in the rough
Default

Looks awesome! I hadn't thought about red, but that's hot!


Sent from my iPad using Tapatalk
qickdraw is offline   Reply With Quote
Old 06-09-2014, 06:24 PM   #11 (permalink)
A True Z Fanatic
 
xxAGAVExx's Avatar
 
Join Date: Nov 2012
Location: Tampa
Posts: 1,036
Drives: 09 370Z BLK M6
Rep Power: 53925
xxAGAVExx has a reputation beyond reputexxAGAVExx has a reputation beyond reputexxAGAVExx has a reputation beyond reputexxAGAVExx has a reputation beyond reputexxAGAVExx has a reputation beyond reputexxAGAVExx has a reputation beyond reputexxAGAVExx has a reputation beyond reputexxAGAVExx has a reputation beyond reputexxAGAVExx has a reputation beyond reputexxAGAVExx has a reputation beyond reputexxAGAVExx has a reputation beyond repute
Default

Did mine this weekend, sorry for the dirty car


Sent from my iPhone using Tapatalk
__________________
l 09/6MT l BP Twin Turbo Kit l E-85 w/Fuel Return l FI 18" Res CF CBE l Powertrix Ultra-Lite Coilovers l Wavetrac LSD | Lots of SPL and Carbon Fiber |
xxAGAVExx is offline   Reply With Quote
Reply

Bookmarks


Posting Rules
You may not post new threads
You may not post replies
You may not post attachments
You may not edit your posts

BB code is On
Smilies are On
[IMG] code is On
HTML code is Off
Trackbacks are On
Pingbacks are On
Refbacks are On


Similar Threads
Thread Thread Starter Forum Replies Last Post
WTB: Evo-R Black Side Blades dangen1980 Wanted 0 09-14-2011 12:16 PM
Evo-r front lip and side skirts black z pics anyone? Colbizle Exterior & Interior 3 07-18-2011 10:54 AM
Installed new tail light blinker bulb's ZPhycho Exterior & Interior 30 10-07-2010 11:37 AM
For Sale: Black Bumpers, Side Skirts, and Mudflaps Thano Parts for sale (Private Classifieds) 10 07-10-2010 10:20 PM
F1 Style Rear Blinker 370Ztune Exterior & Interior 123 08-12-2009 10:05 AM


All times are GMT -5. The time now is 03:53 AM.


Powered by vBulletin® Version 3.8.4
Copyright ©2000 - 2025, Jelsoft Enterprises Ltd.
Search Engine Optimization by vBSEO 3.6.0 PL2