
 |
This takes 2-3 hours depending on how fast you work. It helps to have one person help with the pop rivets. Otherwise this is an easy cooling addition to the
|
|||||||
 |
|
|
LinkBack | Thread Tools | Display Modes |
|
|
#1 (permalink) |
|
Enthusiast Member
Join Date: Apr 2011
Location: The 49th State
Posts: 296
Drives: NISMOSIS
Rep Power: 15       |
This takes 2-3 hours depending on how fast you work. It helps to have one person help with the pop rivets. Otherwise this is an easy cooling addition to the oil cooler location using the GTM Supercharger Stage 1. It might work for Stage 2 if the oil cooler is in the same location as the Stage 1 kit.
All you do is remove a louvered section from an Audi fender lining and then pop rivet the section to a hole cut in your 370Z fender protector. Parts Required: Audi Splash Shield Part Number: 9595250 Pop Rivet Gun 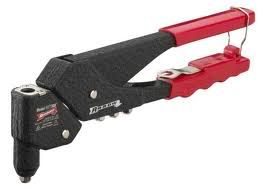 3/16" Large length Aluminum Pop Rivets (You could probably use Medium but Small will be too short). Lowes and Home Depot both should carry these pop rivets. They are a common size. 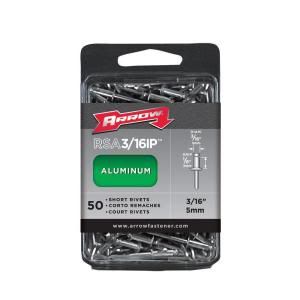 3/16" Aluminum Pop Rivet Washers 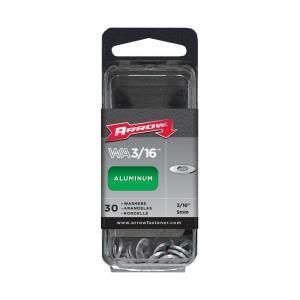 Sharp cutting utensil like a box cutter Dremel for cutting / sanding Assorted pliers and screw drivers to remove the Audi rivets The Audi part is the entire fender lining and it is quite long (that's what she said). You are just interested in the bottom half and the part with the louvers. Once you have the part, cut off ALL of the top half of the fender liner. It is much easier to work with after cutting off the top. 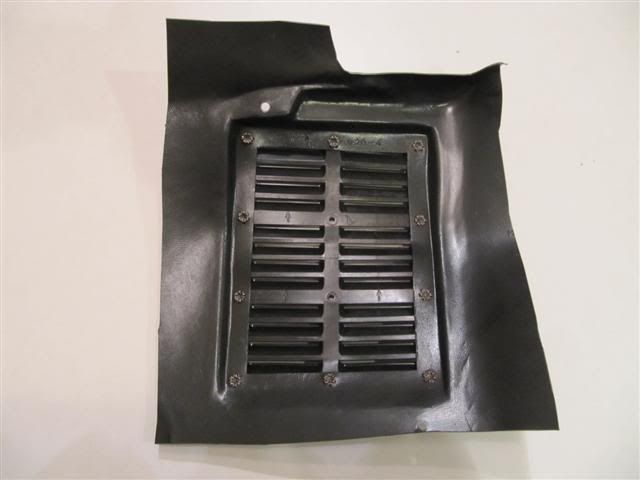 Use needle nose pliers and a small flat head screw driver to pry up and remove all of the star pop rivets (there are 10) to remove the louvered section from the Audi splash shield. You can drill out the Audi rivets but be careful because it is easy to melt the plastic. I used hand tools after melting one of the holes using a drill. This is louvered section you will have when you are done. 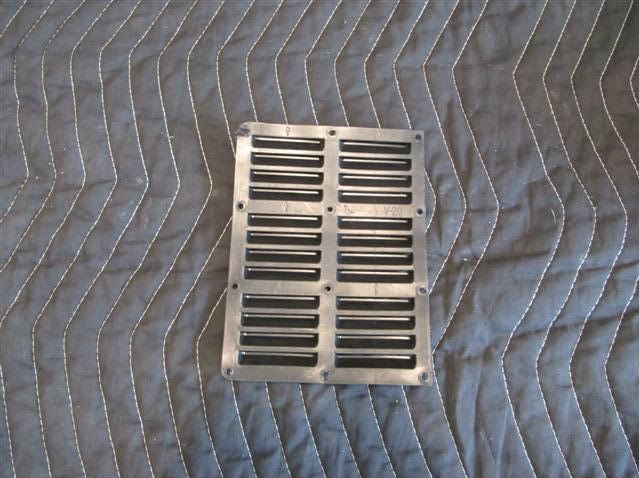 Now jack up the car and remove the front driver side wheel. Then you can remove the fender lining. Nissan calls it the fender protector and is item 1 is this picture. It is held in place with just a bunch of clips. 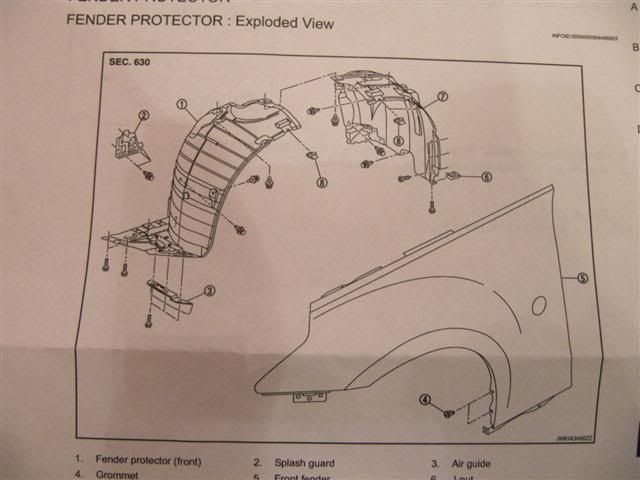 This is a shot of the 3 parts you have: The louvered section, the part you removed the louvered section from, and the Nissan fender protector: 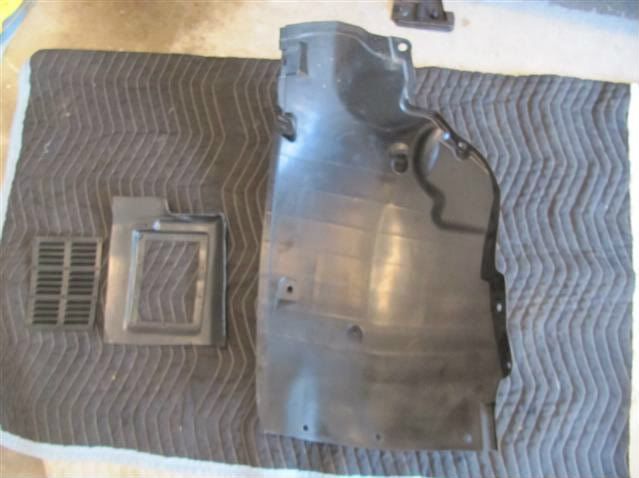 Use the middle part to as a template to draw out the section to be removed from the Nissan fender protector. You need to measure carefully as this part has to be very exact. There is not a lot of variance so measure three times and cut once. This shows where I marked to cut 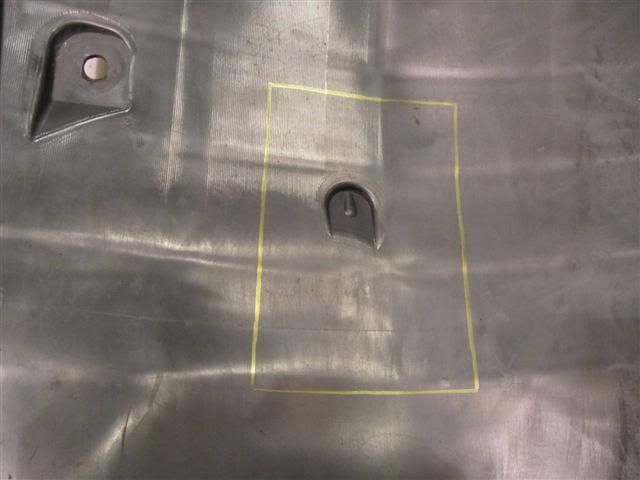 Use a sharp box knife with a new blade or something that you can control to make the cut. You could use a Dremel but you have to be careful to not melt the plastic. I was able to use a sharp box knife to cut most of the section away and used a Dremel to clean up the section. 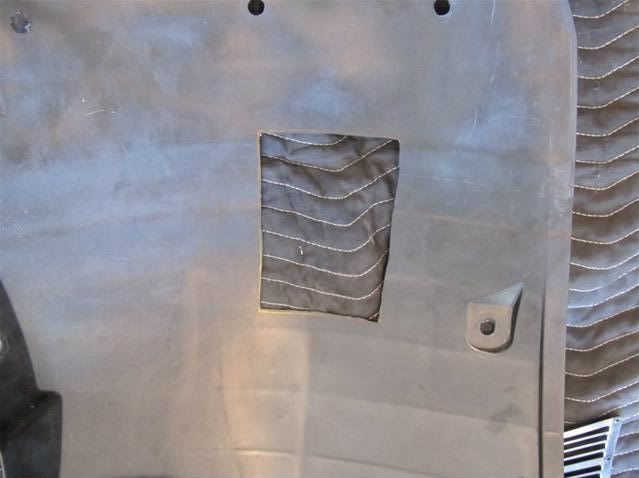 Use pop rivets and washers to mount the louvered section to the hole you cut out of the fender protector. This is a shot of the back after pop riveting the section to the fender protector: 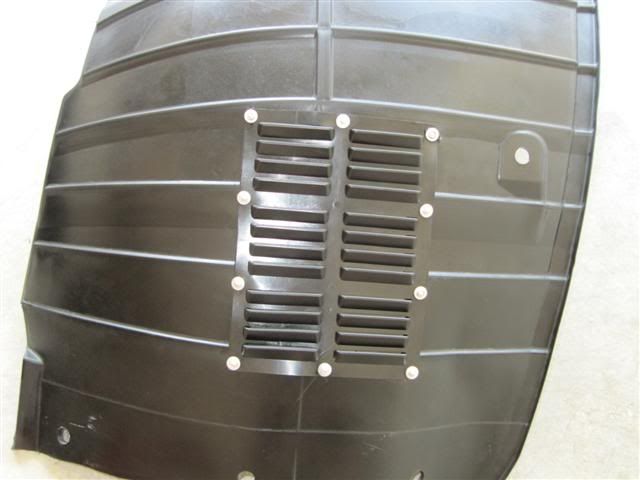 This is as shot after reinstalling the fender protector: 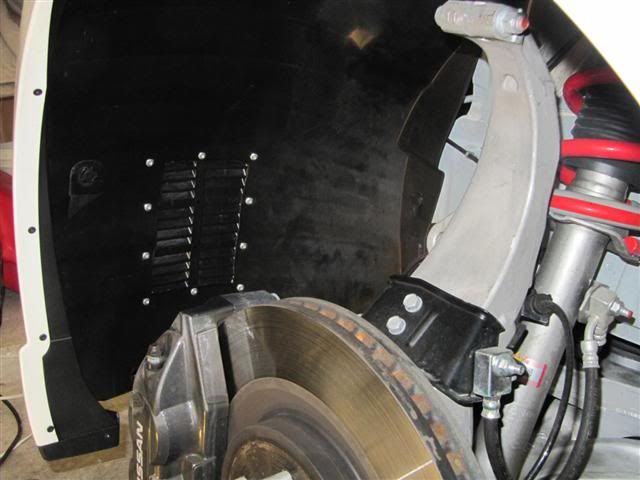 That is all there is to venting your fender lining. I used 3/16" Large Aluminum Pop Rivets with washers. The washers give a more positive engagement at the back of the rivet. I hope this helps those people who still have high oil temps WITH an oil cooler and the GTM Supercharger kit. |
|
|

|
|
|
#2 (permalink) |
|
A True Z Fanatic
Join Date: Aug 2010
Location: Lawrenceville,Ga
Posts: 4,293
Drives: My foot up your azz
Rep Power: 30            |
Pretty good idea,I don't have a SC but I do have a 25 row oil cooler and it still runs a little hot this maybe the missing item I need.
Thanks +1 rep to you sir 
__________________
2013 ZL1 754 rwhp 747 rwtq 
|
|
|

|
|
|
#3 (permalink) | |
|
Enthusiast Member
Join Date: Apr 2011
Location: The 49th State
Posts: 296
Drives: NISMOSIS
Rep Power: 15       |
Quote:
 Yep, I was running hot before the oil cooler. After the SC install with the 25R cooler I am still running too hot on the oil temps, up to 250 on highway driving. I started with the vent, have the Greddy turbo aluminum oil pan on order, and will probably install a SPAL fan on the front of the oil cooler to get more air flow over the cooler and now out the vent. I hope that keeps my temps under 220 in the Texas heat wave. |
|
|
|

|
|
|
#4 (permalink) |
|
A True Z Fanatic
Join Date: Dec 2008
Location: Peoples Republic of MD
Posts: 1,792
Drives: Roadster of DOOM
Rep Power: 20     |
Keep us updated on the heat... Mine gets to 220 but if I push it hard it will go to 240 pretty easily...
__________________
Powertrain Warranty voided on 5/14/2011 Mod List:GTM Supercharger,SmartTop module, Oil Cooler, GT-R Start button, Nismo Exhaust, BC Racing ER Coilovers, Backup Camara For eastwest: 
|
|
|

|
|
|
#5 (permalink) |
|
A True Z Fanatic
Join Date: Dec 2008
Location: Peoples Republic of MD
Posts: 1,792
Drives: Roadster of DOOM
Rep Power: 20     |
250 while playing with a GT2 today... 82 ambient...
__________________
Powertrain Warranty voided on 5/14/2011 Mod List:GTM Supercharger,SmartTop module, Oil Cooler, GT-R Start button, Nismo Exhaust, BC Racing ER Coilovers, Backup Camara For eastwest: 
|
|
|

|
|
|
#6 (permalink) |
|
Enthusiast Member
Join Date: Jan 2009
Location: SF Bay Area, CA
Posts: 271
Drives: '09 370Z
Rep Power: 17  |
Thanks, I'll be getting the GTM Stage 2 SC installed in a few weeks so heating is still a concern for me.
I have a question though. What is the point of the louvres? Could you simply just drill a ton of holes in that spot or cutting slots out instead of buying the Audi part and rivetting it in? |
|
|

|
|
|
#7 (permalink) | |
|
Enthusiast Member
Join Date: Apr 2011
Location: The 49th State
Posts: 296
Drives: NISMOSIS
Rep Power: 15       |
Quote:
Forum member Zat_Zuma did just that and added a SPAL fan:  SPAL fan  I thought the louvered section looked better on the fender protector but looks are completely subjective. The vent as best as I can tell because the temperatures have been somewhat cooler in the DFW Metroplex seem to be about 5-10 degrees lower with the vent. It is hard to say. I am also having the Greddy turbo oil pan installed this week. If that does not lower my temperatures enough, I will add the SPAL fan. As a last resort I will drill a hole for a duct in the front bumper. I guess every little cooling addition helps. Last edited by wind.zero; 08-31-2011 at 05:55 AM. |
|
|
|

|
|
|
#8 (permalink) |
|
A True Z Fanatic
Join Date: Nov 2008
Location: Edmonton, Alberta ...eh
Posts: 1,171
Drives: 2017 Touring auto
Rep Power: 19      |
Just as a update:
Finally got the car running without any major oil leaks and performed a test run to check AFR's and general health. Still have a oil drip from one fitting  . Cheap POS's that I'm going to serious think of replacing with some quality hydraulic hoses and stainless steel fittings that don't leak. . Cheap POS's that I'm going to serious think of replacing with some quality hydraulic hoses and stainless steel fittings that don't leak. Anyways, going forward, about oil temps. What I noticed and logged via Cipher, is that my DEFi gauge is out 10 F until 200 F, then it's out 5 F. The oil temp will match the engine coolant temp, for the most part. The fan and vent holes removed a ton of heat from the oil cooler and the air flow was decent. The ambient temp was 77 F. In the future I would consider a 34 row cooler and bigger fan that has double the air flow. (that's a hint to the higher ambient temps areas) Even with the bigger CSF radiator, the coolant temp averaged around 210 F in city traffic @ 50 mph avg (I'm wondering if I still have air pockets?) and oil temps never got past 200 F. Air intake temps were around 104 F. It was a test run limited to 3500 RPM and I'm sure once I really start working the Supercharger, temps will increase. Overall impressions are good about the Supercharger Stage 1, except for the cheap oil fittings/hoses and some pulley alignment issues, that had to be corrected. Instructions were very good but make sure you have the correct and updated ones. My only other complaint is that be sure you check to make sure you have the correct sized fittings as I was sent the wrong sizes and had to re-purchase and ship at my expense twice during the build process. That is all for now.
__________________
[B]2009 & 2017 370Z Touring Sport Autos SOLD |
|
|

|
|
|
#11 (permalink) |
|
A True Z Fanatic
Join Date: Jul 2010
Location: Newport Beach
Posts: 3,900
Drives: 2010 370Z/Saab 900se
Rep Power: 432            |
Very cool write up Zat, that looks really nice! I wonder if black rivets exist, it would look a bit cleaner in my opinion. I would probably go with a 34 row cooler if I had a SC personally, I hit 220 degrees with my 25 row cooler when working the car hard and I'm still N/A so I can only imagine what FI does.
__________________
-320whp / 259wftlbs- SP Rays -- RE-11s -- SpecialtyZ Tune -- Swift Springs -- Stillen 25R Oil Cooler -- Stillen G3 Intakes -- Berk HFCs -- F.I. 12" CBE -- Stillen Sway Bars -- Es14 Spring -- INGS+1 lip -- CF Spoiler -- GTR Start Button -- VLED Parking Lights -- PWJDM V2 shift knob |
|
|

|
|
|
#12 (permalink) |
|
A True Z Fanatic
Join Date: Aug 2009
Location: Chicago Burbs
Posts: 1,439
Drives: 09 370z Supercharged
Rep Power: 44            |
I'll try to get a pic of mine.. but I basically took an angle grinder and cut out a dozen or so 1/2 inch x 10 inch long holes in the fender liner. The grinder leaves pretty neat lines in the plastic as it kinda melts the edges.. Just another option...
__________________

|
|
|

|
|
|
#14 (permalink) | |
|
Enthusiast Member
Join Date: Apr 2011
Location: The 49th State
Posts: 296
Drives: NISMOSIS
Rep Power: 15       |
Quote:
Some people installed the fan to a temperature (180/190) switch but I wired mine to a manual rocker switch at the console. Glad you like the cooling mods. |
|
|
|

|
 |
| Bookmarks |
|
|
 Similar Threads
|
||||
| Thread | Thread Starter | Forum | Replies | Last Post |
| GTM Stage 2 Supercharger Preliminary Testing Results | SAM@GTM | Forced Induction | 576 | 01-15-2014 09:40 PM |
| GTM Supercharger Stage 1 w/ F.I. LTH | theDreamer | Forced Induction | 140 | 03-16-2013 04:50 PM |
| GTM Performance Engineering Stage 1 Turn key Supercharger kit In house Installation. | SAM@GTM | Forced Induction | 311 | 09-07-2011 03:42 AM |
| Are test pipes ok with GTM supercharger stage 1? | JordoKAP | Forced Induction | 15 | 06-29-2011 02:38 PM |
| GTM supercharger stage 1 videos | Fezzik | Forced Induction | 23 | 05-10-2011 11:34 AM |