Nissan 370Z Forum  

DIY: Windshield Washer Reservoir for the Boosted

Most of us that are boosted (and probably some CAI) had to delete our washer bottles and have just been living with it. I've been boosted for a while now

Go Back   Nissan 370Z Forum > Nissan 370Z Tech Area > DIY Section (Do-It-Yourself)


Like Tree17Likes
  • 8 Post By Jayhovah
  • 3 Post By Jayhovah
  • 1 Post By Jayhovah
  • 1 Post By Dirk McGurck
  • 3 Post By Jayhovah
  • 1 Post By Girald

Reply
 
LinkBack Thread Tools Display Modes
Old 01-15-2017, 09:48 PM   #1 (permalink)
Premium Member
 
Jayhovah's Avatar
 
Join Date: May 2013
Location: St. Pete, FL
Posts: 3,848
Drives: 520whp Fire Breather
Rep Power: 86951
Jayhovah has a reputation beyond reputeJayhovah has a reputation beyond reputeJayhovah has a reputation beyond reputeJayhovah has a reputation beyond reputeJayhovah has a reputation beyond reputeJayhovah has a reputation beyond reputeJayhovah has a reputation beyond reputeJayhovah has a reputation beyond reputeJayhovah has a reputation beyond reputeJayhovah has a reputation beyond reputeJayhovah has a reputation beyond repute
Default DIY: Windshield Washer Reservoir for the Boosted

Most of us that are boosted (and probably some CAI) had to delete our washer bottles and have just been living with it.

I've been boosted for a while now and for the most part, I haven't really missed the washer... but from time to time when you really need it, not having it can be annoying. So I made my own... hope this helps someone!

Background:
Conceptually the washer reservoir is a pretty simple thing. It's just a vented container with a hole for the pump, and optionally a level sensor. It can be as simple as grabbing an empty container (water bottles...detergent bottle, etc) and installing the pump into it.

Requirements:
1) Stock location - There is still a good bit of empty space in there and I want to avoid cutting the factory harness to relocate the pump.

2) Keep the level sensor - because.. why not? I'm always trying to keep my car as factory feeling as possible despite all the mods.

3) Be able to fill from the top of the engine compartment.

What you need: (Updated for v2 filler neck)
Level sensor https://www.amazon.com/gp/product/B0...?ie=UTF8&psc=1
Pump https://www.amazon.com/gp/product/B0...?ie=UTF8&psc=1
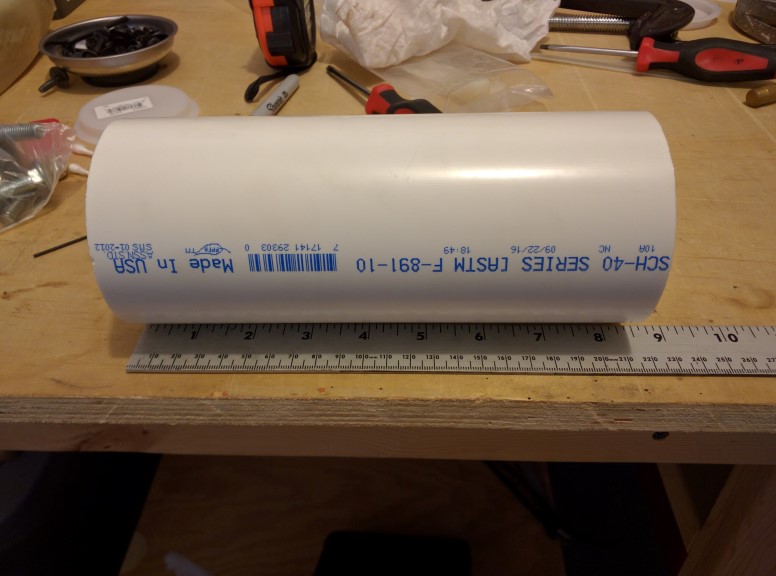
1x 3" PVC pipe, about 8.5"
1x 3/4" x 3/4" Male NPT hose barb
1x 3/4" x 3/4" Female NPT hose barb
1x 3/4" NPT Plug
2x hose clamps
2x 3" test/knockout caps
24" 3/4" ID flexible tubing
Aluminum or Steel for making brackets (mine was 3/4" x 1/8")
PVC Cement
Teflon tape

Parts list if building with larger v1 filler neck:
( Click to show/hide )
What you need:
Level sensor https://www.amazon.com/gp/product/B0...?ie=UTF8&psc=1
Pump https://www.amazon.com/gp/product/B0...?ie=UTF8&psc=1
1x 3" PVC pipe, about 8.5"
2x 3/4" x 3/4" NPT hose barbs
2x hose clamps
2x 3" test/knockout caps
18" 3/4" ID flexible tubing
Aluminum or Steel for making brackets (mine was 3/4" x 1/8")
1x 1 1/2" PVC Coupler
1x 1 1/2" PVC Plug
1x 1 1/2" PVC 3/4" Reducer Bushing
PVC Cement
Teflon tape
Epoxy

1 1/2" parts are for the filler neck, 3" parts are for the bottle.


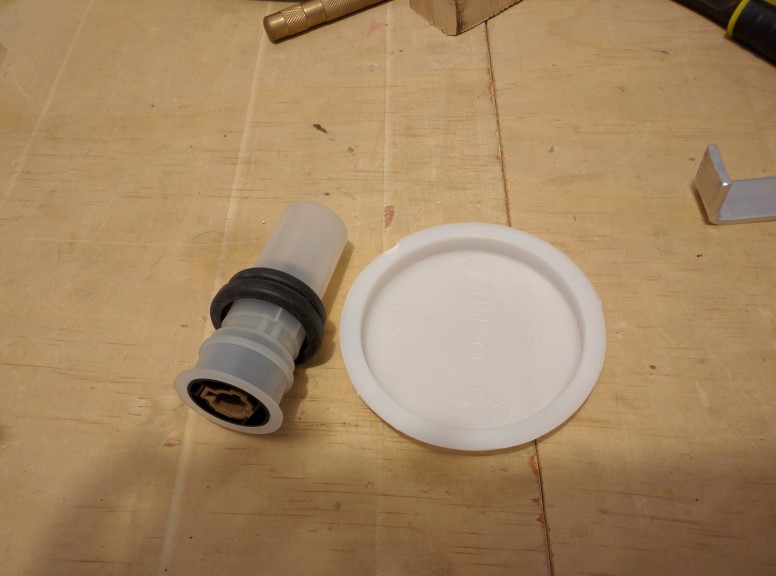
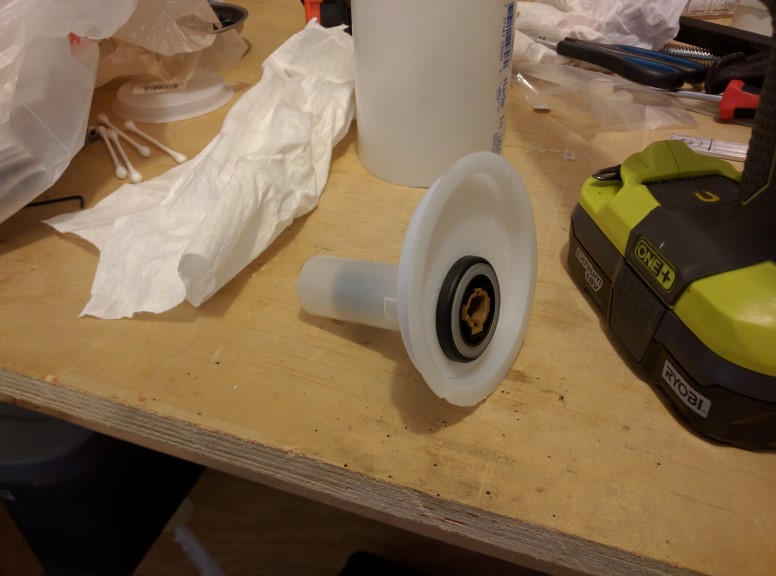
Here is a pic showing the difference between the v2 (smaller) filler neck vs the v1.


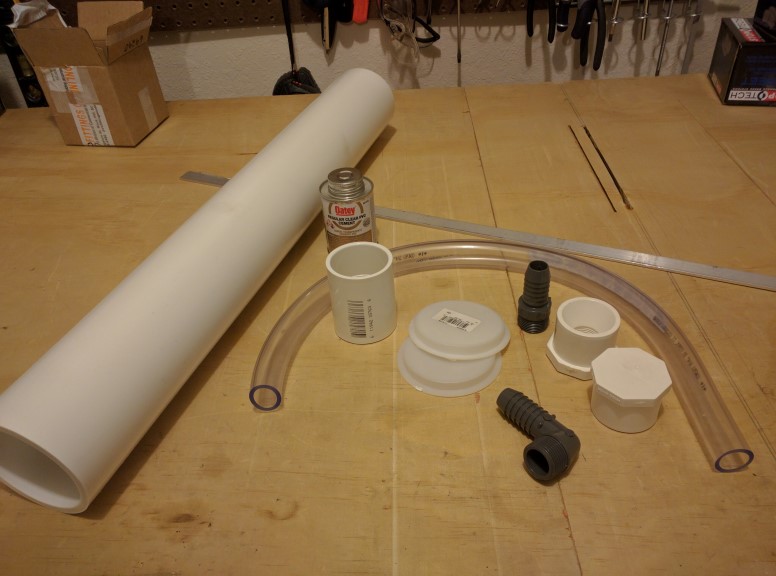
Costs: ~$25 for the PVC stuff (can be found at lowes). ~$30 for the new pump and sensor (or just rip out your OE ones). I had the aluminum laying around.

(Note, picture reflects parts for v1 filler neck)


Bottle:

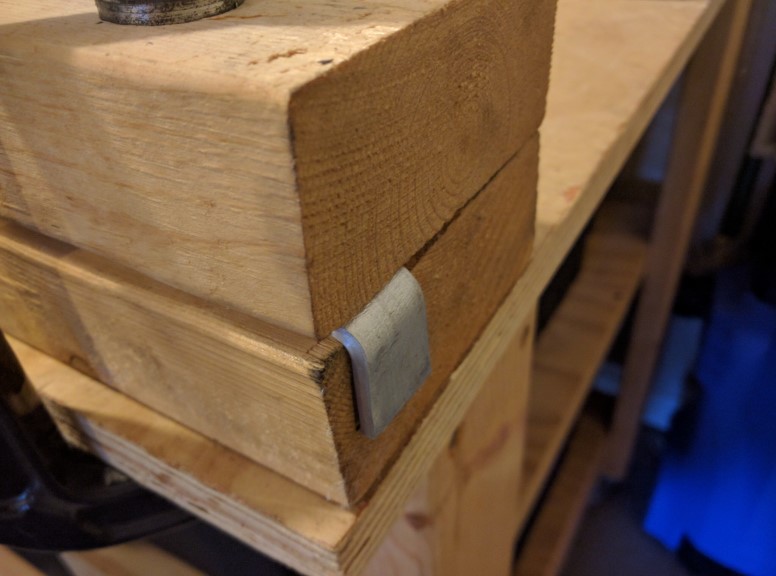
Started out by making a bracket to hold the bottle.. it uses a leftover mount for the OEM bottle.
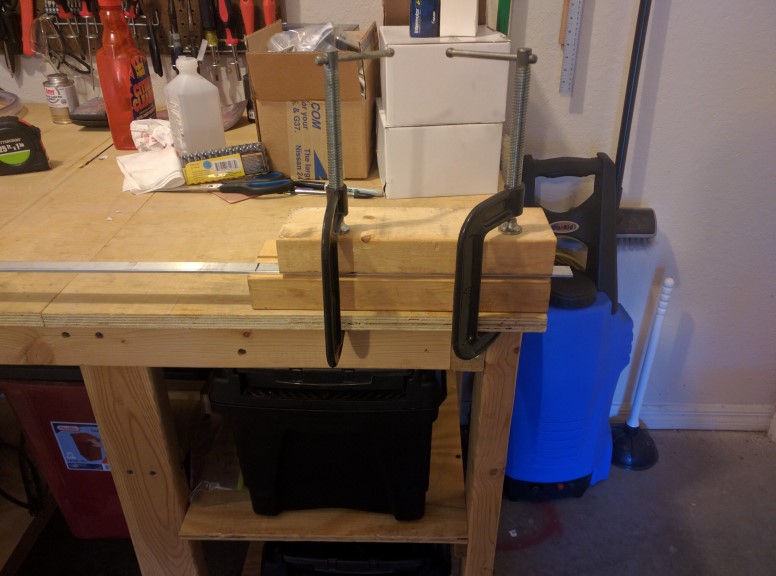
Here is how I make my brackets.. clamp it down and hit it with a hammer.


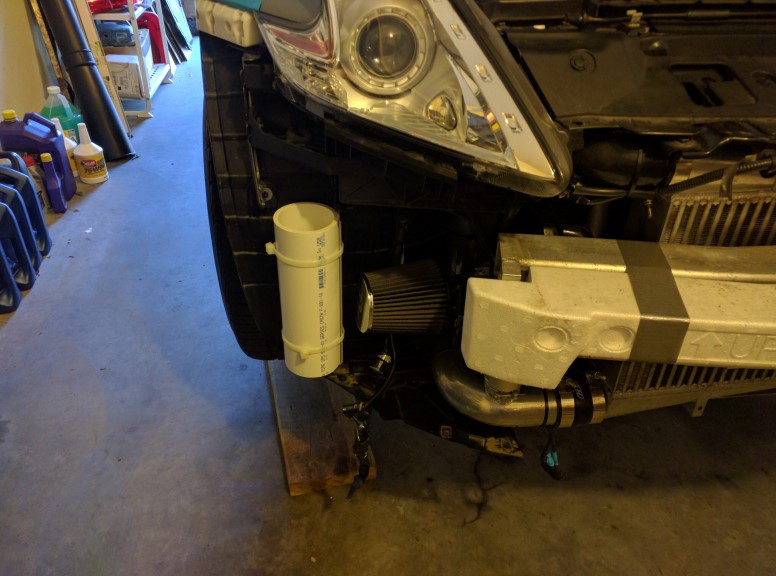
Test fit a piece of pipe to make sure it doesn't interfere with the bumper:


Unfortunately it hits the DRL. pre-'13 guys might be able to use this large of a bottle.


Had to cut the pipe and bracket a little shorter.


Test fit with the bumper again - all good!


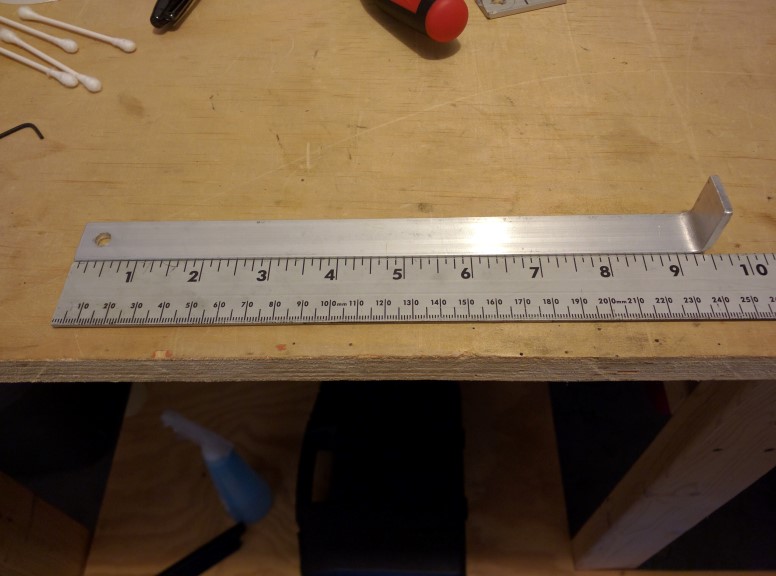
Resulting size of bracket:


And pipe:


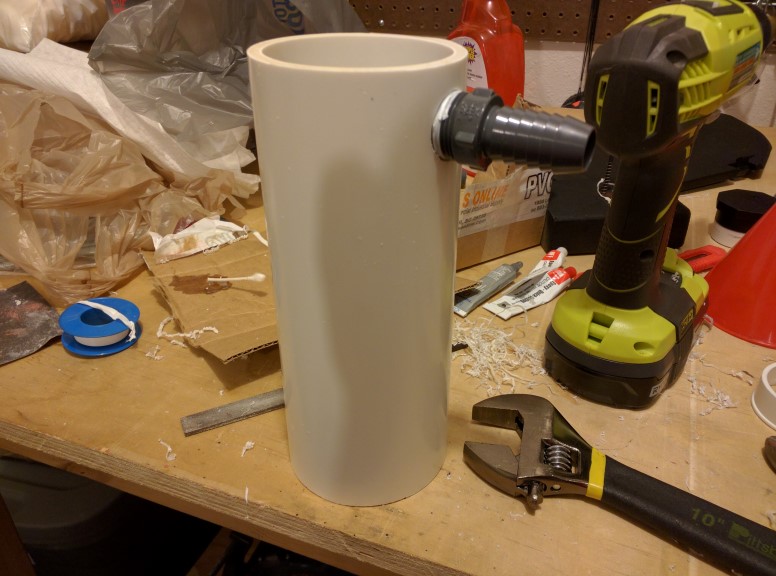
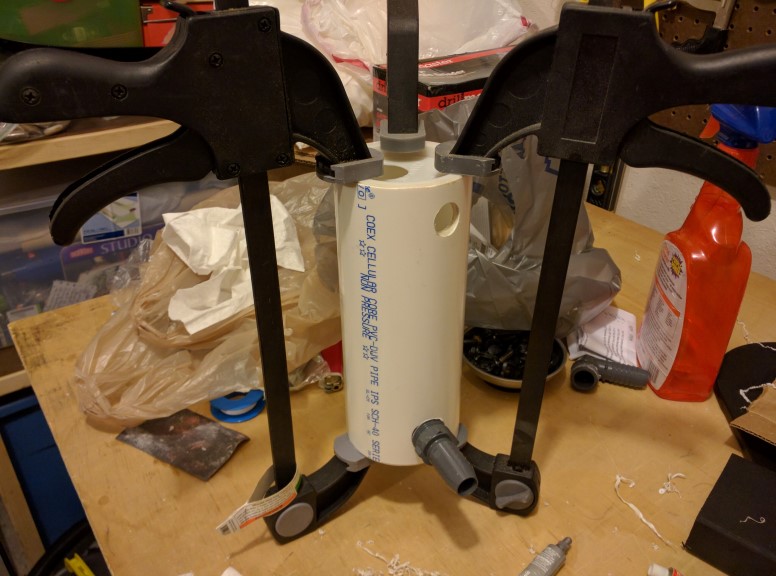
Bore a 1" hole in the pipe close to the edge, ensuring it isn't so close it will interfere with the test cap. If you have a 3/4" NPT tap, thread the hole. I didn't so I just wrapped the barb threads with teflon tape and forcibly threaded it in a few turns. I had originally planned to seal around it with epoxy, but to my surprise this turned out to be water tight.
I used a step bit for all the drilling in this DIY.


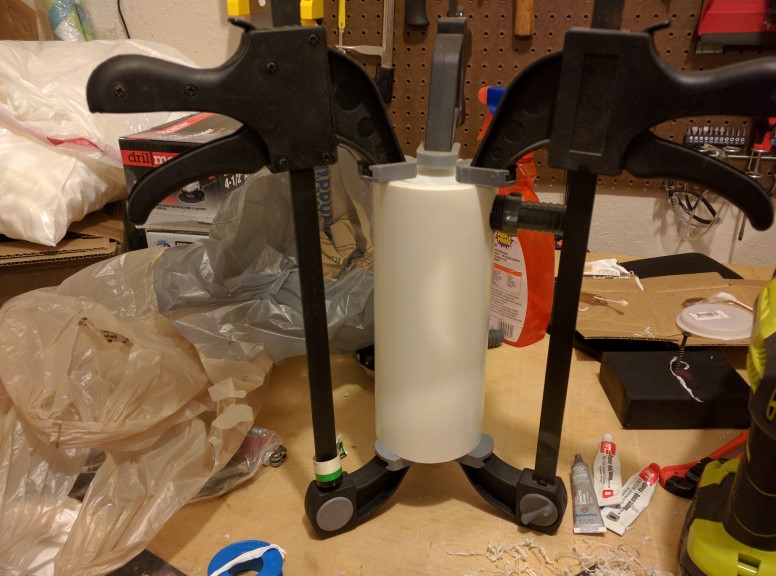
Cement in one of the test caps on the barbed end. Make sure you thoroughly scuff and clean the PVC mating surfaces before bonding to ensure a watertight seal. After it cures you can fill in some water temporarily to check for leaks in the cap or around the barb.


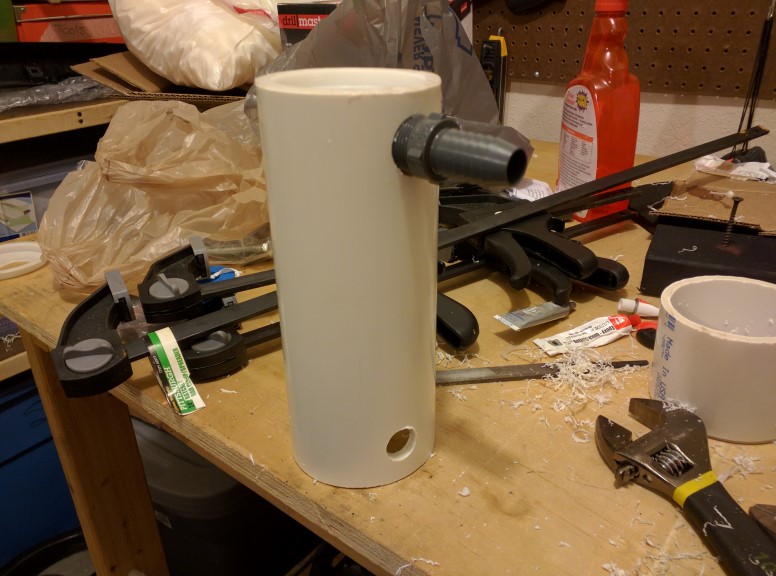
Mark where you want to attach the pump (scroll down to see how mine finished out) and bore a 13/16" hole.


Bore a 1 1/4" hole in the other test cap and fit the level sensor. Cement it onto the other end of the 3" pipe.


v2 Filler Neck:

The v2 neck is much simpler, smaller, and frees up the airbox mount for use with something else (like an oil catch can or something). It consists completely of a 3/4" barb with female 3/4" NPT theaded end and a 3/4" NPT plug. Drill a small hole in the plug for venting.

Here is the v2 neck (smaller) in comparison to the v1.


Make a bracket.. needs to be a little larger to clear the rubber sealing trim for the hood (will be obvious in installed pic):


Bracket installed:


Filler in place - I just ziptied it to the bracket to hold it in place:


Instructions if making the larger v1 Filler neck:
( Click to show/hide )
Filler Neck:

I planned to paint my filler neck so I sanded/filed and filled the 1 1/2" parts to remove the molding imperfections and raised lettering.


Use PVC cement to install the reducer bushing into the coupler. Make sure you scuff and clean the PVC mating surfaces well to ensure a good seal. Install one of the hose barbs into the bushing with teflon tape.


Make up a bracket for the filler neck..


The filler neck is going to where the passenger air box used to be using an existing mounting point (scroll to the end to see). Mark up where you want the bracket on the filler neck and epoxy it in place. Drill a vent hole in the plug (which will be the cap).


Couple coats of paint (I went with texture black)


Attach the 3/4" tubing. My tube was naturally bent from being stored on a spool so I oriented that bend to face the direction I wanted the hose to go.


Thread the tubing down to where the bottle will be and mount the filler neck:


Cap on (just a friction fit).


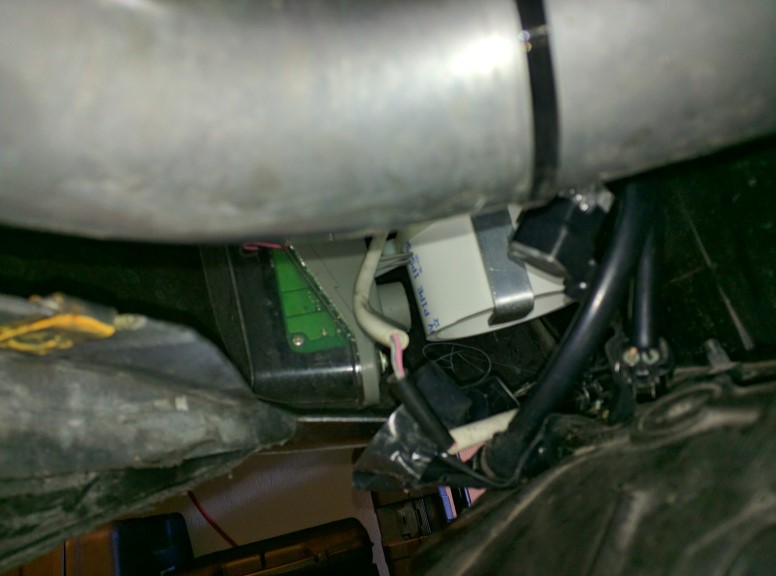
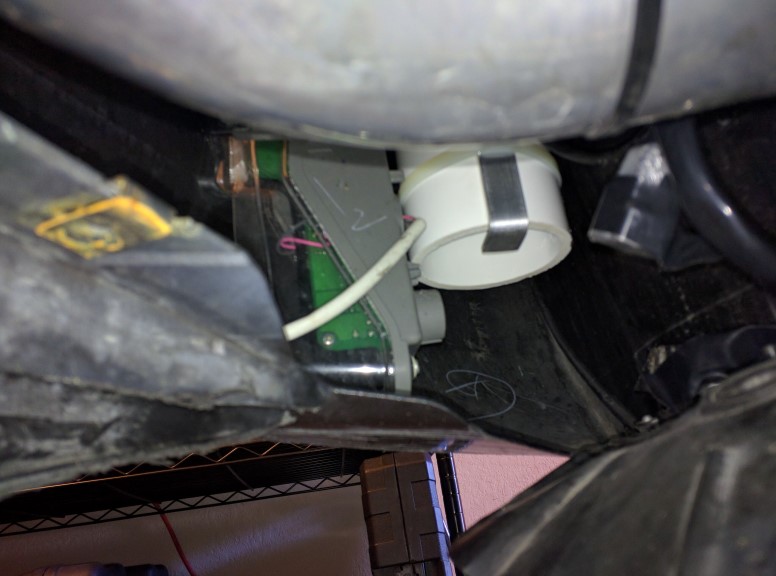
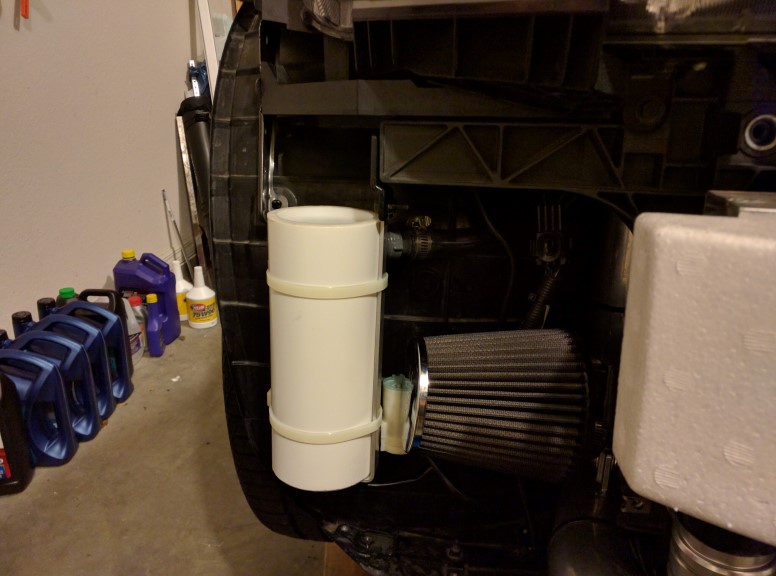
Install the pump into the reservoir and zip tie it onto the bracket. Cut the hose from the filler neck to the appropriate length and clamp it onto the barb at the top of the bottle.
Hook up the harness to the pump and sensor. Connect the washer nozzle hose to the pump.


And filled (you can see the fluid in the hose):


It takes just over a quart if you fill all the way up the hose. You need to fill it slowly to allow air to escape.

Enjoy!!! (Feel free to give me a rep if you use this DIY!)


Tools I used:
Step bit for drilling holes
crescent wrench for threading in barbs
320 grit sand paper for scuffing PVC and paint prep
Hammer
Clamps

Quick reference hole sizes:
Barbs: 1"
Pump 13/16"
Level Sensor: 1 1/4"
CB1, Rusty, TBatt and 5 others like this.
__________________
2013 Gun Metallic Sport - Gamma V3 Twin Turbogized
DIY Gamma V3 TT Install * Jayhovah's Gamma V3 TT Install Pic'Z and Vid'Z * DIY: Washer Reservoir for the Boosted
Quote:
Originally Posted by redondoaveb
You've got a twin turbo sound system, I think you met your audio goals.

Last edited by Jayhovah; 01-25-2018 at 11:17 AM.
Jayhovah is offline   Reply With Quote
Old 01-15-2017, 10:39 PM   #2 (permalink)
woo
Base Member
 
Join Date: Aug 2016
Location: lowcountry,sc
Posts: 37
Drives: 16 white sport A7
Rep Power: 9
woo will become famous soon enough
Default

i still have mine. Why did you have to delete yours? i had to remove the top part. To fix you just cut fill neck and add a small piece of flexable hose and relocate to passenger side fender well. I could of just removed the top part and fill with a long funnel.
__________________
2016 pearl white sport tech, air2air and stillen supercharger
woo is offline   Reply With Quote
Old 01-15-2017, 10:54 PM   #3 (permalink)
Premium Member
 
Jayhovah's Avatar
 
Join Date: May 2013
Location: St. Pete, FL
Posts: 3,848
Drives: 520whp Fire Breather
Rep Power: 86951
Jayhovah has a reputation beyond reputeJayhovah has a reputation beyond reputeJayhovah has a reputation beyond reputeJayhovah has a reputation beyond reputeJayhovah has a reputation beyond reputeJayhovah has a reputation beyond reputeJayhovah has a reputation beyond reputeJayhovah has a reputation beyond reputeJayhovah has a reputation beyond reputeJayhovah has a reputation beyond reputeJayhovah has a reputation beyond repute
Default

Quote:
Originally Posted by woo View Post
i still have mine. Why did you have to delete yours? i had to remove the top part. To fix you just cut fill neck and add a small piece of flexable hose and relocate to passenger side fender well. I could of just removed the top part and fill with a long funnel.
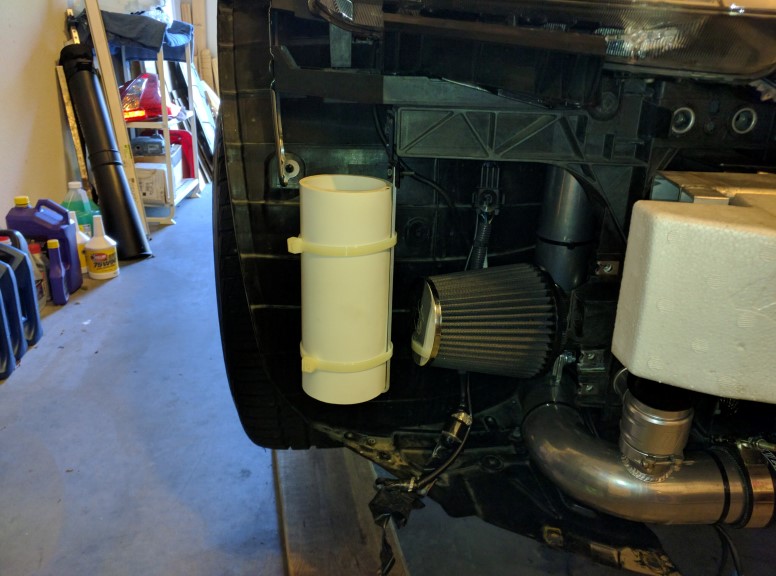
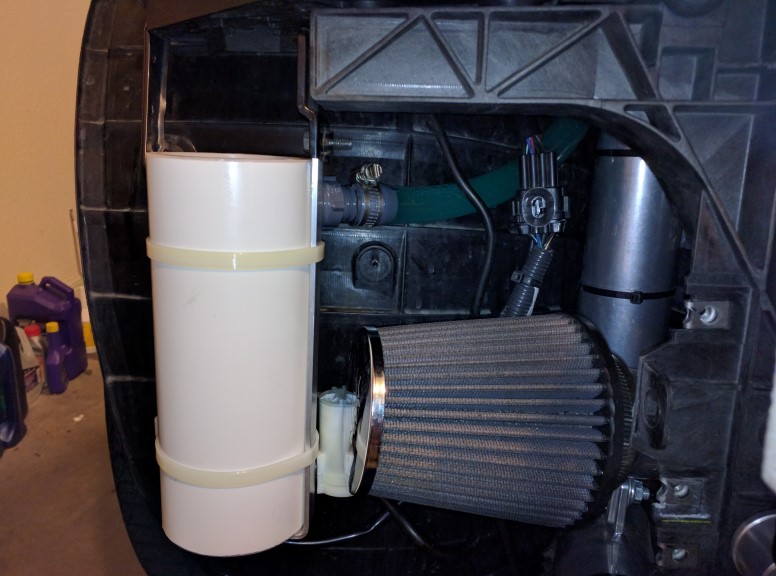
Because of this cone filter (Common placement with most TT kits):
jaytirbhaw, 2011 Nismo#91 and CB1 like this.
__________________
2013 Gun Metallic Sport - Gamma V3 Twin Turbogized
DIY Gamma V3 TT Install * Jayhovah's Gamma V3 TT Install Pic'Z and Vid'Z * DIY: Washer Reservoir for the Boosted
Quote:
Originally Posted by redondoaveb
You've got a twin turbo sound system, I think you met your audio goals.

Last edited by Jayhovah; 01-16-2017 at 03:13 PM.
Jayhovah is offline   Reply With Quote
Old 01-24-2017, 09:07 AM   #4 (permalink)
Base Member
 
Join Date: Mar 2016
Location: MO
Posts: 72
Drives: 2008 G37s
Rep Power: 9
Kris9884 is on a distinguished road
Default

Smart! I imagine its a bit heavier than the stock unit but at least its there, good job!
__________________
My slow build thread on MyG37 - http://www.myg37.com/forums/build-th...upe-build.html
Kris9884 is offline   Reply With Quote
Old 01-24-2017, 10:09 AM   #5 (permalink)
A True Z Fanatic
 
JARblue's Avatar
 
Join Date: Mar 2011
Location: Austin, TX
Age: 43
Posts: 36,450
Drives: 11 Z34, 98 E36 M3
Rep Power: 2684440
JARblue has a reputation beyond reputeJARblue has a reputation beyond reputeJARblue has a reputation beyond reputeJARblue has a reputation beyond reputeJARblue has a reputation beyond reputeJARblue has a reputation beyond reputeJARblue has a reputation beyond reputeJARblue has a reputation beyond reputeJARblue has a reputation beyond reputeJARblue has a reputation beyond reputeJARblue has a reputation beyond repute
Default

Nice, thorough DIY
__________________

2011 370Z 6MT Sport Gun Metallic | ARC | CJM | Ecutek | FI | Fujimura | R2C | SPL | Stillen | TWM | Z1 | ZSpeed |
JARblue is offline   Reply With Quote
Old 06-09-2017, 10:26 AM   #6 (permalink)
Premium Member
 
Jayhovah's Avatar
 
Join Date: May 2013
Location: St. Pete, FL
Posts: 3,848
Drives: 520whp Fire Breather
Rep Power: 86951
Jayhovah has a reputation beyond reputeJayhovah has a reputation beyond reputeJayhovah has a reputation beyond reputeJayhovah has a reputation beyond reputeJayhovah has a reputation beyond reputeJayhovah has a reputation beyond reputeJayhovah has a reputation beyond reputeJayhovah has a reputation beyond reputeJayhovah has a reputation beyond reputeJayhovah has a reputation beyond reputeJayhovah has a reputation beyond repute
Default

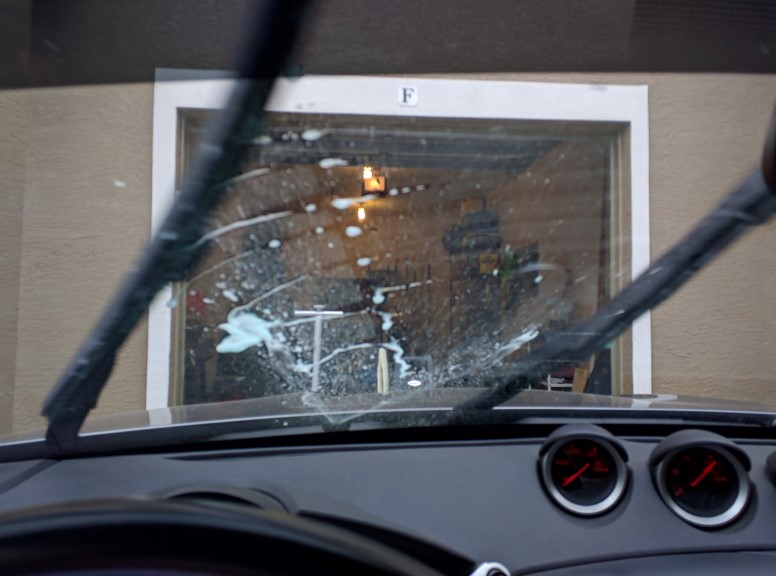
Washer fluid level sensor works....

Attached Images
File Type: jpg washfluid.jpg (95.3 KB, 493 views)
Dirk McGurck likes this.
__________________
2013 Gun Metallic Sport - Gamma V3 Twin Turbogized
DIY Gamma V3 TT Install * Jayhovah's Gamma V3 TT Install Pic'Z and Vid'Z * DIY: Washer Reservoir for the Boosted
Quote:
Originally Posted by redondoaveb
You've got a twin turbo sound system, I think you met your audio goals.
Jayhovah is offline   Reply With Quote
Old 10-04-2017, 09:14 PM   #7 (permalink)
Track Member
 
Dirk McGurck's Avatar
 
Join Date: Jun 2014
Location: Delaware
Posts: 715
Drives: 09 MB 370Z Touring
Rep Power: 21
Dirk McGurck has a reputation beyond reputeDirk McGurck has a reputation beyond reputeDirk McGurck has a reputation beyond reputeDirk McGurck has a reputation beyond reputeDirk McGurck has a reputation beyond reputeDirk McGurck has a reputation beyond reputeDirk McGurck has a reputation beyond reputeDirk McGurck has a reputation beyond reputeDirk McGurck has a reputation beyond reputeDirk McGurck has a reputation beyond reputeDirk McGurck has a reputation beyond repute
Default

I bought an Injen intake without a bottle. I’ll probably do something similar to this rather than spend $100 to get the bottle from Injen.
Jayhovah likes this.
__________________
2009 370Z Touring with Sport
Dirk McGurck is offline   Reply With Quote
Old 12-06-2017, 08:23 PM   #8 (permalink)
Base Member
 
bewhitey's Avatar
 
Join Date: Dec 2015
Location: Denver
Posts: 78
Drives: 370z 40th #704 M6 SC
Rep Power: 9
bewhitey is on a distinguished road
Default

bomb *** washer reservoir!
__________________
Vortech SC|Stillen Sway Bars+Facia+Skirts+CB Exhaust|Z1 Clutch+CSC Elimination Kit|ACT LW Flywheel|Tein Coils+EDFC|SPL Camber Arms|RJM Clutch Pedal|TWM Short Shifter|Morimoto Switchback LED's|Z1 34 Row Oil Cooler|AIR 2 AIR|E85 Flex Fuel|460 whp TheBoostCreep
bewhitey is offline   Reply With Quote
Old 01-25-2018, 11:18 AM   #9 (permalink)
Premium Member
 
Jayhovah's Avatar
 
Join Date: May 2013
Location: St. Pete, FL
Posts: 3,848
Drives: 520whp Fire Breather
Rep Power: 86951
Jayhovah has a reputation beyond reputeJayhovah has a reputation beyond reputeJayhovah has a reputation beyond reputeJayhovah has a reputation beyond reputeJayhovah has a reputation beyond reputeJayhovah has a reputation beyond reputeJayhovah has a reputation beyond reputeJayhovah has a reputation beyond reputeJayhovah has a reputation beyond reputeJayhovah has a reputation beyond reputeJayhovah has a reputation beyond repute
Default

Updated this to reduce the size of the filler neck and free up the mounting location for an oil catch can. If you wanted to make the v1 neck the info is still there wrapped with "spoiler" buttons.

v2 Filler Neck:

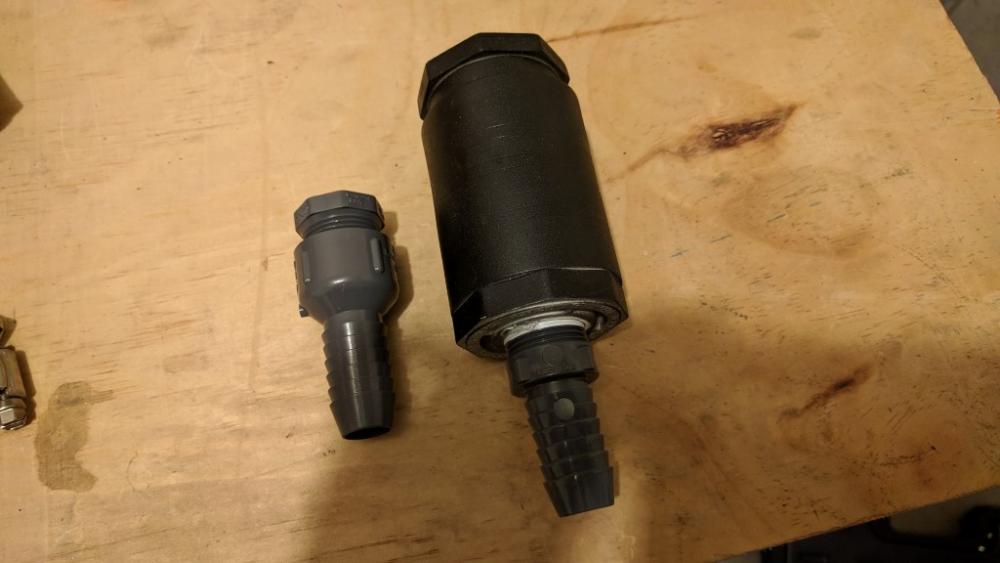
The v2 neck is much simpler, smaller, and frees up the airbox mount for use with something else (like an oil catch can or something). It consists completely of a 3/4" barb with female 3/4" NPT theaded end and a 3/4" NPT plug. Drill a small hole in the plug for venting.

Here is the v2 neck (smaller) in comparison to the v1.

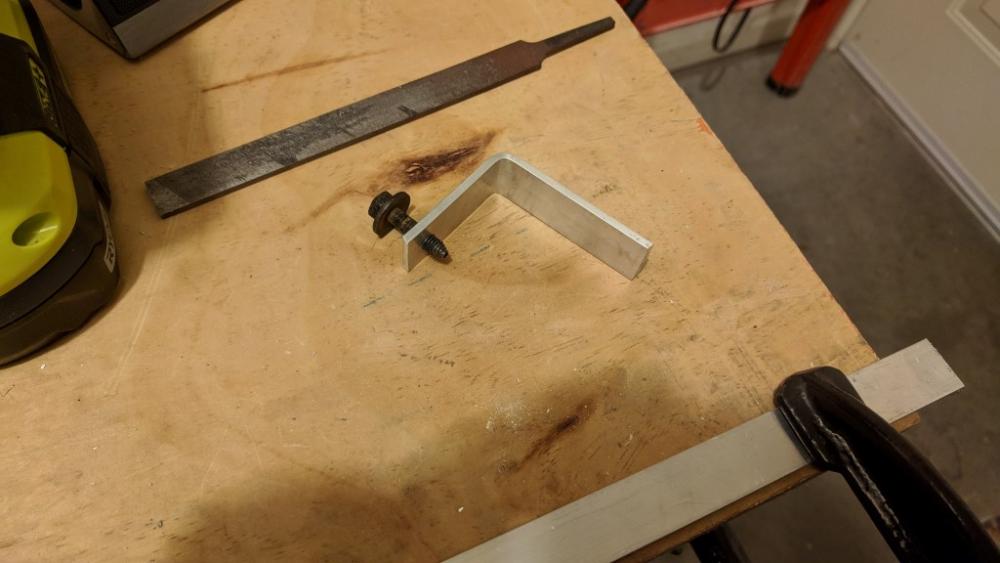
Make a bracket.. needs to be a little larger to clear the rubber sealing trim for the hood (will be obvious in installed pic):


Bracket installed:
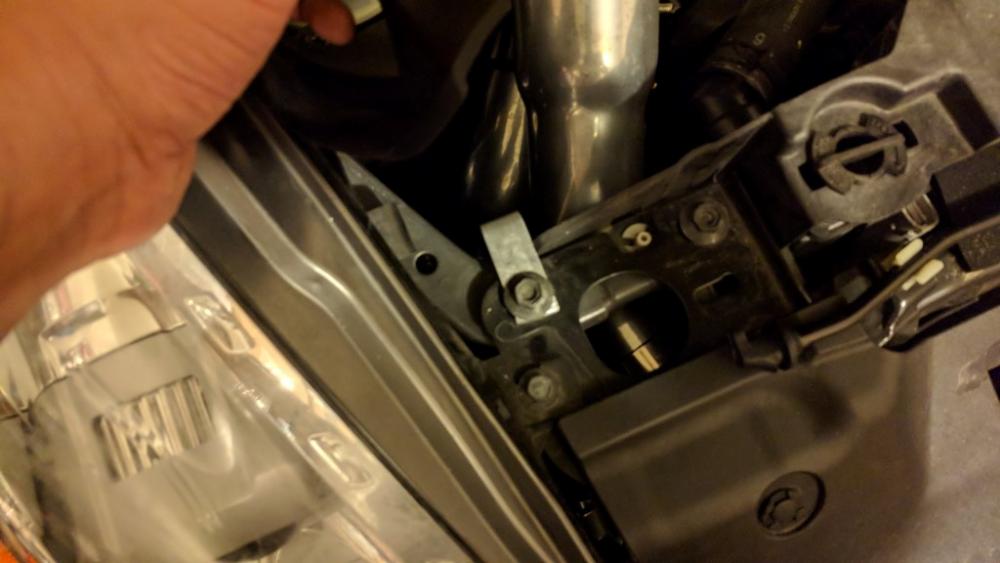


Filler in place - I just ziptied it to the bracket to hold it in place:
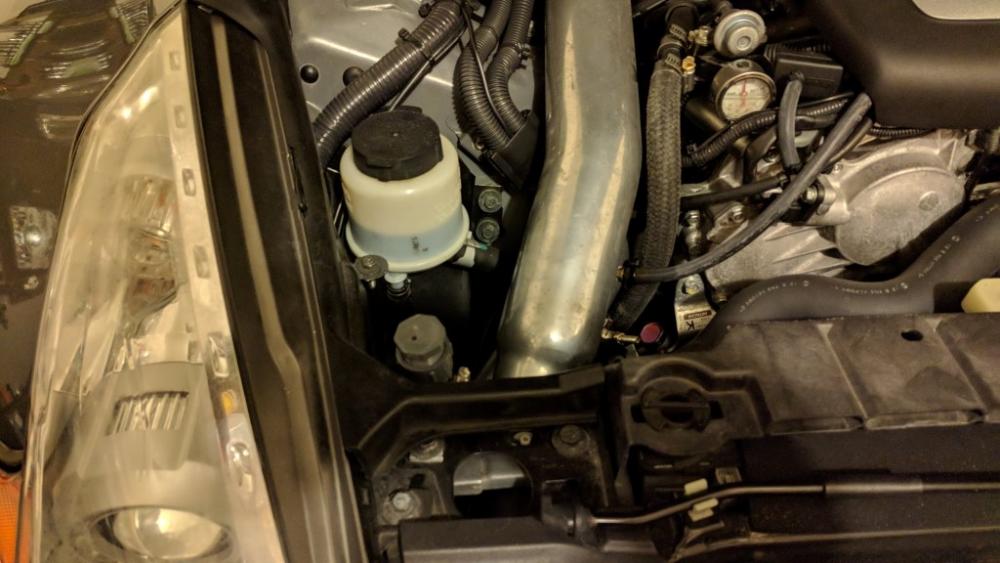
CB1, Kzonts and ZontheRocks like this.
__________________
2013 Gun Metallic Sport - Gamma V3 Twin Turbogized
DIY Gamma V3 TT Install * Jayhovah's Gamma V3 TT Install Pic'Z and Vid'Z * DIY: Washer Reservoir for the Boosted
Quote:
Originally Posted by redondoaveb
You've got a twin turbo sound system, I think you met your audio goals.
Jayhovah is offline   Reply With Quote
Old 01-29-2020, 02:54 PM   #10 (permalink)
Base Member
 
Girald's Avatar
 
Join Date: Jun 2017
Location: Denver
Posts: 135
Drives: 15' 370z SpTech 6MT
Rep Power: 3363
Girald has a reputation beyond reputeGirald has a reputation beyond reputeGirald has a reputation beyond reputeGirald has a reputation beyond reputeGirald has a reputation beyond reputeGirald has a reputation beyond reputeGirald has a reputation beyond reputeGirald has a reputation beyond reputeGirald has a reputation beyond reputeGirald has a reputation beyond reputeGirald has a reputation beyond repute
Default relocate the res...

I relocated my res to right next to the bose sub...

I used a res tank and pump that came off of a car in the junk yard. i found one with a tall snorkel to a small tub. i cut the snorkel neck to about 1/2 inch. i epoxy'ed the smaller neck on, using other bits of the plastic to patch some areas.

the path for the hose/electrical was simple.. snip and solder to the oem pump wires, run it along the hood weather strip and into the grommet.. along the door kicker and all the way to the back wall of the unibody (all trim panels have to be pulled.)

I never hooked up the fluid level sensor , and it doesnt give me a light. everything runs fine and i left a space open to install my much bigger setrab power steering cooler

As for the intakes... turbo life never makes thing easy... zzz
MrJdmNismo likes this.
__________________
AAM tt'ed // Soon: Moving back to the East Coast
Girald is offline   Reply With Quote
Reply

Bookmarks


Posting Rules
You may not post new threads
You may not post replies
You may not post attachments
You may not edit your posts

BB code is On
Smilies are On
[IMG] code is On
HTML code is Off
Trackbacks are On
Pingbacks are On
Refbacks are On


Similar Threads
Thread Thread Starter Forum Replies Last Post
[WTB] WTB Windshield washer reservoir NoleBlooded_Z Parts for sale (Private Classifieds) 2 07-17-2016 06:18 AM
Cracked windshield washer reservoir Solid370z Engine & Drivetrain 23 01-08-2015 07:05 PM
[FOR SALE] BNIB - GTM Windshield Washer Reservoir Kit esfourteen Parts for sale (Private Classifieds) 4 10-12-2014 12:29 PM
Windshield Washer Reservoir with TT? Nixlimited Forced Induction 13 06-07-2014 11:30 AM
[WTB] Windshield washer reservoir PEARL-Z Parts for sale (Private Classifieds) 3 12-05-2013 07:06 PM


All times are GMT -5. The time now is 05:39 PM.


Powered by vBulletin® Version 3.8.4
Copyright ©2000 - 2024, Jelsoft Enterprises Ltd.
Search Engine Optimization by vBSEO 3.6.0 PL2