
 |
This is my meandering walk-through of installing the 19-row oil cooler kit as well as the brake cooling duct kit, both from Stillen. The directions that come with both kits
|
|||||||
 6Likes
 |
|
|
LinkBack | Thread Tools | Display Modes |
|
|
#1 (permalink) |
|
Enthusiast Member
 Join Date: Dec 2009
Location: Mill Creek, Wa
Posts: 495
Drives: 04 Nissan Titan 4x4
Rep Power: 373            |
This is my meandering walk-through of installing the 19-row oil cooler kit as well as the brake cooling duct kit, both from Stillen. The directions that come with both kits are not the greatest so I relied on a combination of their instructions as well as the following useful DIYs that I will try not to duplicate here too much
 DIY: Front Bumper Removal by DIGItonium DIY: Stillen 19 Row Oil Cooler Install - driver side (stock PS cooler unmoved) by djpathfinder While I'm at it, a big thanks to DIGItonium and djpathfinder for the helpful walk-throughs and to JT at Stillen as well for getting me the parts as soon as they were ready!  Also useful was the brake duct installation write-up from MotoIQ on their Project 370Z, primarily from their much clearer pictures. Apart from the typical hand tools, you'll need something to cut plastic with, such as a Dremel, a strong 1/4" drill bit for drilling through the steel oil cooler mounting bracket, and extra zip ties, since you can never have enough and I ended up using and then cutting off several while I was rigging the brake hoses for steering motion. Starting off, I removed the bumper cover and decided to leave the power steering cooler alone and mount the oil cooler on the driver's side: 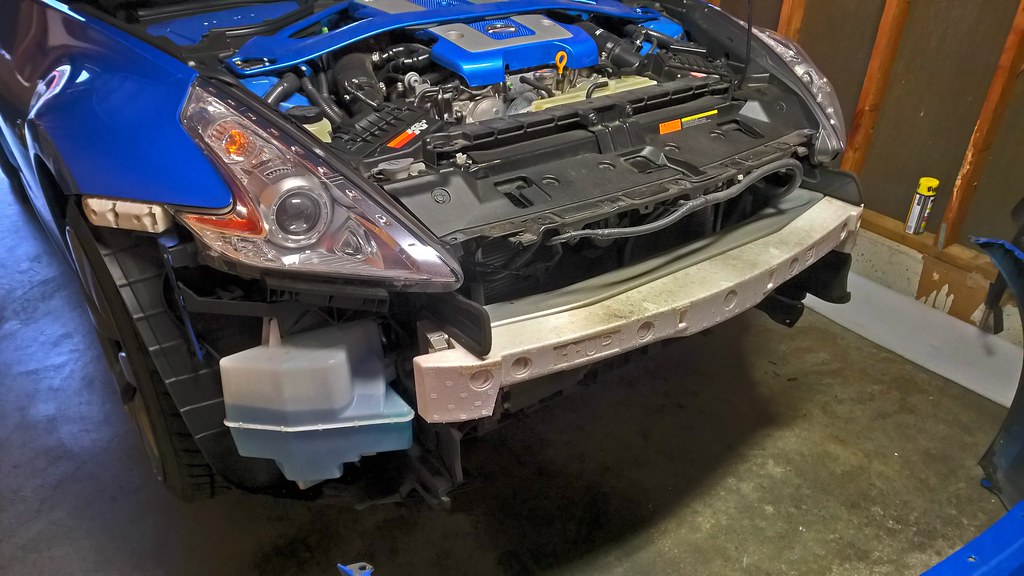 There are two existing locations on the radiator support where you'll need to pick up some speed nuts and bolts from a dealership parts counter or wherever, it took mine a few vain search attempts in their computer to find the parts before I convinced him to just take the sample I brought with me back to their shelves and find the closest thing. 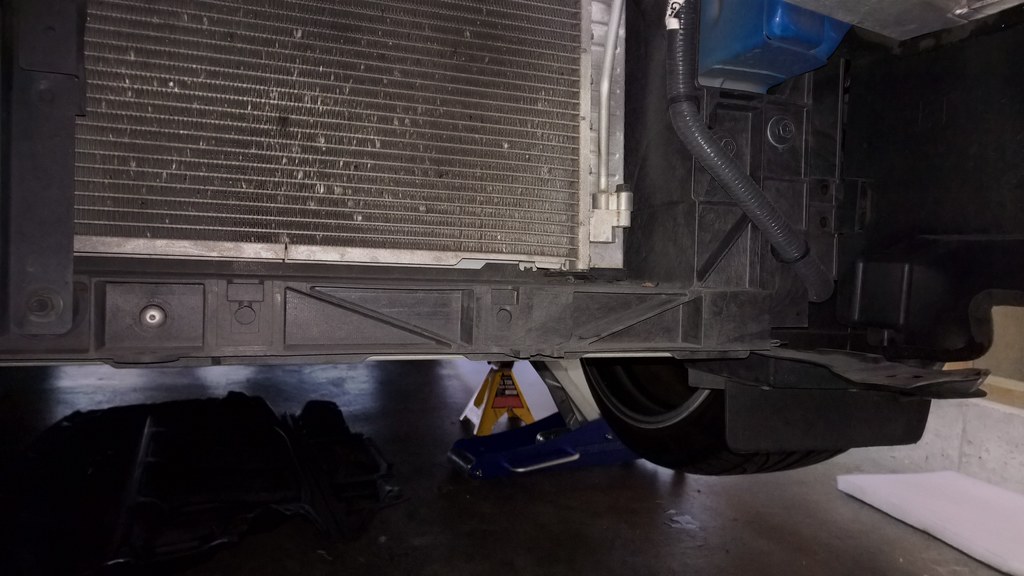 Here is the lower shroud support from the passenger side. As you can see, I cut out quite a bit to accommodate both the brake hoses and oil lines that will have to pass through the same area. I did not want to cut through the vertical radiator support as some here have done, which in retrospect, would have given me some extra length in the oil lines as you'll see later. 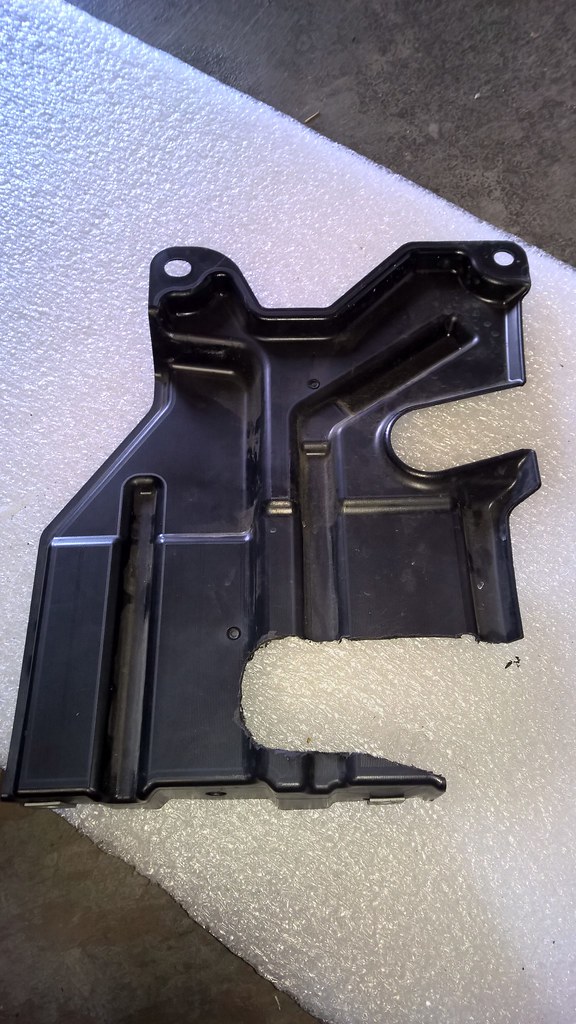 Here is a before/after set of pics of the piece forward of the radiator support that appears mainly to control airflow behind the bumper cover. You will need to notch out a small section on the bottom on both parts (the drivers side has a symmetric part) to allow clearance for the hoses. 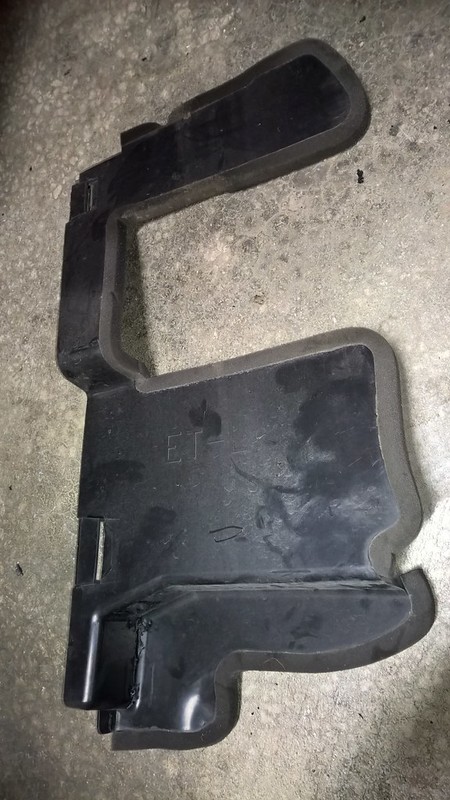 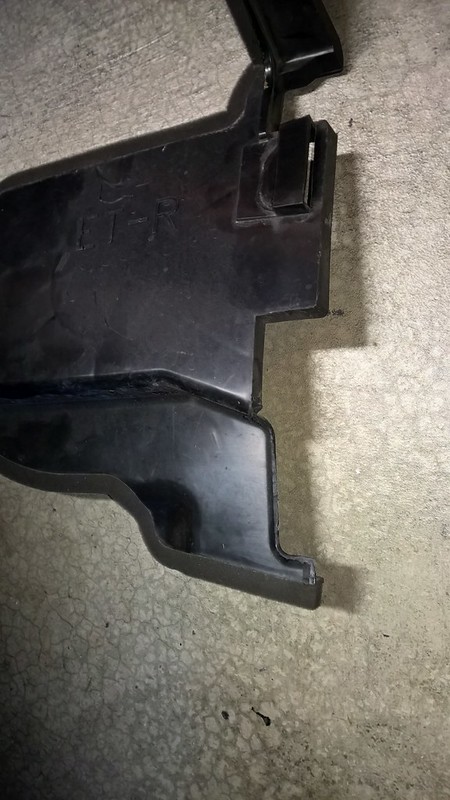 Test-fitting everything to ensure I had enough clearance. As the process carried on, the stiffness of the oil lines would force the gaps here to close up but there's still plenty of room. 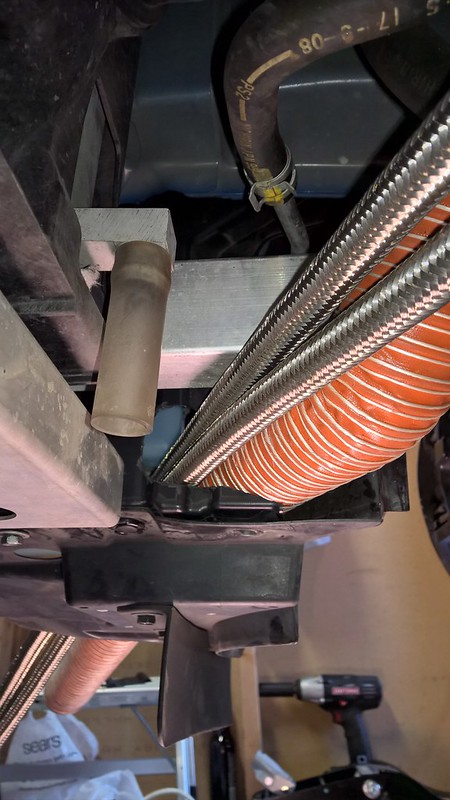 Moving along with the oil cooler first, I pre-installed the lines to the filter fitting and oriented the hose fittings to approximately 10:00-11:00 as you look up. Refer to the write-up above as to which length line goes where, typing this up now after it's been a couple days, I do not recall which is which but it is driven by how the oil lines route forward that decides which is the best way to orient them. There is a gap in the engine mount that allows the oil line to clear when you orient them equally between the mount and the alternator. This gives you more room to work when replacing the filter during future oil changes at the expense of length you would use to push the oil radiator further to the driver's side. (Thanks to djpathfinder!) 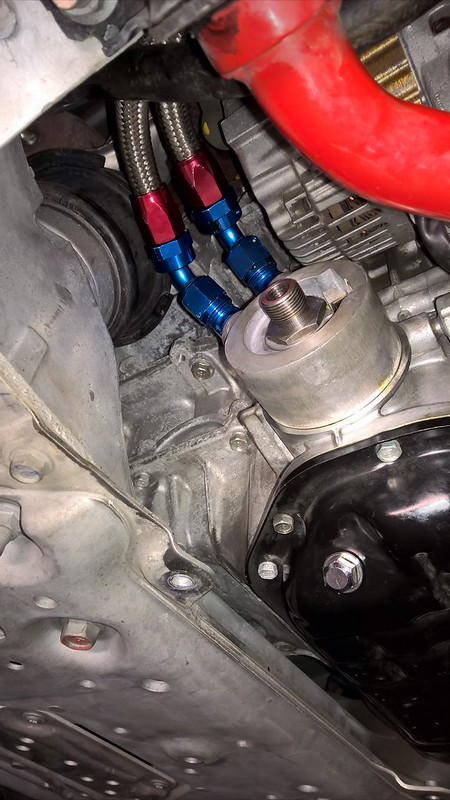 The Stillen kit includes a length of fuel hose that is originally intended to re-locate the power steering cooler. It is re-purposed as protective sleeving in areas where the oil lines are close to, if not rubbing on structure, shown below in the engine bay and routing forward of the radiator. 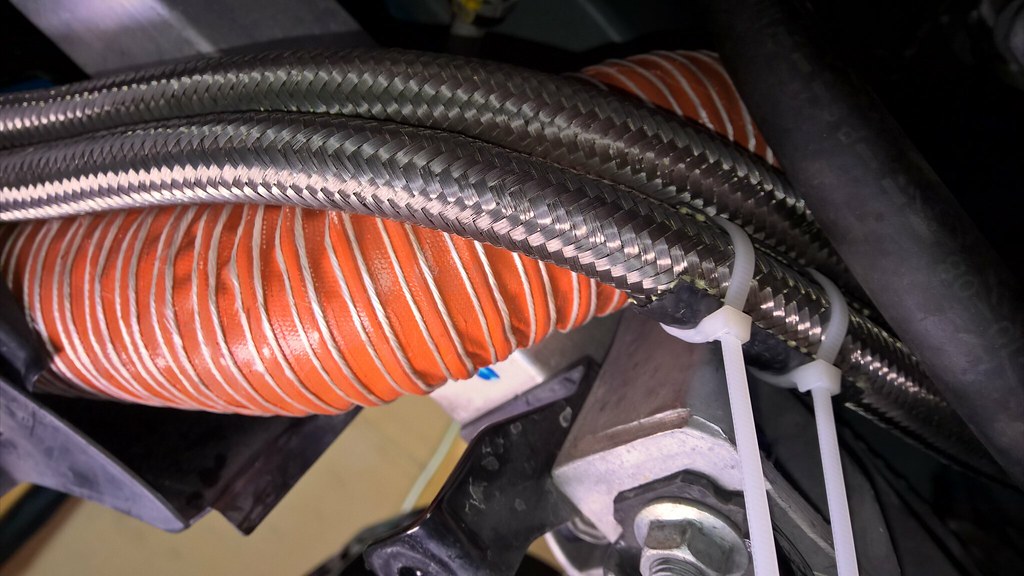 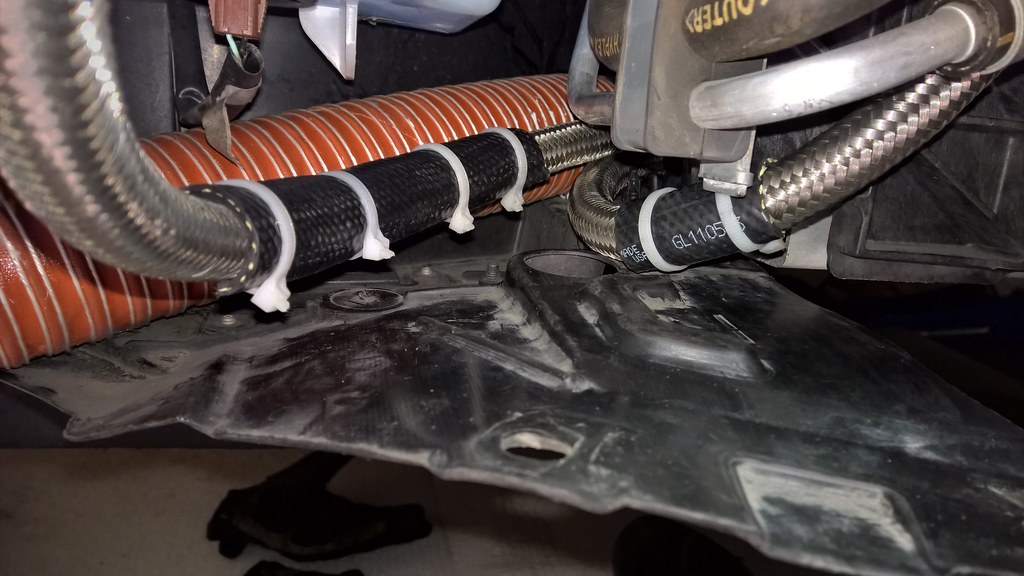 Now here's where I messed up, I routed the longer line FORWARD of the power steering cooler when routing it aft would have gained me and inch or two of extra length. Anyhow, once I had loosely routed the lines, I attached them to the cooler and positioned the cooler as far to the driver side as the lines allowed. I carefully marked new hole locations and measured carefully where they needed to go. Be sure to measure and mark again and use a counter-punch to start your holes so you don't walk the drill bit all over the bracket. Also note that the cooler itself is mounted directly in front of the ambient air temperature sensor...  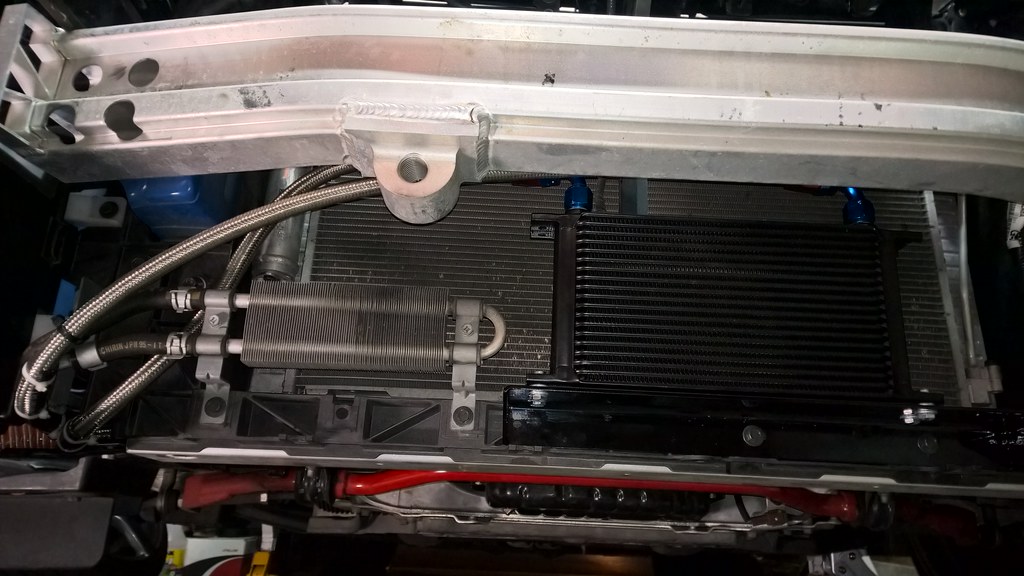 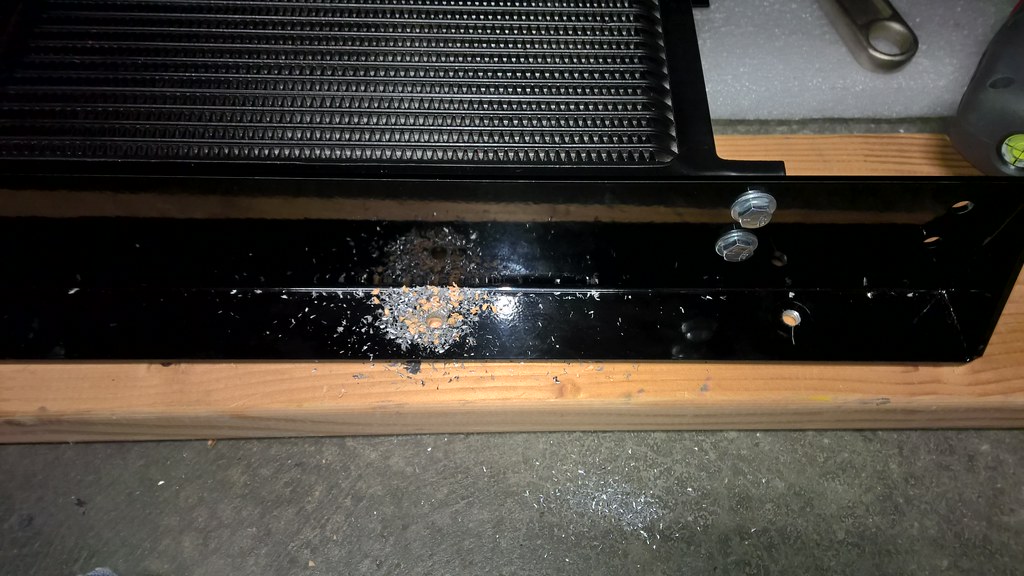 With the oil cooler effectively installed, I went ahead and added ~5.5 quarts before running the engine for a bit until the cooler started to warm up. With the engine off and after a few minutes to let it settle, I added more oil while checking the dip stick until the level looked ok, ended up being about ~6.5 quarts, remember to verify oil levels once you get the car back on level ground if it's not already level like on a lift or something. To be continued....? 
__________________
 2009 370Z w/ Sport Last edited by Titan1080; 04-09-2015 at 01:49 AM. |
|
|

|
|
|
#2 (permalink) |
|
Enthusiast Member
 Join Date: Dec 2009
Location: Mill Creek, Wa
Posts: 495
Drives: 04 Nissan Titan 4x4
Rep Power: 373            |
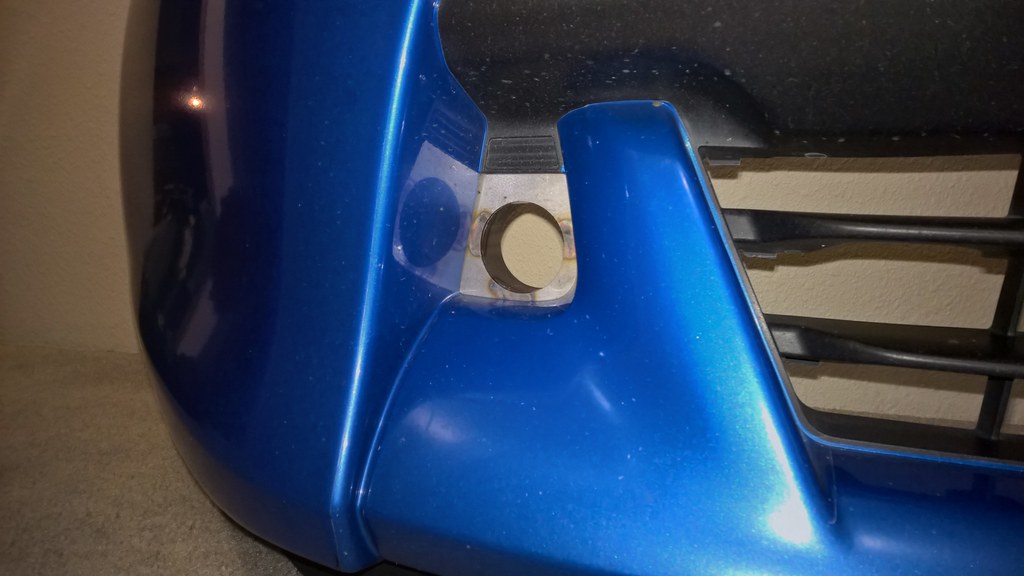
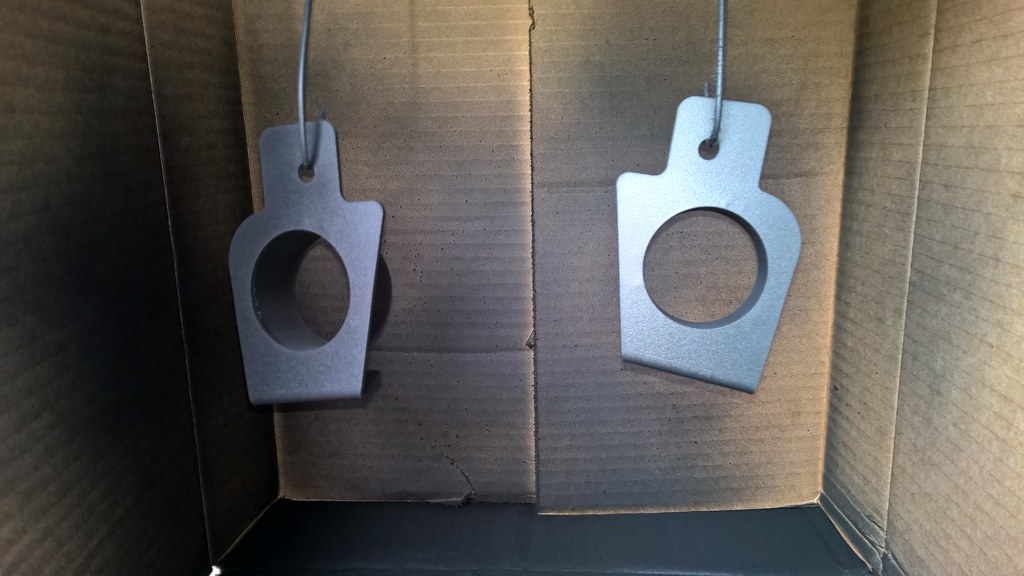
Moving right along, next up is installing the fittings. This is pretty straight forward on the bumper, but as shown, my fittings were unpainted/unpowder coated when I received them, and thus look rather shoddy. I do not know if this is how they are normally shipped or not, I just shrugged, hung them up in my "paint booth" and painted them black.
   Having installed new rotors last fall, pulling the brakes and hub apart and installing the duct bracket was fairly straight forward for me and the MotoIQ walk-through does a good job outlining those steps. I will add that I found if you steer the caliper outward, you have fairly easy access to 3 of the hub bolts before you have to steer to the opposite bump to get to the 4th. Also, when you remove the hub, make sure you know which side is up because that matters. A lot as I learned... 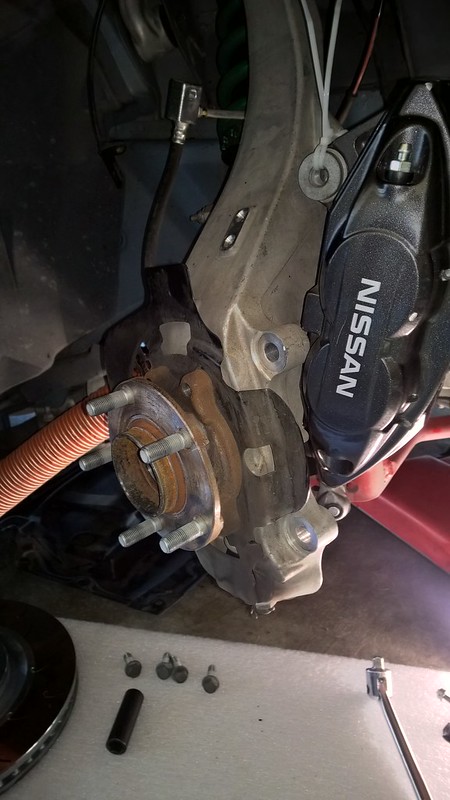 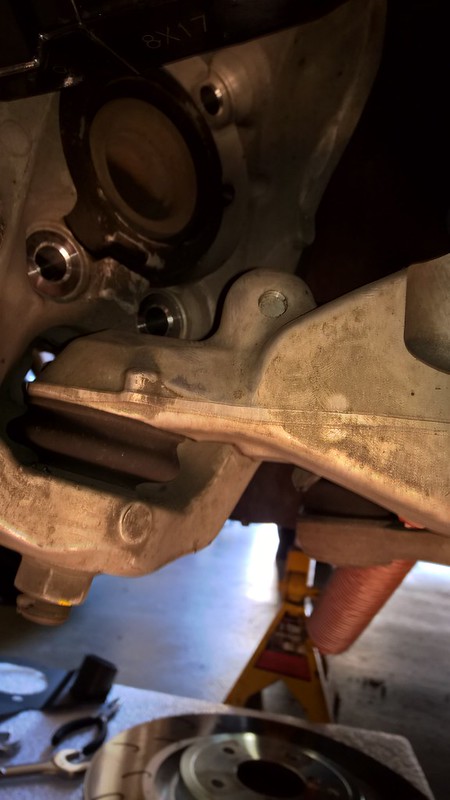 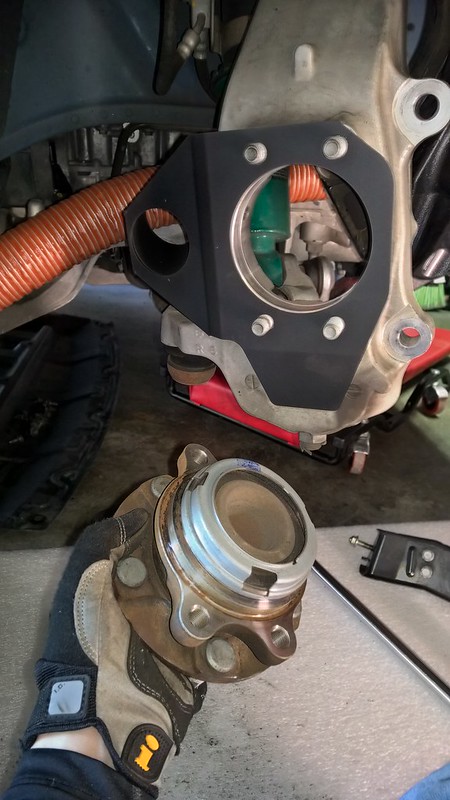 Here's a few quick views of where exactly the forced air exits into the center of the rotor. I shined a light through for a bit of clarity.   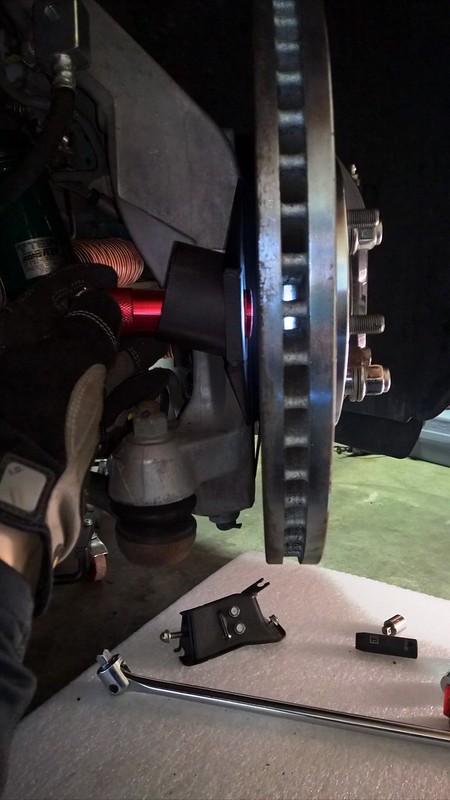 This is why you need to make sure you re-install the hub right-side up, the ABS sensor was the last thing for me to re-install, only to find out it won't go in! There are gaps as shown on what appears to be a dust shield or something for the bearing that allows the sensor to pass through it....opps. 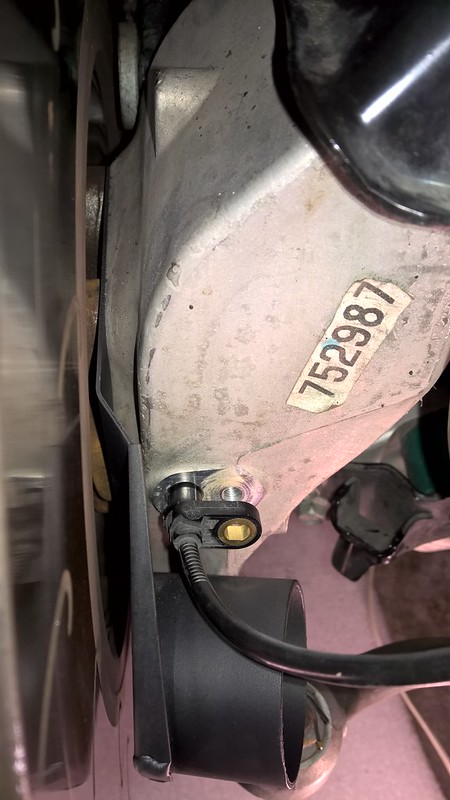 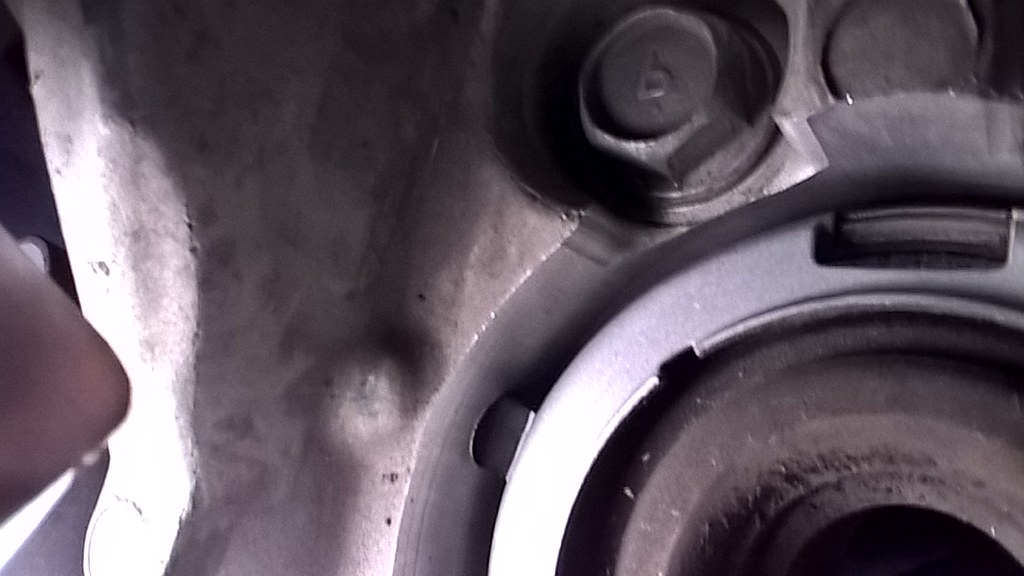 Here is the drivers side lower shroud support, don't need to cut nearly as much out of it for obvious reasons. 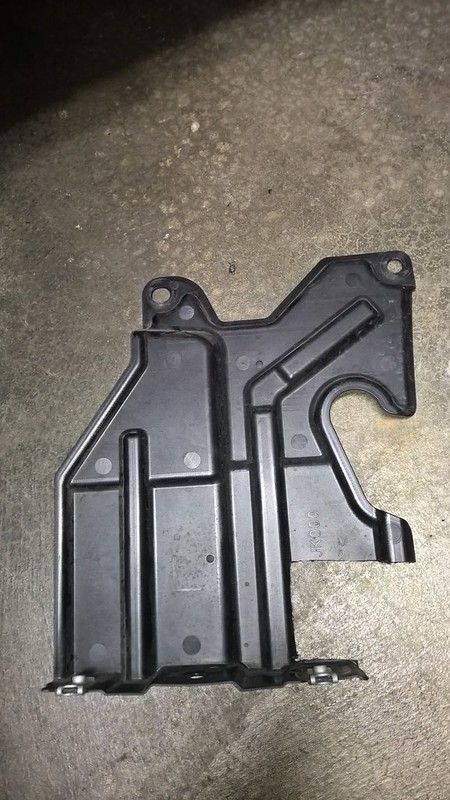 This is a piece from both wheel wells that the instructions seem to imply that you toss. I decided to notch it out to allow re-installing it such that the fender liner retains a couple speed bolts. It looked good originally, but during the rigging process, I discovered that it prevents the brake hose from getting as close to the inner wheel well as it possibly could so I cut the entire rear portion off. 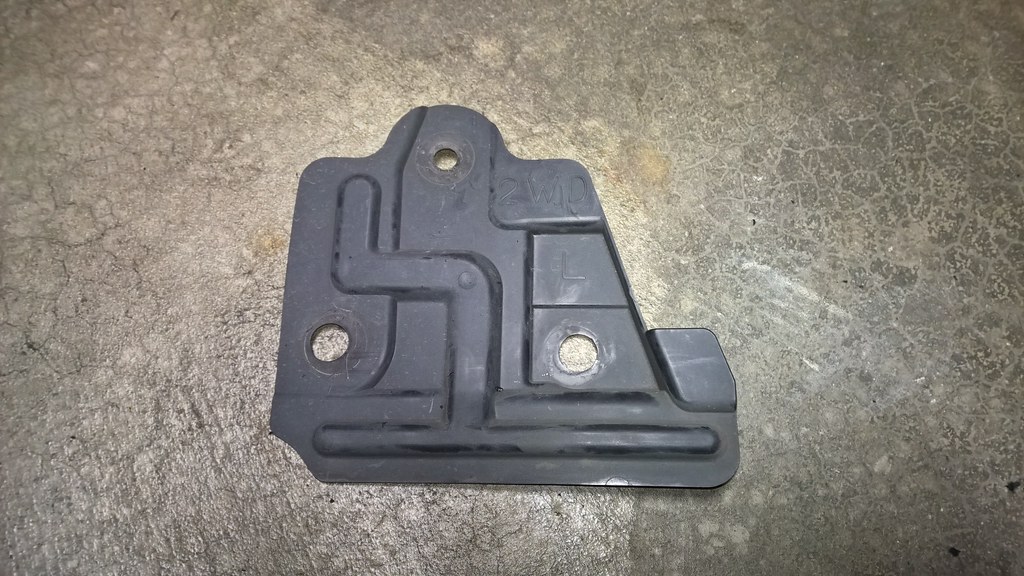 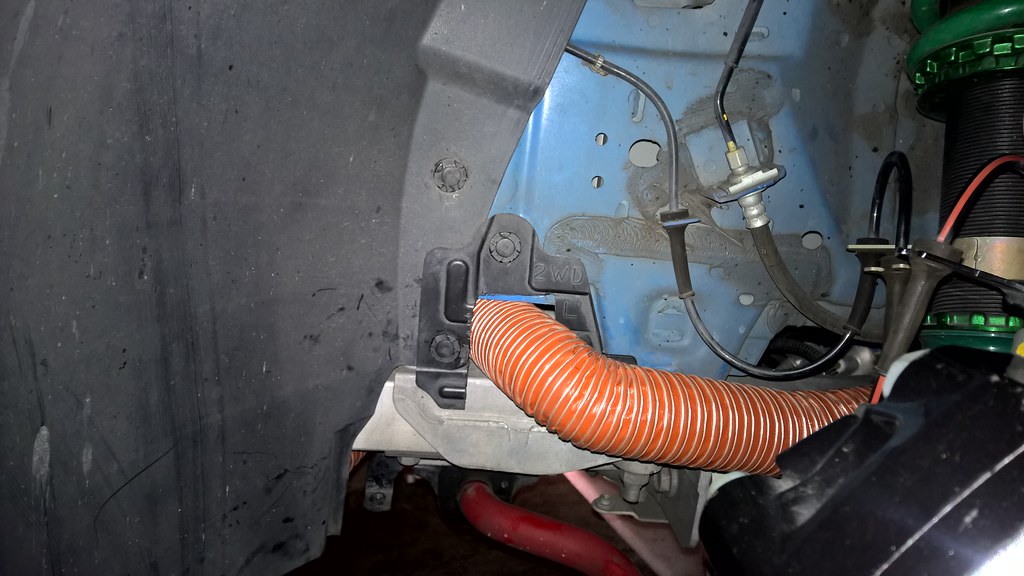 The final, as-installed part shown below is from the passenger side wheel well and is an exact opposite part to the driver side part shown above. 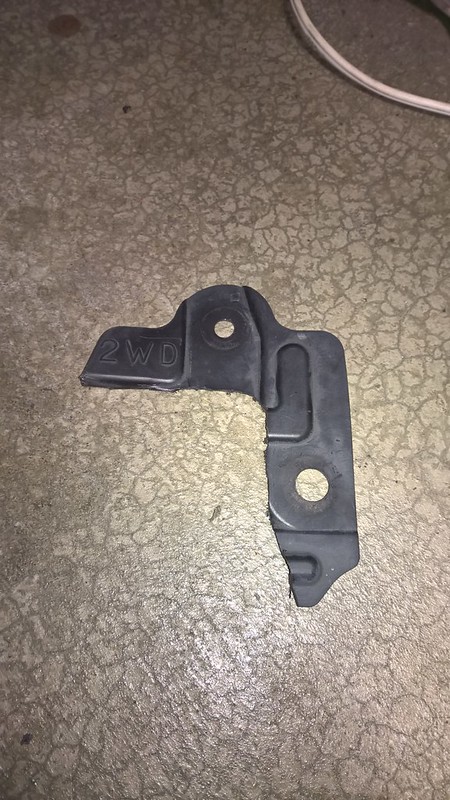 This is where the fun begins. I started at the hub and worked my way forward, first making sure I had enough length at full extension to reach where I would zip tie to the lower control arm. For this, I followed the manner in which the Stillen instructions described in pictures how to zip tie the hose to the LCA, which is not the clearest in the world but it worked. I was a little frustrated with how MotoIQ did theirs, maybe I misunderstood or missed a spot where they added a zip tie, regardless, their clearer pictures didn't work for me as I could not get the hose to bend and compress where I needed it to. I ended up using two zip ties for securing the hose to the LCA and get it to compress as shown. As I secured and tightened the zip ties, I pulled the tube slack forward and into the bumper area. It helps to have a buddy steer the wheels for you so you can watch the articulation as you go.  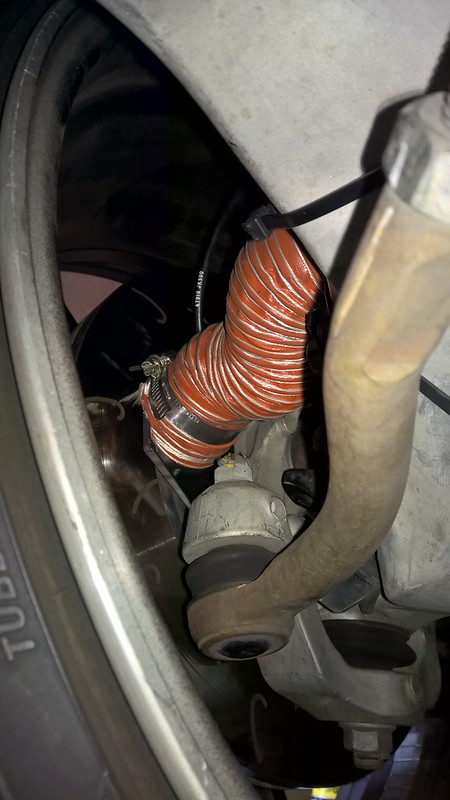 Here's some views of the final routing on the drivers side.... 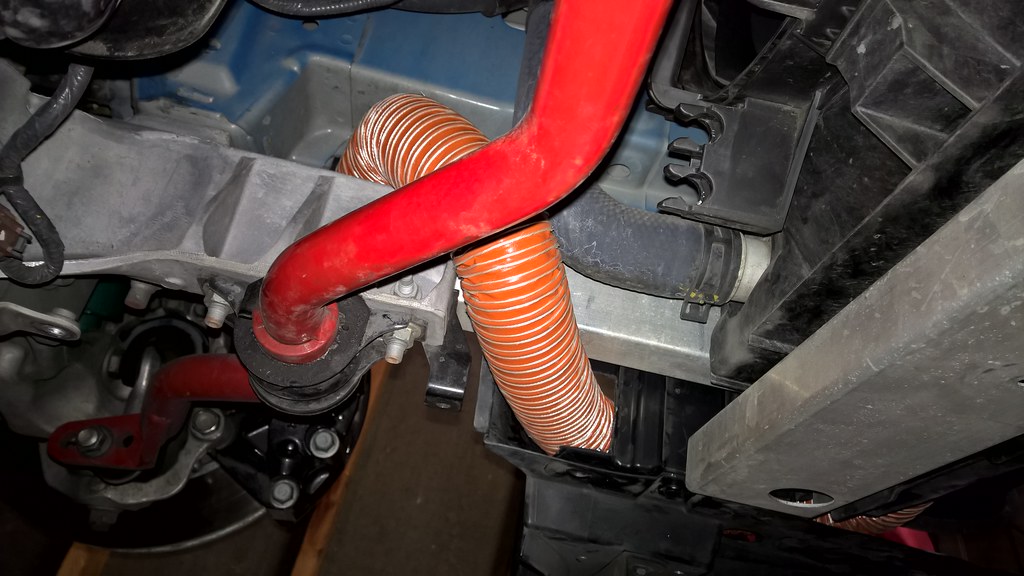 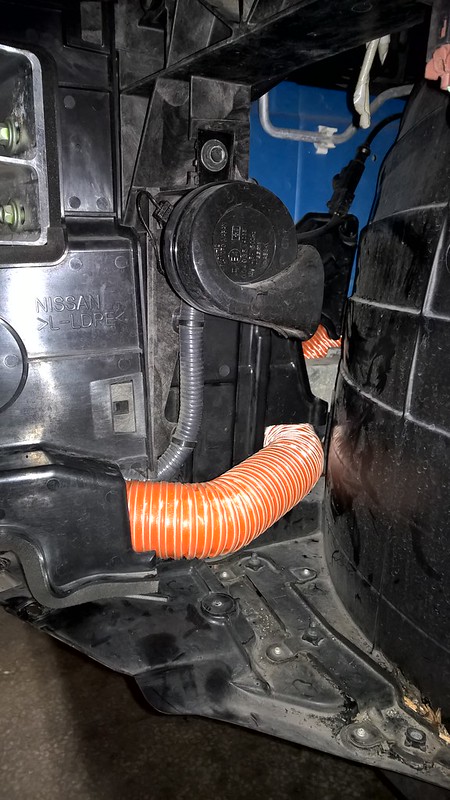 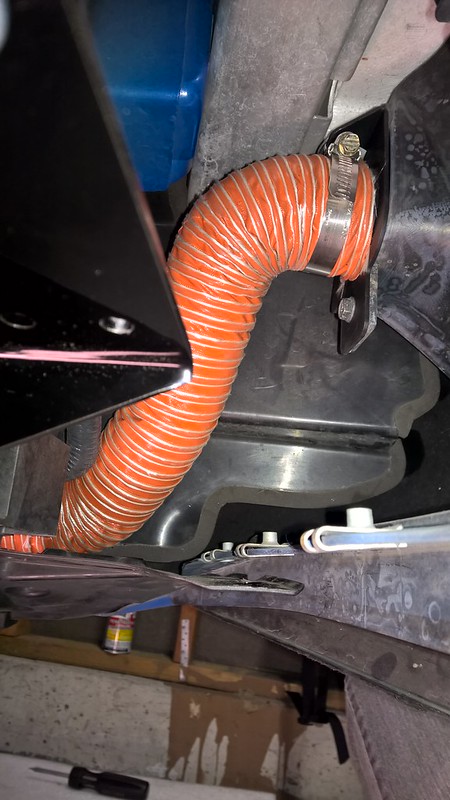 ...and on the passenger side. 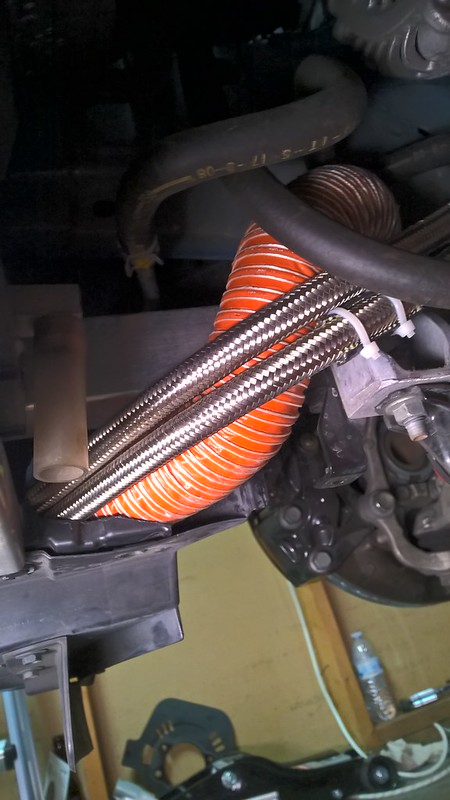 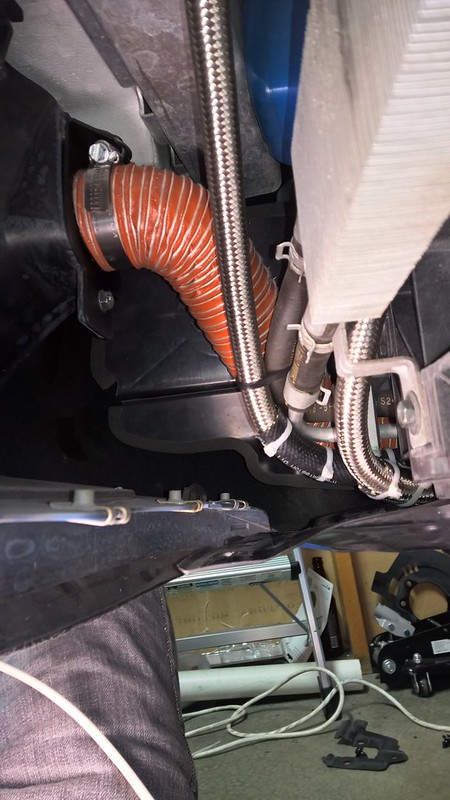 And with that, here's the final look! Hope this helps you out when you're doing both the oil cooler and brake cooler. Let me know if any of this confused or other-wise steered you wrong!  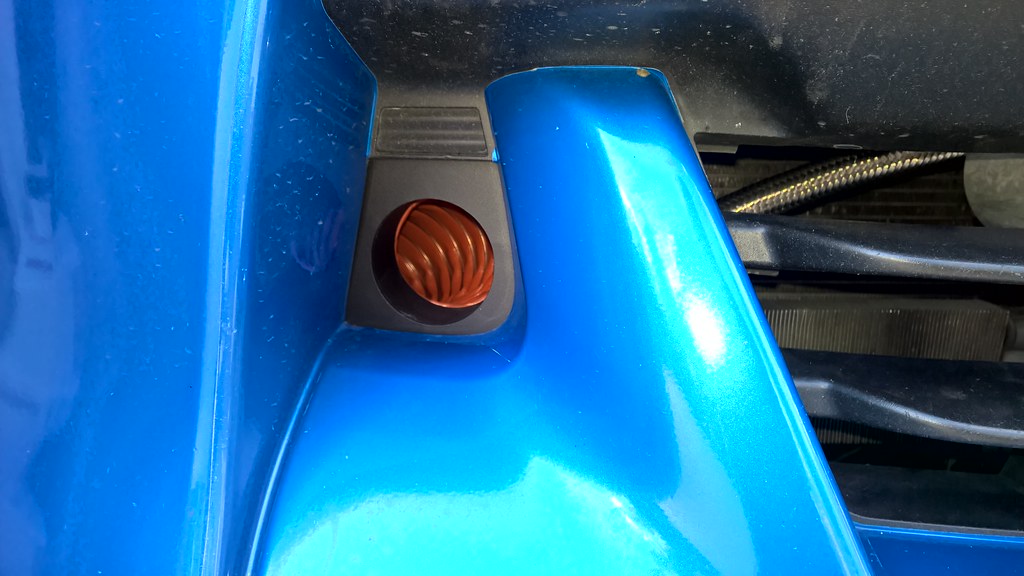 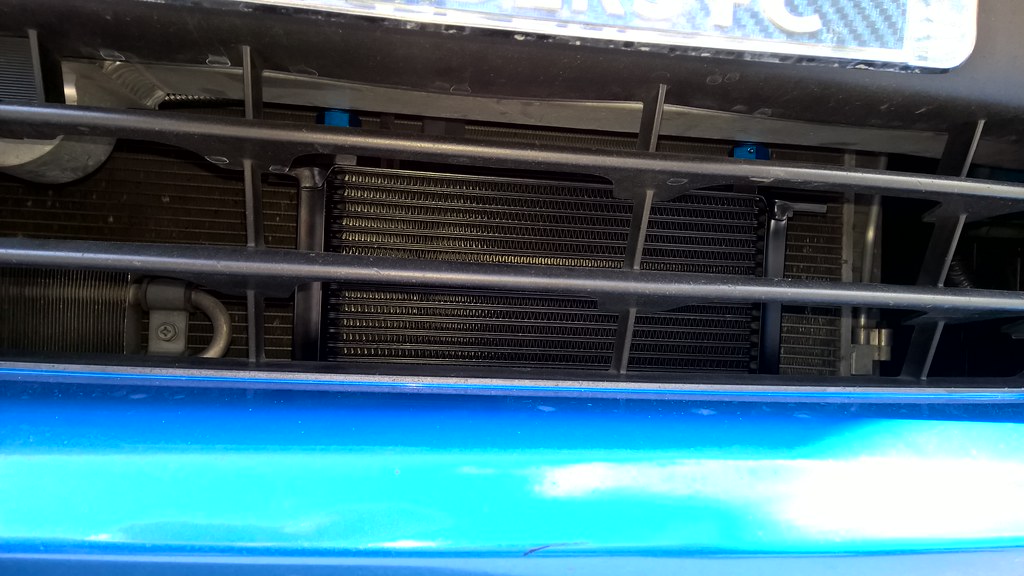 Oh, and one more thing, this is what happens when you install an oil cooler directly in front of your ambient air temp sensor, REALLY hoping this doesn't throw off the ECU!  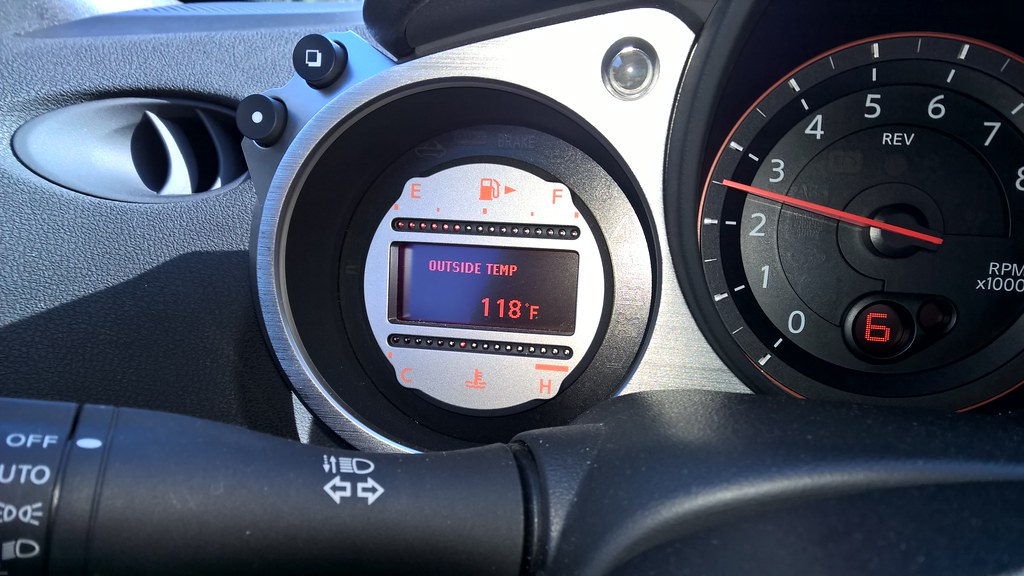
__________________
 2009 370Z w/ Sport Last edited by Titan1080; 04-13-2015 at 08:38 PM. |
|
|

|
|
|
#4 (permalink) |
|
Enthusiast Member
 Join Date: Dec 2009
Location: Mill Creek, Wa
Posts: 495
Drives: 04 Nissan Titan 4x4
Rep Power: 373            |
Thanks! The next time I swap my track tires on, I'll snap a couple more pics of the arrangement of zip ties on the lower control arm, I can't begin to describe it in words!
__________________
 2009 370Z w/ Sport |
|
|

|
|
|
#7 (permalink) | |
|
A True Z Fanatic
Join Date: Sep 2014
Location: Memphis Area
Posts: 3,118
Drives: '09 MB
Rep Power: 124434            |
Quote:
I'm particularly interested in the issue with the ambient air temp sensor. If it doesn't impact the ECU, will you just live with it, or try to find a solution? By the way, do you have a pic showing exactly where the sensor is located? I need to install an oil cooler and was considering mounting it on the driver's side, so looking for as much info as possible. Again, thanks for the time you put in to this. Last edited by Memphis370Z; 04-09-2015 at 07:46 AM. |
|
|
|

|
|
|
#8 (permalink) |
|
Enthusiast Member
 Join Date: Dec 2009
Location: Mill Creek, Wa
Posts: 495
Drives: 04 Nissan Titan 4x4
Rep Power: 373            |
The sensor is mounted on the vertical piece roughly in the middle of the radiator, in the upper-right-ish of the pic. I can't recall whether there is any slack in the harness for possibly relocating mine somewhere else, added it to the to-do list next time I have the lower engine cover off for an oil change.

__________________
 2009 370Z w/ Sport |
|
|

|
|
|
#9 (permalink) |
|
Enthusiast Member
 Join Date: Dec 2009
Location: Mill Creek, Wa
Posts: 495
Drives: 04 Nissan Titan 4x4
Rep Power: 373            |
What kit are you going with? The lines with the Stillen kit I don't think are long enough to get the cooler far enough to the driver side without obstructing that sensor, at least with the way I oriented the filter sleeve. Vipor in his write-up put a cooler together from off-the-shelf parts and went through the radiator support instead of around and is well clear of the sensor.
DIY: Oil Cooler Installation on a Nismo (Damper Included!) - vipor
__________________
 2009 370Z w/ Sport |
|
|

|
|
|
#10 (permalink) | |
|
A True Z Fanatic
Join Date: Sep 2014
Location: Memphis Area
Posts: 3,118
Drives: '09 MB
Rep Power: 124434            |
Quote:
I'm sure I'll either go with the Stillen kit or the Z1 kit. Either way, I think a 25 row will be sufficient. At least I hope so. |
|
|
|

|
|
|
#11 (permalink) | |
|
Base Member
 Join Date: May 2014
Location: Dallas
Posts: 106
Drives: 2011 370z (mb)
Rep Power: 11  |
Quote:
(drilled radiator support) DIY: stillen 24 row oil cooler on driver side |
|
|
|

|
|
|
#12 (permalink) |
|
Track Member
 Join Date: Apr 2012
Location: Riverside, CA
Posts: 559
Drives: 12 370z GM M6
Rep Power: 15   |
Idk if this has been brought up, but the temperature sensor directly works with the climate control. I'm assuming you have a hard time getting the heater on? Mine was backwards, it would say that it was too cold outside, thus never blowing cold. Ended up being a bad sensor.
|
|
|

|
|
|
#13 (permalink) |
|
Base Member
Join Date: Dec 2016
Location: Los Angeles
Posts: 204
Drives: 14' Nissan 370Z SP
Rep Power: 1999            |
Has anyone here has ever tried to make their own brake duct cooling? I'm not knocking Stillen, but I literally saw one of these kits in person and held it and I'm pretty sure it's some stuff from Home Depot with a higher price tag. They even have the same exact red hose at Home Depot.
|
|
|

|
|
|
#14 (permalink) | |
|
A True Z Fanatic
Join Date: Jun 2011
Location: WHAT
Posts: 2,551
Drives: 2018 Camaro SS 1LE
Rep Power: 424            |
Quote:
I used a 3" kit on my 370z because Stillen's kit didn't cool enough. - Only a 2" on their side. purchased flanges for the ducting to mount to get some pop rivets and a drill and get to work on your splash shield! 
__________________
2018 Camaro SS 1LE (455hp) - 2011 Nissan 370z (333hp) - 2004 VW R32 (240hp) - 2000 Civic Si (160hp)
|
|
|
|

|
 |
| Bookmarks |
|
|
 Similar Threads
|
||||
| Thread | Thread Starter | Forum | Replies | Last Post |
| DIY - Brake Cooling Ducts | ResIpsa | DIY Section (Do-It-Yourself) | 46 | 07-28-2014 09:46 PM |
| NISMO Circular Brake Ducts Using Revotec Inlets & Stillen Brake Cooling Kit | DLo | Brakes & Suspension | 24 | 09-17-2013 01:10 AM |
| Brake cooling ducts | lazer_Z | Brakes & Suspension | 27 | 11-08-2011 11:17 AM |
| Brake Cooling Ducts? | my2004Z | Nissan 370Z General Discussions | 6 | 05-06-2011 08:33 PM |