
 |
Thought I would share my custom install of the Joying 9.7" head unit. I purchased the JY-VOS01N4GS and absolutely love it. For those that are unaware, I have a Navi
|
|||||||
|
|
LinkBack | Thread Tools | Display Modes |
|
|
#1 (permalink) |
|
Base Member
Join Date: Jan 2014
Location: California
Posts: 165
Drives: 09 Nissan 370Z GM M6
Rep Power: 6722            |
Thought I would share my custom install of the Joying 9.7" head unit. I purchased the JY-VOS01N4GS and absolutely love it.
For those that are unaware, I have a Navi based Z which makes this type of activity even more difficult. It is currently paired with my eZ Navi Delete board, which has had a lot of work done to it and the code over the last few months and has been very stable during my daily driving. I purchased the single DIN version on this system so that I would have a space available for a pocket to store my phone, glasses, or what not. It always bugged my not having a convent place in the car to put such things. There are two mfg's that produce aftermarket stereo kits for the 370Z: SCOSCHE and Metra. I originally purchased the SCOSCHE and modified it's bracket to position the HU where I wanted it in the dash.  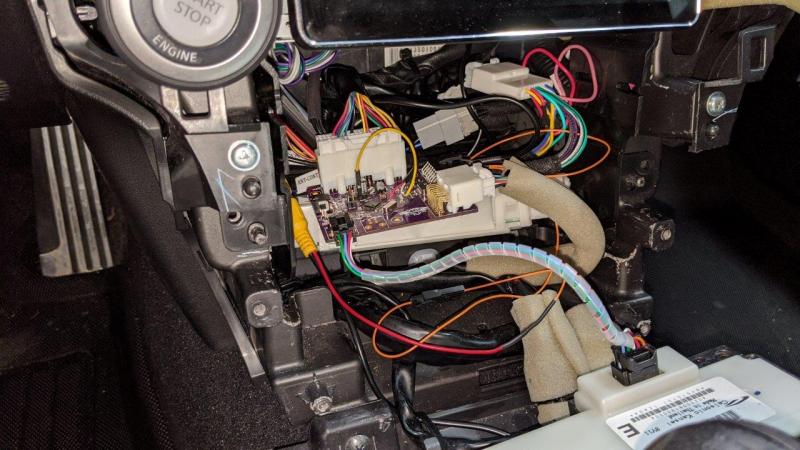 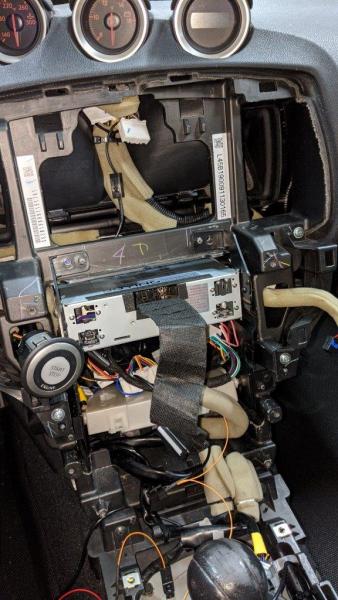 Since my car came with the factory Navi, I had a mounting bracket that held the stock screen. I decided to use that bracket in conjunction with another bracket that I fabricated out of #16 gauge sheet metal with square and threaded holes for the snap clips that are designed to mount the screen to the HU. I installed the clips to the bracket I made and mounted it to the factory screen bracket. This ensures the screen is centered and mounts it very rigidly. I am currently only using 4 mounting clips, but made cutouts for one on each side of the screen. Joying was nice enough to send me some extras and they will be installed there. 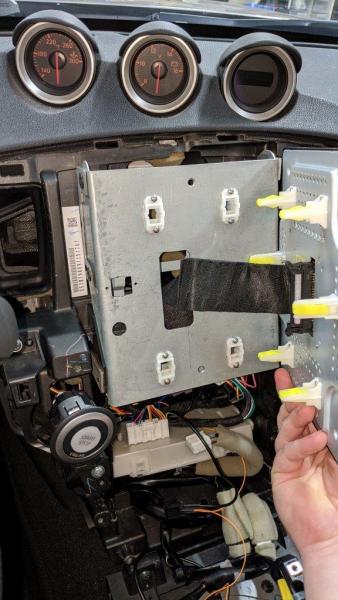 The screen is positioned to be recessed in the dash and slightly angled for better viewing. 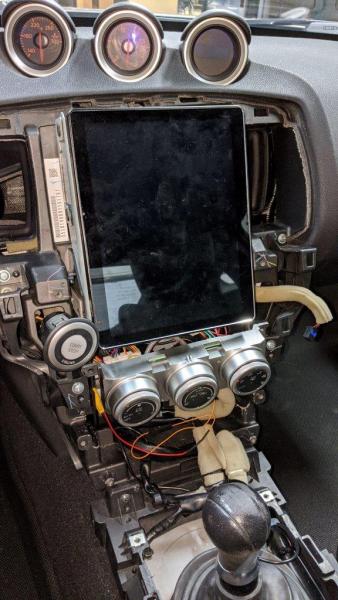 The wiring was almost 1:1 with the original wiring harness. I made sure to get a version of the audio harness that had all the necessary locations pinned out (some are missing pins that were needed for the steering wheel control, etc). The only thing I needed to wire up outside the harness was a robust GND wire as the factory head unit gets its GND through another connector that I was not using anymore. The other connectors that are needed for full functionality are broken out from the eZ Navi Delete board. These include reverse indication (actually a power supply that I used to power the rear view camera directly), and the mic signal. 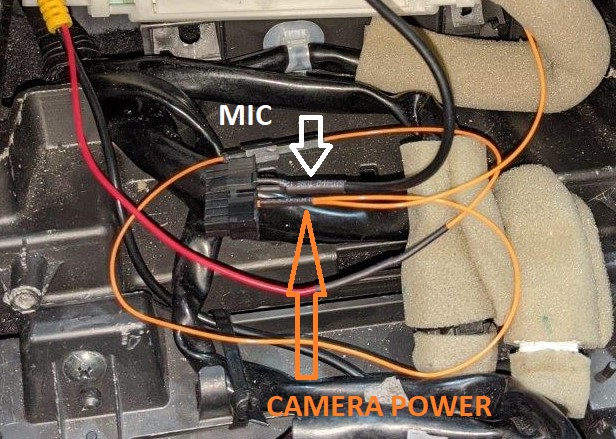 I reused the original wiring for the mic that runs down the A-pillar so I didn't have to take any of that apart. Its terminated in the cab light module on the original connector that runs to the factory mic. Once it comes out of the eZ Navi Delete board (via connector above) it runs to the mic input on the HU. An interesting thing that I learned about this HU is that there is also a built in mic in the system. I think its in the screen because I was able to do voice commands before I even did the mic install where the factory mic is. The UI is pretty clean and the unit if fully Play Store compatible.   When the car is in reverse, the backup mode is activated. 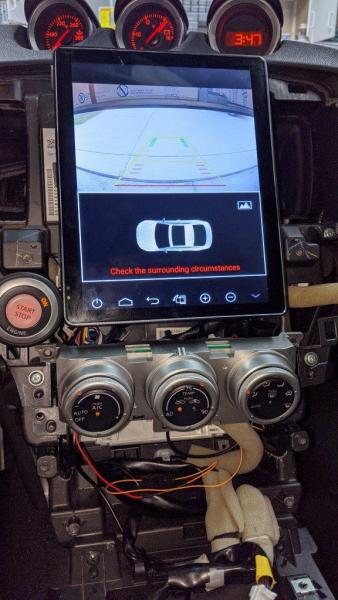 I bought one of those cheap 370Z backup camera units with the replacement licence plate light mount. Turns out that the HD camera I got from Joying has the exact same mounting configuration as the crap camera that came with the mount so I was able to swap them in about 3 minutes! 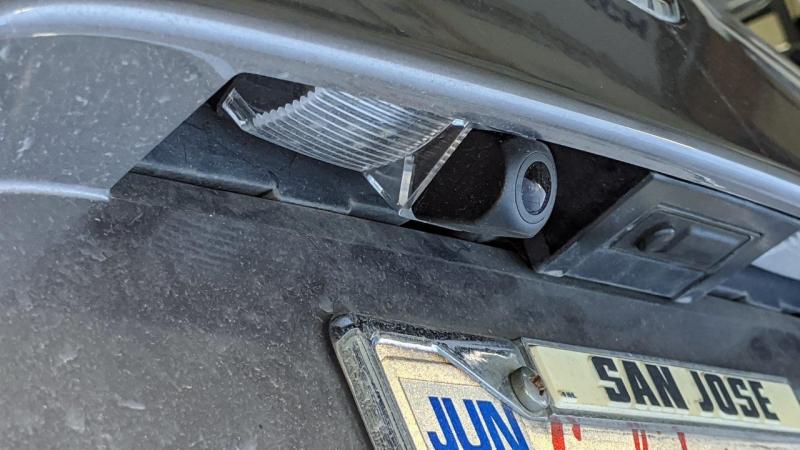 I am now getting around to buttoning everything up. I need to figure out a bit of wire management in the dash and install the GPS antenna (still considering locations). The eZ Navi Delete board sits nicely under the HU and behind the pocket, so I will probably make a mount that secures it to the top of the AC Amp box. The last bit of work will be modifying the fascia and creating a bezel that finishes around the edge of the screen. My current plan is to 3D scan this area with the screen in place to model the bezel and 3D print it. Then install magnets so that it snaps in place. 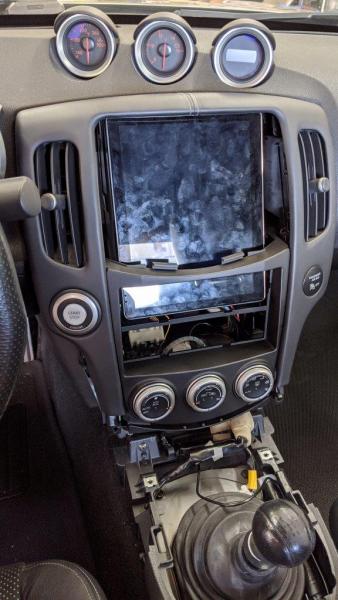 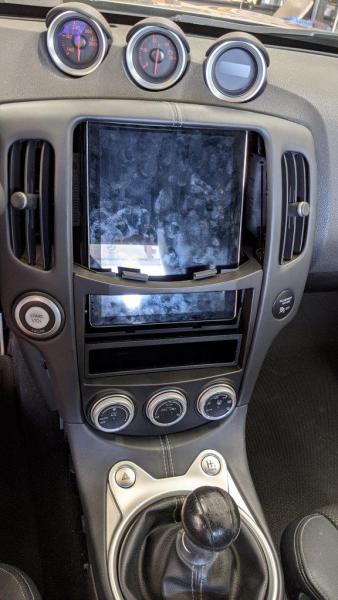 FYI: I had the SCOSCHE for a long while before I got around to ordering the HU and I found out that the double DIN cutout in the fascia was not quite large enough for the screen. The Metra has a larger cutout (and is what is shown above), but the HU mounting style is different. There are no brackets like with the SCOSCHE. Instead, the HU is designed to be snapped into the fascia itself. This was incompatible with my needs as I wanted the screen to sit in front of HU, so I ended up using the SCOSCHE brackets and Metra fascia. This is not ideal from a $$$ point of view, but since I was past the return period of the SCOSCHE, I was stuck with it anyway so decided to utilize it. So far I am pretty happy with how it is shaping up. It is fully functional (except GPS without the antenna). The steering wheel controls interfaces with the HU perfectly and are completely configurable within the settings. You can map any function you want. I chose to preserve the original functionality, except for the "Back" button. There isn't really a need for that as a physical button, so I mapped it to Mute. I would also like to point out the the company, Joying, is a pleasure to work with. Even though they are based in China, I would still get rapid response from them if I had questions. There were a few times where we exchanged 5-6 emails within an hour so vs the typical next day+ response time. Even with all the chaos happening right now. Very impressive. |
|
|

|
| Bookmarks |
|
|
 Similar Threads
|
||||
| Thread | Thread Starter | Forum | Replies | Last Post |
| Joying 9.7" Screen Android Head Unit Installation | Joe29 | Audio & Video | 4 | 01-28-2020 11:52 AM |
| 2-way component system wiring with Joying Android HU | bangity | Audio & Video | 6 | 11-11-2019 04:50 PM |
| Android HU install. | 2011 Nismo#91 | Audio & Video | 33 | 02-25-2019 08:22 PM |
| [FOR SALE] Joying Android radio | Fhjkalfhu | Parts for sale (Private Classifieds) | 12 | 01-21-2018 12:42 PM |
| Install complete / 12" JL / 1000 watts JL amp / capacitor / 12" Z enclosure sub box | Westwood | Audio & Video | 17 | 08-25-2010 04:40 PM |