 |
I agree with the last post. I like the Nissan symbol so anything like that with a Z on it I am going to buy!
|
|||||||
 |
|
|
LinkBack | Thread Tools | Display Modes |
|
|
#197 (permalink) | |
|
A True Z Fanatic
Join Date: Jan 2009
Location: Nor Cal
Posts: 1,113
Drives: with his eyes close
Rep Power: 718            |
Quote:
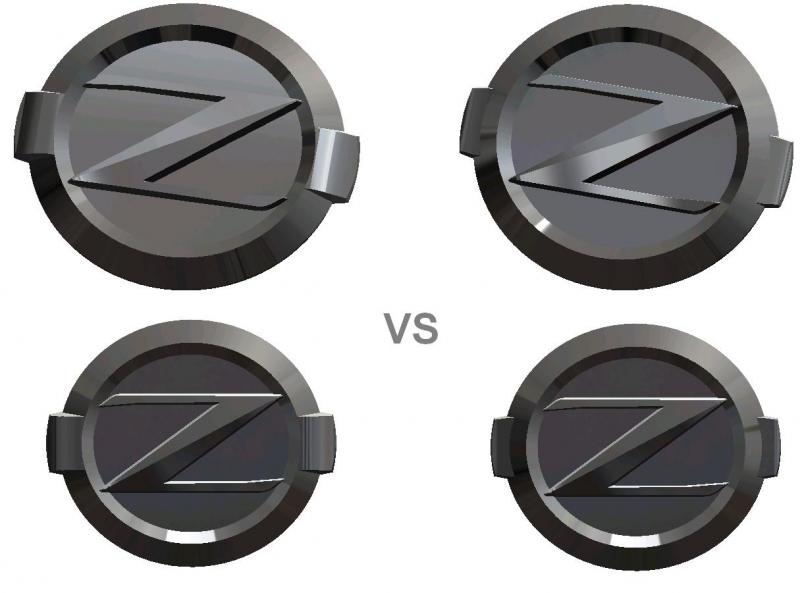
Anyhow, I'm on the same boat as AG with the ZF-2A and ZR-2A right now. As much as we all like to have the middle portion (fillet) of the emblem to be color matched to body color (whether if it's powder coated or painted), it's best to leave that as a second operation (for you guys). I suggest if we're applying any finishing to it, we should do it to the whole badge. As for the people that don't like the fillet part, you can either paint it yourself, or I think it's best to just have the body shop (or yourself) to shave off whatever tabs that's protruding into the hollow parts of the emblem and paint it prior to applying the emblem. Because at the end of the day, you're spending that much work to get an emblem that's machined, you might as well go all the way and do it right.  As for the two piece idea, it's a good idea except it's really not ideal because it's not cost effective way just so we can have a 2 tone surface. Double side tape can be really tacky. Another method is we can have (which i don't recommend) is have the top piece pierce through the bottom piece and have it sandwich between the bumper. And then we can have it thread into a lock nut on back side of the bumper. Of course this will require drilling 2 holes, but now for sure it'll be secure and nobody can steal it. But I can see this being super hard to machine and will cost super expensive. AGstacker, do you need me to send you the files again, or do you have both the front and back? I think you only have the front files. |
|
|
|
|
|
#198 (permalink) |
|
A True Z Fanatic
Join Date: May 2009
Location: Ontario, Canada
Posts: 16,202
Drives: In your way
Rep Power: 63            |
One more comment tho. For me not wanting to do much to my car it would need to fill in the stock holes and not require a lot of work to install. Just my two cents!
|
|
|
|
|
#199 (permalink) | |
|
A True Z Fanatic
Join Date: Jan 2009
Location: Nor Cal
Posts: 1,113
Drives: with his eyes close
Rep Power: 718            |
Quote:
One more note, I hope I didn't discourage anybody with having ideas, I am open to and should be able to easily show you what you want through my CAD drawing, (i.e. color or texture or even shape alterations) but just keep in mind it doesn't necessary mean it can be machined. That being said, we're also trying to come up with a prototype, so let's try to vote on one idea for now. Last edited by scruffydog; 06-07-2010 at 11:32 PM. |
|
|
|
|
|
#201 (permalink) | |
|
Base Member
Join Date: May 2010
Location: SF bay area
Posts: 95
Drives: Car
Rep Power: 15  |
Quote:
I am not familiar with the powder coating process and I welcome input from any knowledgeable persons on this forum. If people want to finish their badges them selves that's perfectly fine but I want to know I've made the right choices before I lay down My $$$. Haste makes waste yadda, yadda, yadda... Thank you for your post, please stay tuned. Last edited by AgStacker; 06-08-2010 at 12:06 AM. |
|
|
|
|
|
#204 (permalink) |
|
Base Member
Join Date: May 2010
Location: SF bay area
Posts: 95
Drives: Car
Rep Power: 15  |
Spent a few hours at the shop today after work. I started laying the ground work for the g-code program I will be creating. I imported one of Scruffy's models into some software created to work in conjunction with the software he used to design the parts. It's called CAMworks (Computer Assisted Machining) This type of software allows the user to reproduce compound geometry with out the use of specially made tooling.
I will be honest and tell you that this is a very challenging part by my standards. I have never made a part that forced me to rely so heavily on CAM. Usually I take a much less sophisticated approach to my programs that only requires me to CAM when absolutely necessary . But the fact is the entire visible surface of this badge must be CAMed. It's the only way. So, I set out to do it and I must say that I am very pleased with myself. The program is by no means complete, but after a couple hours of trying different approaches I had made significant headway on the most difficult steps in the process. I left the shop with a feeling of accomplishment and a big smile on my face. A few more days like today and the program will be ready, and I will be waiting for the opportunity to bring these parts to life. I'll make some screen shots of the software, and post a few updated photos of the shop over the coming days to keep up the interest in this thread. (print screen + ctrl V = awesome, thanks Kevin) |
|
|
|
|
#205 (permalink) | |
|
A True Z Fanatic
Join Date: Jan 2009
Location: Nor Cal
Posts: 1,113
Drives: with his eyes close
Rep Power: 718            |
Quote:
I did forget to mention something last time....about the fillet circle, the current thickness is 4.3 mm or something like that, since I don't know what the height of the tabs are (esp the front ones being so big), we may want to increase the thickness of the fillet part if necessary? I guess worst case if these tabs get to be too tall, we can always shave a little bit and it's still cover by the fillet circle. |
|
|
|
|
|
#206 (permalink) |
|
Base Member
Join Date: May 2010
Location: SF bay area
Posts: 95
Drives: Car
Rep Power: 15  |
ah yes, I've found the file for ZF-2A, thank you. as for the 4.3 mm thickness, please refer to the pictures I posted at the top of page 9 in this thread. I think we're ok on the front, but those rear nubs look pretty damn big. To me it looks bigger than 4.3mm. Did you say you are trying to keep your bumper cover in perfect condition to re-sell it after upgrading to Nismo? or is that just for the front?
|
|
|
|
|
#207 (permalink) | |
|
A True Z Fanatic
Join Date: Jan 2009
Location: Nor Cal
Posts: 1,113
Drives: with his eyes close
Rep Power: 718            |
Quote:
Now, if I increase the thickness for the rear fillet circle, shouldn't I increase the thickness for the front too to match it? Just a thought. I wanted to bring it up before it's too late. The other option is for us to shave a little bit off the tab (nubs). |
|
|
|
|
|
#208 (permalink) |
|
Base Member
Join Date: May 2010
Location: SF bay area
Posts: 95
Drives: Car
Rep Power: 15  |
So Im looking at the last files you sent me.
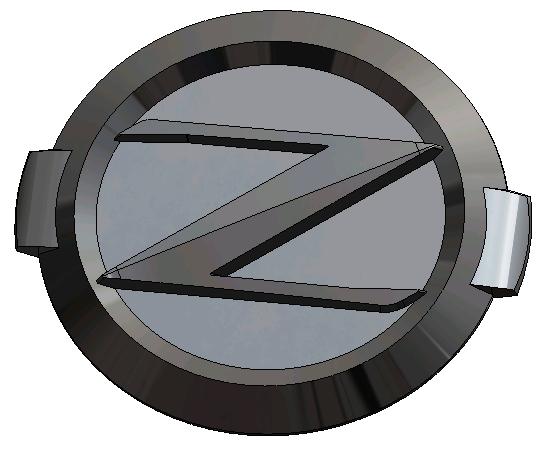
the lower tab you sent me (#4) is this one  but I want to make this one  please resend when you have a chance. Last edited by AgStacker; 06-09-2010 at 07:49 PM. |
|
|
|
|
#209 (permalink) |
|
A True Z Fanatic
Join Date: Jan 2009
Location: Nor Cal
Posts: 1,113
Drives: with his eyes close
Rep Power: 718            |
I can't see any attached pictures on your msg above. but I re-sent you the front emblem. Before you proceed, did we want to leave it at 4.3mm tall for the fillet circle for the rear even though we may not be sure it'll cover the height of the tabs? I'm still editing the rear emblem ZR-2A. Please let me know
|
|
|
 |
| Bookmarks |
|
|
 Similar Threads
|
||||
| Thread | Thread Starter | Forum | Replies | Last Post |
| GT Motoring - custom tow hook finshing pics, Custom finishes now available | GT Motoring | Exterior & Interior | 45 | 09-05-2010 04:31 AM |
| FS: Custom fit 370Z sunshield. sunshade. | Steven | Parts for sale (Private Classifieds) | 0 | 01-25-2010 12:48 AM |
| Ebay: Custom Speaker box for 370z | Phimosis | Audio & Video | 8 | 06-09-2009 06:00 PM |
| My Custom speaker box for the 370z | Phimosis | Audio & Video | 20 | 06-05-2009 11:48 AM |
| Custom Sub Enclosure - 370z KY owners | customboxman | Nissan 370Z General Discussions | 40 | 04-06-2009 06:37 PM |