
|
Part 2: The Gauge Itself. I decided on a pretty awesome looking (feature-wise) gauge from Spek-Pro: ProParts - Gauge Controllers, Mounting Pods . That listing shows it as 0-150 PSI,
|
|||||||
 |
|
|
LinkBack | Thread Tools | Display Modes |
|
|
 11-04-2011, 12:12 AM
|
#1 (permalink) |
|
A True Z Fanatic
 Join Date: Mar 2009
Location: Houston, TX
Posts: 4,024
Drives: too slow
Rep Power: 3595   |
Part 2: The Gauge Itself.
I decided on a pretty awesome looking (feature-wise) gauge from Spek-Pro: ProParts - Gauge Controllers, Mounting Pods. That listing shows it as 0-150 PSI, but the current model they're shipping is actually a 0-120 PSI gauge face with a 0-150 PSI pressure sensor. It's a little pricey at $255, but IMHO worth it. The basic rundown on the features of this gauge: 52mm (2-1/16"), digital internals with analog-style display LED Backlight: several different colors for the main backlight, red needle. 3 Buttons along the bottom of the faceplate for programming menus: you can pick the backlight color, set the brightness, recall the last peak value, calibrate the gauge to zero sensor pressure (w/ engine off), and set high- and low- pressure alarm pressures. Regardless of your chosen backlight color, when the pressure is low or high enough to trip one of your alarm settings, the gauge backlight switches to flashing red. There's an alarm wire output that you can hook up, which will ground a small 12V load to do whatever you want it to do. Full details on the features, wiring, and programming are in this rather poorly put together but informative instruction manual: http://www.propartsllc.com/pdfs/Pressure.pdf I didn't use the dimmer wire (supposed to dim the gauge with the headlights/dimmer for your dash). I tried hooking it up to the dimmer+ and dimmer- lines used by the factory radio harness, but had no luck making it work, so I left it disconnected. It could be that I just didn't do something right at the time though. The brightness is easy enough to adjust from the gauge's buttons in any case. I did make use of the alarm wire though. I went down to a local electronics shop and picked up a small 12V Piezo Buzzer rated for 75dB. You could search somewhere like Mouser to buy something similar online, e.g. this 95 dB one, they have a pretty wide selection of them there. My 75dB is loud enough to really be annoying, but I haven't yet had the chance to see if it's loud enough for windows down on the track with a helmet on. If not I'll upgrade it later. In any case, any reasonable piezo buzzer is well under the 1.5 Amp limit for the gauge's alarm wire, so you don't even need to use a relay or anything. Keep in mind the gauge's alarm "output" is a switched ground: you hook your buzzer's negative terminal to the gauge output, and your buzzer's positive terminal to an ignition-switched +12V source. The problem with wiring up that alarm and setting an appropriate low pressure point on the gauge though, is that anytime I'd want the ignition on and the engine not running, the alarm would be sounding off the whole time due to the gauge being powered up and reading 0 PSI. I thought about putting a killswitch on the alarm itself, but then I figured I'd flip it off and forget that I did so, which ruins the whole point. So instead I wired up a lighted on/off switch for the whole gauge itself. This allows me to shut off the gauge+alarm if I'm going to have the ignition on and engine off for a while, and it's really obvious if I leave it that way when I start driving because the whole gauge is powered off (duh, turn the switch on). As far as mounting for all of this goes (the gauge, the switch, the alarm buzzer), for now my center dash config is still a lid-less cubby and 2 empty DIN-sized pockets where the radio used to be. Later I'll probably upgrade to the "standard" of just a flat faceplate over this area to mount hardware on, but for now I mounted the gauge inside the cubby, and the switch and alarm hidden in the back of one of the DIN pockets. This pic is the DIN pocket w/ the switch+alarm, obviously: 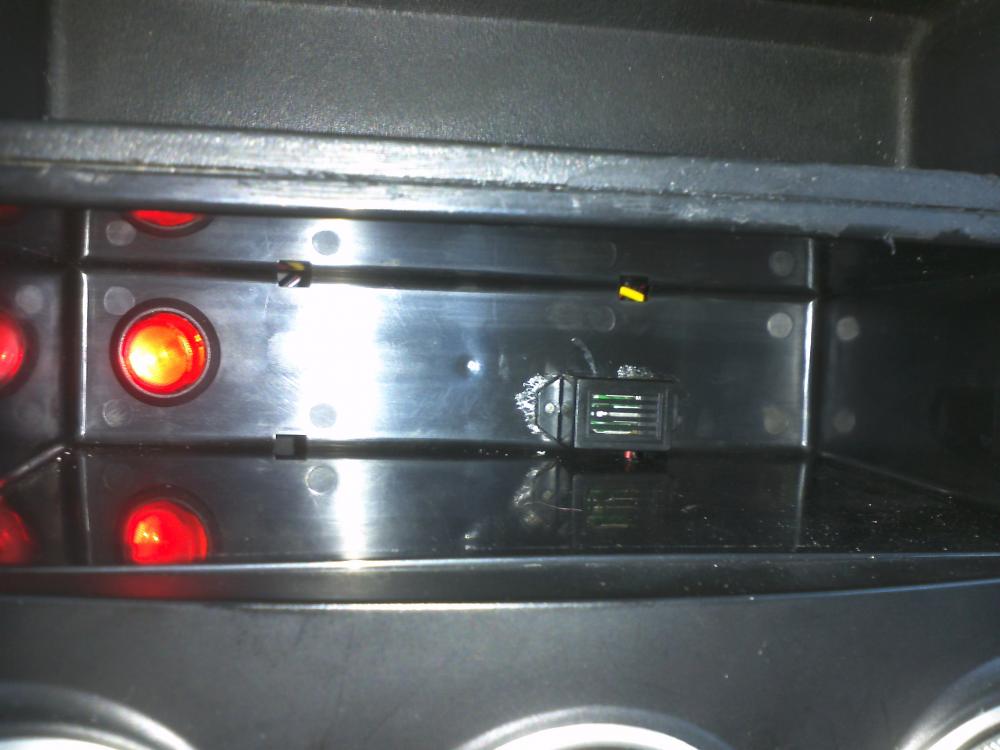 And this horrible shaky video is me playing with the gauge while the car is half-warmed-up. The brightness setting is just too high for the camera, hence the blurry look of the lit-up parts of the face. I roll through the basic settings menus (peak display, high alarm setting, low alarm setting, backlight color, brightness). On the way through, I set the low alarm high enough to make it trip at my current pressure just so you can hear it go off and see it flash, and then set it back to zero after. Warning: partway through this video, I trip the alarm, and you're going to get really annoyed at the buzzing sound long before I get back through the menu system to set the low pressure alarm back to zero. Have your mute button handy: |

|

|
|
11-04-2011, 06:22 AM
|
#2 (permalink) |
|
A True Z Fanatic
Join Date: Mar 2009
Location: North East
Posts: 6,203
Drives: 09 370Z Sport M6
Rep Power: 654 |
Nicely done! And thanks for confirming the thread type.
__________________
Hotchkis ARB | Stillen CAI | Art Pipes | Berk CBE | Stillen AP Racing Brakes | AE Performance Oil Cooler | BC Racing ER Coilovers | Doran Control Arms |
|
|
|
|
11-06-2011, 05:14 PM
|
#3 (permalink) |
|
A True Z Fanatic
Join Date: Mar 2009
Location: Houston, TX
Posts: 4,024
Drives: too slow
Rep Power: 3595 |
Just got home from my DE weekend. This was The Driver's Edge program, running at MSR Houston. The whole weekend was really awesome. A lot of fun, and a lot of learning.
The car held up great, no random mechanical issues to solve over the weekend (which means the 100lbs of tools and spare parts I lugged to the event were mostly dead weight). The new brake stuff (Relentless 2pc rotors + Carbotech XP8 pads) were awesome. Brought the car down pretty hard, and never faded on me. The new oil pressure gauge worked fine. The new battery relocate didn't come apart or anything. The Conti DW's are still going strong, lots of tread still on 'em. I was in the Green (noob) run group, since this was my first event. It was the right place for me to be I think, at least initially, as there was more classroom time and more coverage of basic track-driving mechanics. It was a big group though, and there were a number of cars there that just weren't "getting it" and kinda slowing us down. Still, even then while we were slowed down, it gave me the opportunity to practice passes (including some off-line passes near corner entries), and my instructor and I got to sit back and chat about where the guy in front of us was doing good or making a bad line or using the brakes when they shouldn't, etc. For my last run on the second day, my instructor went ahead and moved me up a group and let me run with the Blue group. In that group everyone's past the very basics and kinda knows how to handle themselves, cornering speeds and lines are closer matched between the cars, and passing was being handled a lot more efficiently. Everything just "clicks" better between the drivers in that group, and I was able to hold my own I think, at least on this track in this direction. Planning to do more events with these guys (and at more tracks), and work towards being a consistent blue-grouper, although I may need to drop back to green on new tracks at least once to figure them out, we'll see how that works out. My instructor (Ginger) was awesome, she talked me through correcting a lot of my mistakes (and yes all the instructors at these use the in-helmet headsets to talk to you). As my speed ramped up, things kept changing, that was something I didn't really anticipate. When you finally nail down a challenging corner and exit it significantly faster, then you're suddenly coming into the next faster than you've done before, and it changes your setup a bit. Might have to brake earlier, get further to the outside before turning in, etc. I had a few slip-ups from mistakes (e.g. not shedding enough speed before turn-in, or not unwinding the steering enough as I laid back into the throttle), which led to a few minor slides (a couple of throttle oversteers, and one sideways 4-wheel drift), but I managed to correct them gently and not go off track, and recover my line a little further down, so I think things are coming along well. Lots to learn yet, but it will come with time. I still need to do a minor tear-down on the car for after-analysis and make sure everything's good (primary concern is if my new oil pressure fittings had a tiny slow leak, it might not be apparent until I get back in there and feel for the slick on the fittings or look for drip marks on the undertray). I shot video of my 2nd day sessions (3 with green, and the final run with blue, although I forgot to hit the "record" button when we started blue, and then finally realized it and hit the button while we were on a straight a few laps in). I still need to get those edited and youtube'd. Either I'll get it done tomorrow, or it'll be a week, since I'm leaving the country for a week tomorrow evening. I'll stop rambling now with one final note: If you've got a functioning Z and you've never been to a DE type event, you really owe it to yourself to do so. You're missing out on a big chunk of your Z's fun value 
|
|
|
|
|
| Bookmarks |
|
|
 Similar Threads
|
||||
| Thread | Thread Starter | Forum | Replies | Last Post |
| TravisJB Journal | travisjb | Member's 370Z Gallery | 1977 | 11-03-2017 09:39 AM |
| DannyGT's Journal/Progress | DannyGT | Member's 370Z Gallery | 174 | 10-17-2017 10:25 AM |
| RCZ's 370Z Journal. | RCZ | Member's 370Z Gallery | 1743 | 08-09-2013 11:55 PM |
| Edmonton Journal Review of the 370Z | BanningZ | Nissan 370Z General Discussions | 13 | 08-09-2009 05:44 PM |
| LiquidZ's Journal | LiquidZ | Member's 370Z Gallery | 22 | 05-22-2009 11:42 PM |


 183Likes


 Hybrid Mode


