 |
Installed the A.M. Performance baffled oil pan today. The install is pretty easy, and their detailed instructions cover it all well. I had some extra difficulty with removing my existing
|
|||||||
 |
|
|
LinkBack | Thread Tools | Display Modes |
|
|
|
|
#1 (permalink) |
|
A True Z Fanatic
 Join Date: Mar 2009
Location: Houston, TX
Posts: 4,024
Drives: too slow
Rep Power: 3595            |
Installed the A.M. Performance baffled oil pan today. The install is pretty easy, and their detailed instructions cover it all well.
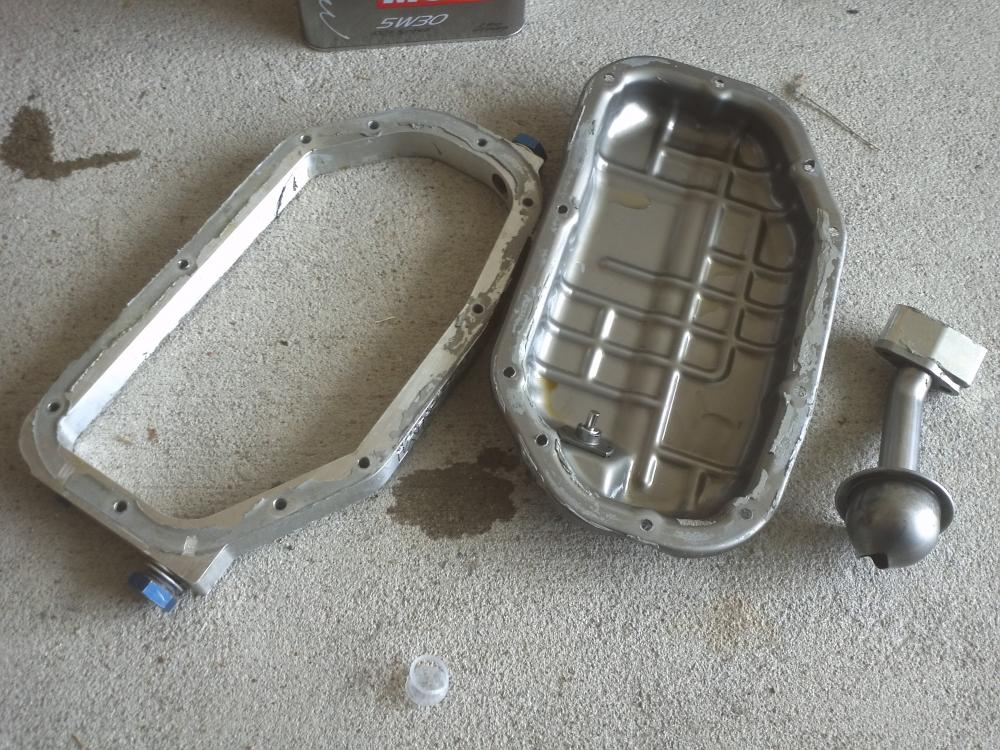
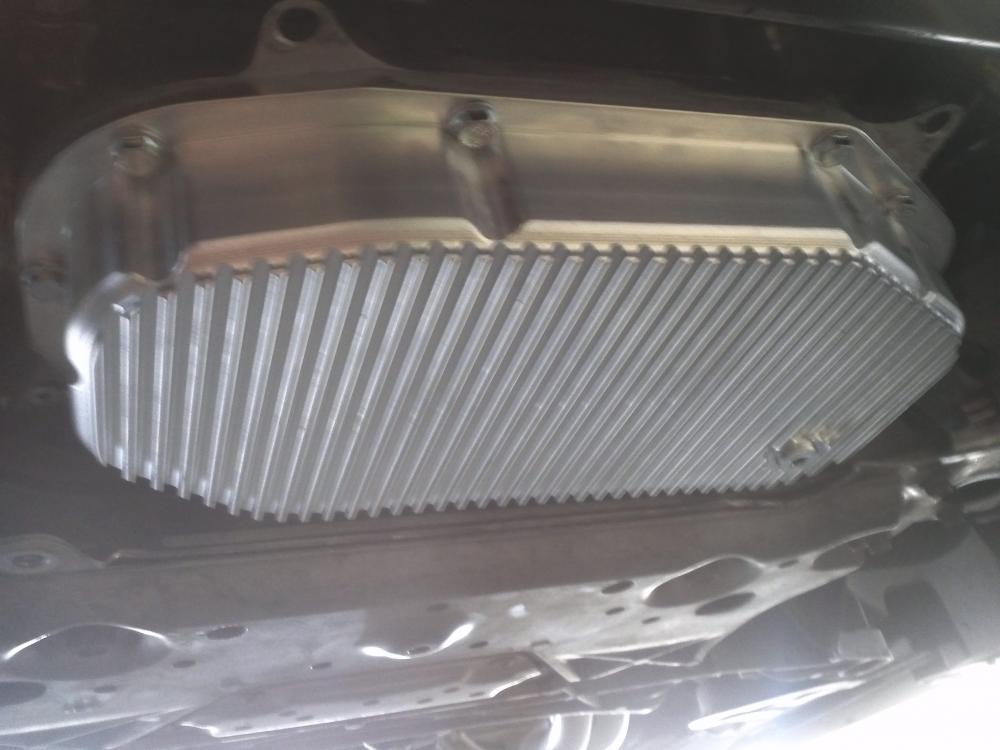
I had some extra difficulty with removing my existing AAM oil pan spacer. It's easy enough to separate the OEM oil pan from the spacer, but separating an installed spacer from the engine is kinda rough, because there's really no flex or give between those two solid aluminum parts to get a gasket separating tool to slip into and break the Ultra Grey. For anyone else removing a solid aluminum oil pan spacer, my tips are: (1) scrape/cut as much of the edge of the gasket as you can with a razor blade, all along the inside and outside edges, (2) liberally apply brake cleaner or any other volatile chemical that might help break down the Ultra Grey gasket, again all along the edge inside and out, and (3) use a long prybar to separate them. When you look at the situation, you'll see there's an aluminum "tab" sticking out of the engine block side that doesn't mate up with the oil pan spacer, and the spacer has an edge that sticks out too far nearby as well. The trick is just getting the prybar wedged between these two aluminum outcroppings so that you can solidly pry them apart (without trying to shove anything between them at the gasket itself). AAM oil pan spacer and OEM pan after removal (note the squared off aluminum outcroppings on the spacer near the blue oil fitting plugs, these are what you can pry against):  New oil pan, installed (and yes, it definitely gives better clearance than the spacer solution did. we're back to the lower brace under the engine being the lowest point rather than the oil pan). Also note the two aluminum tabs with empty holes sticking out the front of the block, above the pan. These are the other side of what you brace the prybar against to help remove an old spacer.: 
Last edited by wstar; 08-13-2011 at 12:19 PM. |
|
|

|
|
|
#2 (permalink) |
|
A True Z Fanatic
 Join Date: Mar 2009
Location: Houston, TX
Posts: 4,024
Drives: too slow
Rep Power: 3595            |
Oh one more note for anyone swapping out an existing AAM (or similar) spacer kit for the AM Performance pan. AM Performance wants you to re-use the two stock bolts for the oil pickup. The AAM kit supplied new longer ones, and I have long since misplaced the original bolts. The correct replacement bolts from a hardware store is a pair of M8-1.25 x 20mm, class 8/8.8.
|
|
|

|
 |
| Bookmarks |
|
|
 Similar Threads
|
||||
| Thread | Thread Starter | Forum | Replies | Last Post |
| TravisJB Journal | travisjb | Member's 370Z Gallery | 1977 | 11-03-2017 09:39 AM |
| DannyGT's Journal/Progress | DannyGT | Member's 370Z Gallery | 174 | 10-17-2017 10:25 AM |
| RCZ's 370Z Journal. | RCZ | Member's 370Z Gallery | 1743 | 08-09-2013 11:55 PM |
| Edmonton Journal Review of the 370Z | BanningZ | Nissan 370Z General Discussions | 13 | 08-09-2009 05:44 PM |
| LiquidZ's Journal | LiquidZ | Member's 370Z Gallery | 22 | 05-22-2009 11:42 PM |