
|
Put the transmission in... most of the way. The engine needs to slide forward 1/4 inch. That should resolve most of the gapping issue on the intake once the engine
|
|||||||
 |
|
|
LinkBack | Thread Tools | Display Modes |
|
|
 04-07-2021, 09:52 AM
|
#1 (permalink) |
|
A True Z Fanatic
Join Date: Oct 2010
Location: Portage, MI
Posts: 2,296
Drives: Tricycle
Rep Power: 589151   |
Put the transmission in... most of the way. The engine needs to slide forward 1/4 inch. That should resolve most of the gapping issue on the intake once the engine is sitting in the proper place.
If it seems like I post a lot working on the car... I really do try getting out there a lot to get this thing done! If I don't do it, no one else will. The 4L80e is a HEAVY transmission but the 7AT that was in there is nearly as heavy. -Edit I plan on using foil tape on the edges of the airbox and radiator. I have a v2 for both the crash bar and radiator... but I'm not going to worry about that until later down the road. I need to use what I have. That's the problem with learning curves, you always find better ways of doing things when you're done. Last edited by gbrettin; 04-07-2021 at 10:02 AM. |

|

|
|
04-07-2021, 10:10 AM
|
#2 (permalink) |
|
A True Z Fanatic
Join Date: Aug 2013
Location: Shawnee KS
Posts: 5,698
Drives: 15 Magma Red 6MT
Rep Power: 2684377 |
It would be a whole lot easier to modify the trans mount. Slot the holes that mount to the trans, use star type lock washers under the bolt heads. That way you can mount the crossmember to the frame, then tighten up the trans to the xmember.

__________________
 2015 Magma Red 6MT Sport Tech/2012 Fairlady MB 6MT Base (RIP 08032018)https://www.nicoclub.com/FSM/370Z/Coupe/ 2015 Magma Red 6MT Sport Tech/2012 Fairlady MB 6MT Base (RIP 08032018)https://www.nicoclub.com/FSM/370Z/Coupe/
|
|
|
|
|
04-07-2021, 03:39 PM
|
#3 (permalink) | |
|
A True Z Fanatic
Join Date: Oct 2010
Location: Portage, MI
Posts: 2,296
Drives: Tricycle
Rep Power: 589151 |
Quote:
If you are wondering why I didn't mark the mounts. I actually did... here comes the but... BUT.. I mounted the engine mounts on backwards previously. AFTER I mounted it on incorrectly, I put on additional thicker black marks while mounted incorrectly.  This is all learning and fabrication pains. I'm learning tolerances are not necessarily a bad thing. |
|
|
|
|
|
04-08-2021, 07:52 AM
|
#4 (permalink) | |
|
A True Z Fanatic
Join Date: Aug 2013
Location: Shawnee KS
Posts: 5,698
Drives: 15 Magma Red 6MT
Rep Power: 2684377 |
Quote:
 You'll be an expert at LS swapping when this is done. 
__________________
2015 Magma Red 6MT Sport Tech/2012 Fairlady MB 6MT Base (RIP 08032018)https://www.nicoclub.com/FSM/370Z/Coupe/
|
|
|
|
|
|
04-08-2021, 09:51 AM
|
#5 (permalink) |
|
A True Z Fanatic
Join Date: Oct 2010
Location: Portage, MI
Posts: 2,296
Drives: Tricycle
Rep Power: 589151 |
IG@gbrettin
Transmission in and things have lined up significantly better. Still needs adjustment on the intake but we're doing great now! ------------ I used the biggest pry bar the shop had and slid the engine forward. lol. Thankfully it was only a 1/4 inch. I ordered -8 lines for fuel, Few more fittings, PS reservoir cap power steering cooler and parts to make my own PS cross over line. I tried to pay a guy to make me a cross over line but he kept jerking me around. Basically got to the point where I said... thanks but I'll make my own now. It's cheaper if I do it anyway. His loss. All the little stufff that doesn't get included in people's swap.... it's actually a lot. That's why I took the time to write down something simple as "PS reservoir cap". Speaking of that... I have a trick idea for the cap... I'll just show you guys when it's done though. Not large strides here... but they are steps in the right direction. A note here... The reason I update this log when ever I do work... Lots of stuff happens and If I don't stay on top of it I will get overwhelmed and simply not post here. That's just how I work. |
|
|
|
|
04-12-2021, 04:19 PM
|
#7 (permalink) |
|
A True Z Fanatic
Join Date: Oct 2010
Location: Portage, MI
Posts: 2,296
Drives: Tricycle
Rep Power: 589151 |
I guess I slacked on posting over the few days. I have been getting out to the shop and doing a couple things.
I ordered a Lokar dipstick, and assumed plug and play. WRONG. The damn thing does not fit and now I am trying to figure out what I can do. Might pawn this one off to the engineer. I have "ideas" what to do at this time. The cap I ordered was not the right cap. I fixed it. The dipstick was too long so I cut it. I added the power steering cooler. It fit in perfect. Only draw back was that I cut the Sikky line to fit the correct length into the PS pump. When I pulled the line off it didn't have enough length to meet the PS cooler. Easy fix. I just added the left over hose to the PS cooler and bought a 2 dollar barb that will join the line. Actually, That may even be the better solution so that I can drain the fluid lower if ever needed. The cross over line I ordered appears to be the correct length and the banjo bolts will likely work under the pan. This is a big issue for other swapped Z cars as well. If you guys remember, I ground down a couple holes in my exhaust manifolds. Well! that has been fixed and 8 EGT bungs have been added. My buddy is helping with the finalization of the hot and cold side. Some adjustments were done on the cold side upper but the lower side requires an additional pie on each side. He took the lowers to his shop to turn the aluminum smooth so that it doesn't look like a bag of azz holes. The exhaust flanges are off to Independent Engineering (my buddy who is helping fab) so that vbands will be welded on. He has a really nice shop for welding... instead of the plastic crate I set up for him in the picture. Jeff/Independent Engineering will swing out next weekend with revisions. I suspect he will need another week of additional time to get the waste gates welded, BOV welded (assuming they come this week) and other welding finalization items. Jeff will also be the man helping with an option for the oil dipstick (he just doesn't know it yet). Last picture is the wheel on my car... I thought it was funny because of all the work that has been done to the car, I still have OE wheels. I don't intend on upgrading them this year either. -Edit I have a picture of a digital caliper... that is the surface of the top on the PS cap. A titanium company, Titanium Works, said that they want to put "seen" titanium objects on my car. I don't know if that means they want to sponsor me or not. *shrug* . Anyway. surface of the cap.. yeah. I checked in with them to see if they had a titanium caps for GM. They didn't., but he said that they could make a titanium plate with a thin two sided tape. I said they are welcome to make something up for that spot. Might look kinda cool with something there. I dunno. I figured it's an option for them. We'll see. Last edited by gbrettin; 04-12-2021 at 04:34 PM. |
|
|
|
|
04-12-2021, 08:07 PM
|
#8 (permalink) | |
|
Base Member
Join Date: Jun 2019
Location: Ontario
Posts: 191
Drives: 19 370z Heritage EAC
Rep Power: 3361 |
Quote:
__________________

|
|
|
|
|
|
04-14-2021, 10:57 AM
|
#9 (permalink) |
|
A True Z Fanatic
Join Date: Oct 2010
Location: Portage, MI
Posts: 2,296
Drives: Tricycle
Rep Power: 589151 |
With great success I also have set backs. I'll lead off with that.
In true form how I have been doing things... I stripped more threads. I REALLY hate aluminum and steel threads now. I put 45 deg ends on the water line and I tried cheating it by not removing the air shroud. It put me at a weird angle and the Fragola threads cut the bung. The top of the pump was also threaded in first which caused the line to be tight. I know what caused it. Ill avoid (maybe) that in the future. The bung will be chopped off on the radiator and re welded. New bungs (yes multiple) are on their way. I informed the welder and he's way more cool than I am about it. I wanted to punch a hole through the radiator. Now onto the success. The cross over line for the notched oil pan was a success. This is seriously the win I needed yesterday. Infact, it's such a big deal it almost made the stripped bung less painful... almost. When I started this build there were no rear sump oil pan options. The notched pan was done to give clearance on to what we thought common bolt clearances would be. Worst case scenario, the pan would be fabbed more if the cross over didnt fit. Thankfully I found a thread on FB where the LSx Z/G community had the same issue with 350z. 20 dollars in parts later from their suggestions: 1' 4an brake line and 2 banjo bolts... IT WORKED! What a weird mix of win vs fail. I'm not going to dwell on the bad. Sh1t happens. Ill need to disassemble the front of my car coming up for this weekend because the hotside and cold side are going in. Hotside first (because the front will be tore down).. It's also time to pump the old fuel out as well. There's a funny story (not funny to me) that a shop hand at Auto Dynamix "helped" me with.... I'll save that story when I pump out the tank and show you pictures. Let's just say I about murdered someone... Side note. Has anyone gone through all the pictures on the OneDrive? How was the interface if you did? Last note. I am EXTREEMLY pleased with the flow of hoses now. The simplistic line is great. Also a PITA to get it to that point. Less is more and the dance of hose looks beautiful to me. Edit- Posting the YouTube video of the pan so you can see how much effort has gone into it to make it work. Last edited by gbrettin; 04-14-2021 at 11:05 AM. |
|
|
|
|
04-19-2021, 09:39 AM
|
#10 (permalink) |
|
A True Z Fanatic
Join Date: Oct 2010
Location: Portage, MI
Posts: 2,296
Drives: Tricycle
Rep Power: 589151 |
Getting to the shop through the week was a bust. I got my 2nd covid shot and that oretty much gave be covid light and I was sick for a couple days.
Saturday was the main day I needed to be there. Met up with Jeff so that we could wrap up the Intake, that happened!. We were going to put BOV but shipping took a while and in true Murphy fashion they showed up at my house after I got back from the shop. Exhaust flanges are a wrap. vbands are on! there's 1/32 between the flange and the alternator but should double to 1/16 when tightened down. SUPER tight but it works. Now for some bitter sweet up turbo up pipe news. I've opted to go with fender dump exhaust for now due to space and will not be running the Fast Intentions Exhaust. This decision means that additional space is now available and no core support (which was there when I made the up pipes) has yielded space as well. I found two mandrel 45's in the shop and then we tested . Passenger side will need one pie at the exhaust flange while the driver side needs nothing. The clean path will reduce a TON of turbulence which means clean boost. There's also less welds so less chances of breaking from heating and cooling. Exhaust tubing will be far away from my tires now, which means I can change the OE steering knuckles out to voodoo or some other billet brand in the future. Most importantly, I can run wide tires with out worrying about hitting the exhaust. It's lame to put time/money into something and change... but i've come to accept that it simply needs to happen to achieve better results. Knowledge/Skill has a lot to do with this as well, I simply know more now and the final layout now known too. Not a lot of pictures because we were getting after it. After the pipes are completed, I will get them to the coater for Cerakote. Then I will send to a different company for another thermal wrap. |
|
|
|
|
04-21-2021, 10:16 AM
|
#11 (permalink) |
|
A True Z Fanatic
Join Date: Oct 2010
Location: Portage, MI
Posts: 2,296
Drives: Tricycle
Rep Power: 589151 |
Looks like I have 1/32 in-between the edge of the vband and the alt. Ill need to grind the back corner a bit and then put in a metal heat shield. I'm not going to be down replacing a 400 alternator every year.
All the bolts are in on the transmission now. I just need to find bolts for the flexplate... or get new ones... Anyway... The BOV placement is going to be on the inside. There's not a lot of options really. They are going to be either slightly pulled back hidden or our where you can see them. Good news with the Lokar oil dipstick. I can adjust the cable on it. 100% useable. So yeah, not much in the way of movement. Next steps are pulling electrical and fuel. I didn't feel like doing either of those things last night. |
|
|
|
|
04-22-2021, 08:36 AM
|
#12 (permalink) |
|
A True Z Fanatic
Join Date: Oct 2010
Location: Portage, MI
Posts: 2,296
Drives: Tricycle
Rep Power: 589151 |
Marked and drilled the holes last night. Looks like I'm committed now! It will get welded Saturday.
Next up. Fuel lines... Not even sure what to think about this part. The tank needs to be drained. I have new lines and SOME fittings. I need to buy more, but wont until I see the whole run. I'll start thinking about A2W lines and transmission cooler mounting at the same time. -Edit There was a lot of anxiety cutting the holes. A whole lot of time gone into it. THAT is why this part of the process has been spaced out. It's easier to think about it for a while and circle back. No need to rush to punch a hole. Last edited by gbrettin; 04-22-2021 at 10:43 AM. |
|
|
|
|
04-23-2021, 11:32 AM
|
#13 (permalink) |
|
A True Z Fanatic
Join Date: Oct 2010
Location: Portage, MI
Posts: 2,296
Drives: Tricycle
Rep Power: 589151 |
Bolted down my Lokar oil stick and started looking at fuel lines. I also started stressing about oil pressure for the turbos and where to tie in. Turns out my ridiculous oil filter has a port built in for that already. I called clearview filters and ordered part "169". I looked online but couldn't find the same part, I figured it would be safe just to get it directly from clearview.
Another night of pondering and looking at stuff mostly. Last picture is a white LS swapped 370z in the shop for work. Wild to see another LS Z in the community. It's getting a whipple charger added to the 6.2l gen4. That thing is going to RIP! |
|
|
|
|
04-25-2021, 06:20 PM
|
#14 (permalink) |
|
A True Z Fanatic
Join Date: Oct 2010
Location: Portage, MI
Posts: 2,296
Drives: Tricycle
Rep Power: 589151 |
Swirl pot has a port for the steam vent now. Blow off valves welded on. Drivers side up pipe re-done to use space more efficiently. Don't need to worry about the tire hitting the up pipe now.
|
|
|
|
|
05-03-2021, 08:50 AM
|
#15 (permalink) |
|
A True Z Fanatic
Join Date: Oct 2010
Location: Portage, MI
Posts: 2,296
Drives: Tricycle
Rep Power: 589151 |
Hooked up the steam vent and coolant catch. Swapped the coolant catch fitting to a brass straight barb fitting instead of using the push lock that came with it. When I went to Auto Zone to get the hose I got the good ol' "Year, Make and Model" even though I told them I needed to see their bulk hose. They were pretty insistent so I gave them the year make model. They went cross eyed and got the manager quick.
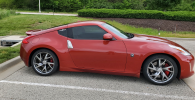
I forgot to test the whole setup to see how intake fit under the bumper after the finish welding. Everything fits! I brought one OE fender to the shop to see what the gigantic vent looks like. It's gigantic and it makes my OE wheels look like garbage. The turbo sits nicely in the bumper but it looks like I will need to run a Turbo Guard until I can fabricate air boxes with filters in the nose. I took some measurements for the pressure and drain side of the turbos. I'm torn on making a oil catch and then pump the oil into the pan or to just plumb direct to the Turbowerx. ... I'm leaning towards plumbing directly to the TurboWerx. Less is more at this point. At this point I wanted the car done to drive to Zdayz (again). But you know... build problems, skill and finances really can put a damper on that. Summer tires were purchased for the Juke so I can enjoy a few days at Fontana, NC and then cut over to Zdayz later in the week. SWAPS ARE CHEAP and EASY...  |
|
|
|
|
| Bookmarks |
|
|
 Similar Threads
|
||||
| Thread | Thread Starter | Forum | Replies | Last Post |
| Racing in Slow Motion IV | MightyBobo | The Lounge (Off Topic) | 4 | 03-12-2013 08:12 PM |
| Racing In Slow Motion IV | Robert_K | The Lounge (Off Topic) | 1 | 07-13-2012 11:01 AM |
| Slow shipping slow response slow everything | thispecialk | Nissan 370Z General Discussions | 15 | 11-01-2010 08:23 PM |
| Racing in Slow Motion | MightyBobo | The Lounge (Off Topic) | 2 | 12-17-2009 03:27 PM |
| IIHS Small Car Test: Three Gruesome Slow-Motion Crash Videos | AK370Z | Other Vehicles | 13 | 04-15-2009 09:42 AM |


 4069Likes


 Hybrid Mode


