Nissan 370Z Forum  

Skosmc drift build / ruining my car journal.

Originally Posted by 370Ztune Some good progress!! Nice work! Thank you Sir

Go Back   Nissan 370Z Forum > Nissan 370Z General Area > Member's 370Z Gallery


Like Tree11Likes

Reply
 
LinkBack Thread Tools Display Modes
Old 06-23-2015, 07:29 PM   #16 (permalink)
Base Member
 
Join Date: Apr 2012
Location: Indiana
Posts: 62
Drives: 09 370z
Rep Power: 13
skosmc is just really niceskosmc is just really niceskosmc is just really niceskosmc is just really niceskosmc is just really nice
Default

Quote:
Originally Posted by 370Ztune View Post
Some good progress!! Nice work!
Thank you Sir
skosmc is offline   Reply With Quote
Old 06-23-2015, 07:48 PM   #17 (permalink)
Base Member
 
Alpine's Avatar
 
Join Date: Jun 2012
Location: Miami
Posts: 68
Drives: 370z Nismo #70
Rep Power: 13
Alpine is on a distinguished road
Default

Cool love to see fellow drifters. I think your #1 priority should be finding an LSD though. Open diff sliding is laaaaaaaame
__________________

Instagram: Chirard
Alpine is offline   Reply With Quote
Old 06-23-2015, 08:02 PM   #18 (permalink)
Base Member
 
Join Date: Apr 2012
Location: Indiana
Posts: 62
Drives: 09 370z
Rep Power: 13
skosmc is just really niceskosmc is just really niceskosmc is just really niceskosmc is just really niceskosmc is just really nice
Default

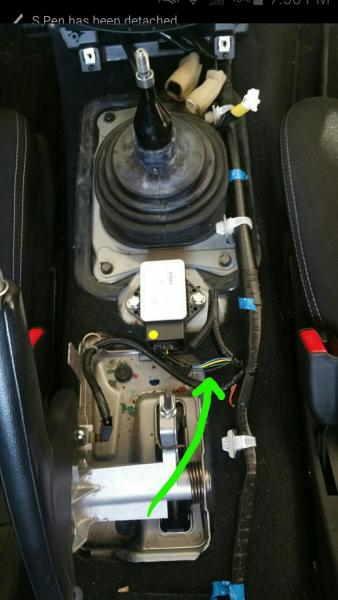
Had an hour or so to work on the Z tonight before I go ride the fixed gear and get some TACOS!! Figured I'd take a picture of the green power wire to the yaw sensor everyone always ask about. Waiting for switch to come in and I'll splice it and wire the switch in

skosmc is offline   Reply With Quote
Old 06-23-2015, 08:05 PM   #19 (permalink)
Base Member
 
Join Date: Apr 2012
Location: Indiana
Posts: 62
Drives: 09 370z
Rep Power: 13
skosmc is just really niceskosmc is just really niceskosmc is just really niceskosmc is just really niceskosmc is just really nice
Default

Quote:
Originally Posted by Alpine View Post
Cool love to see fellow drifters. I think your #1 priority should be finding an LSD though. Open diff sliding is laaaaaaaame
Welded base diff, SPC solid subframe mounts and diff mounts all waiting to be installed. Also stiffening up the rear coils and probably gonna order a sway bar this week. ....If I stop being lazy and actually get working on this thing. lol.
skosmc is offline   Reply With Quote
Old 06-24-2015, 09:22 AM   #20 (permalink)
A True Z Fanatic
 
Masterbeatty's Avatar
 
Join Date: May 2012
Location: Whales Vagina
Posts: 4,586
Drives: the speed limit...
Rep Power: 122867
Masterbeatty has a reputation beyond reputeMasterbeatty has a reputation beyond reputeMasterbeatty has a reputation beyond reputeMasterbeatty has a reputation beyond reputeMasterbeatty has a reputation beyond reputeMasterbeatty has a reputation beyond reputeMasterbeatty has a reputation beyond reputeMasterbeatty has a reputation beyond reputeMasterbeatty has a reputation beyond reputeMasterbeatty has a reputation beyond reputeMasterbeatty has a reputation beyond repute
Default

Since you are dropping the rear subframe anyway to install the subframe bushings, it is going to be easier to put the diff bushing in as well. Also if you have a deep freezer or your regular freezer can go really low temp put the bushings in their for atleast a week. Because they are a PITA to put in our steel subframe.
__________________
2011 MB 6MT
Masterbeatty journal
Masterbeatty is offline   Reply With Quote
Old 06-25-2015, 05:31 PM   #21 (permalink)
Base Member
 
Join Date: Apr 2012
Location: Indiana
Posts: 62
Drives: 09 370z
Rep Power: 13
skosmc is just really niceskosmc is just really niceskosmc is just really niceskosmc is just really niceskosmc is just really nice
Default

Quote:
Originally Posted by Masterbeatty View Post
Since you are dropping the rear subframe anyway to install the subframe bushings, it is going to be easier to put the diff bushing in as well. Also if you have a deep freezer or your regular freezer can go really low temp put the bushings in their for atleast a week. Because they are a PITA to put in our steel subframe.
Yeah, read that on someone elses build on here. Never would of thought about it till they said that! Thanks for the info though, must appreciated
__________________
Instagram: Sean.c
skosmc is offline   Reply With Quote
Old 07-07-2015, 12:08 PM   #22 (permalink)
Base Member
 
Join Date: Apr 2012
Location: Indiana
Posts: 62
Drives: 09 370z
Rep Power: 13
skosmc is just really niceskosmc is just really niceskosmc is just really niceskosmc is just really niceskosmc is just really nice
Default

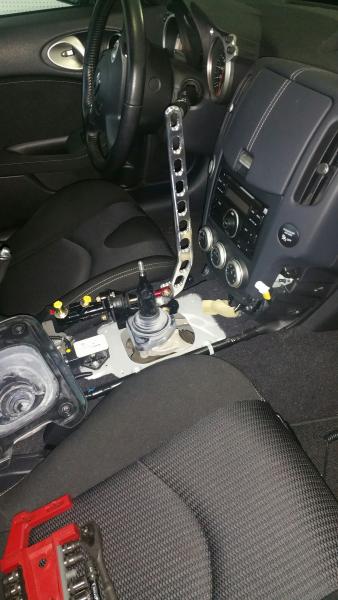
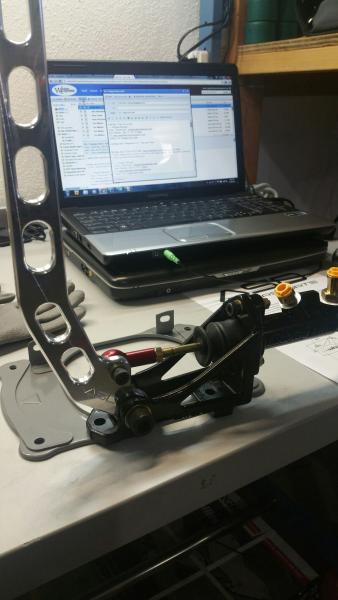
Well it was a busy week, last week / weekend. Still managed to chip away at the long Z list. Hydro came in. Started mocking that up.


Ran into a small clearance issue with the boot bracket. Had to shave that down.


A lot more to come with this. Ordering some more things I need for it today. Should be a very clean install when it's all done..
__________________
Instagram: Sean.c
skosmc is offline   Reply With Quote
Old 07-07-2015, 12:24 PM   #23 (permalink)
Base Member
 
Join Date: Apr 2012
Location: Indiana
Posts: 62
Drives: 09 370z
Rep Power: 13
skosmc is just really niceskosmc is just really niceskosmc is just really niceskosmc is just really niceskosmc is just really nice
Default

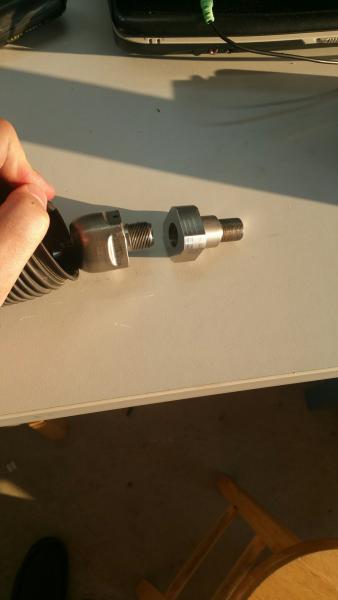
Next I moved on to the front of the car. I'm trying to get it completely wrapped up so I can move to the back. Went to remove the bump stop brackets and add the tire rod spacer. Removed the cotter pin and outer tie rod off.


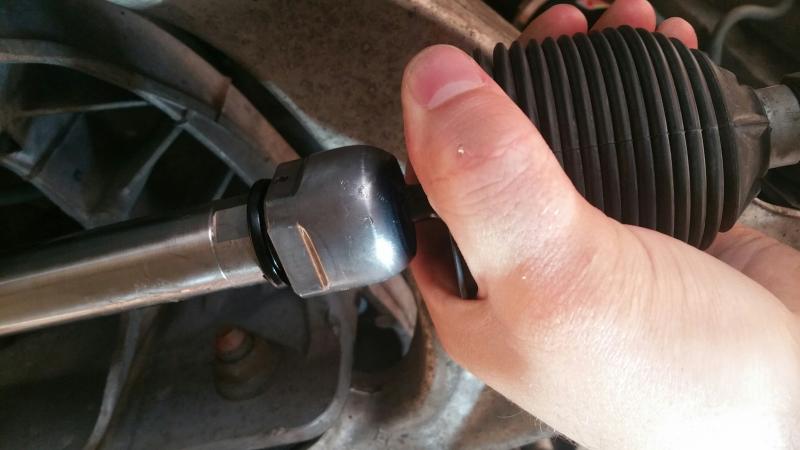
Here's the inner tie rod after moving the boot down.


I then removed it and the outer to get them on the bench and add the spacer. Turns out 350z tie rods are a different size.. Who would of guessed. So I called my buddy and he started making me a new one as well as a smaller spacer for the drivers side. I'll be going to pick those up tonight.


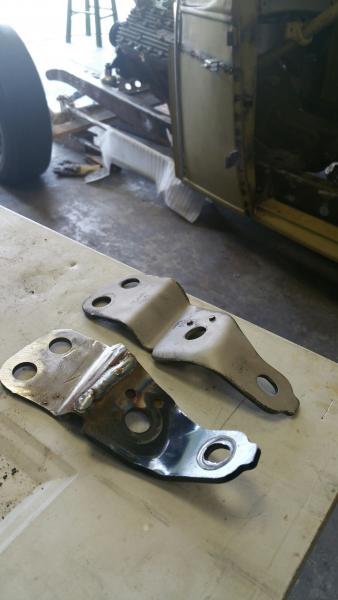
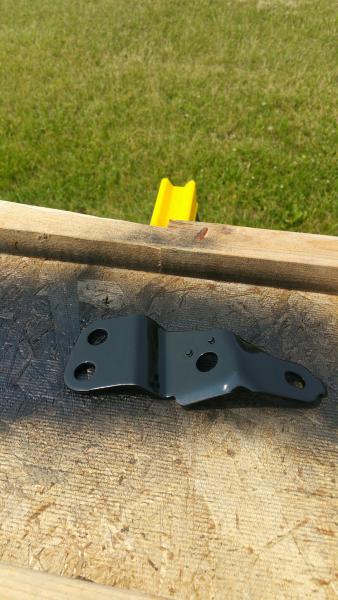
After that I decided to start working on the bump stops. Took them over to my fathers so I could grind down the brackets. Got a little crazy with the grinder on one of the brackets so welded it up and smoothed it out. Then sand blasted them down and got some paint on them. (Not the best welder. Don't judge it )


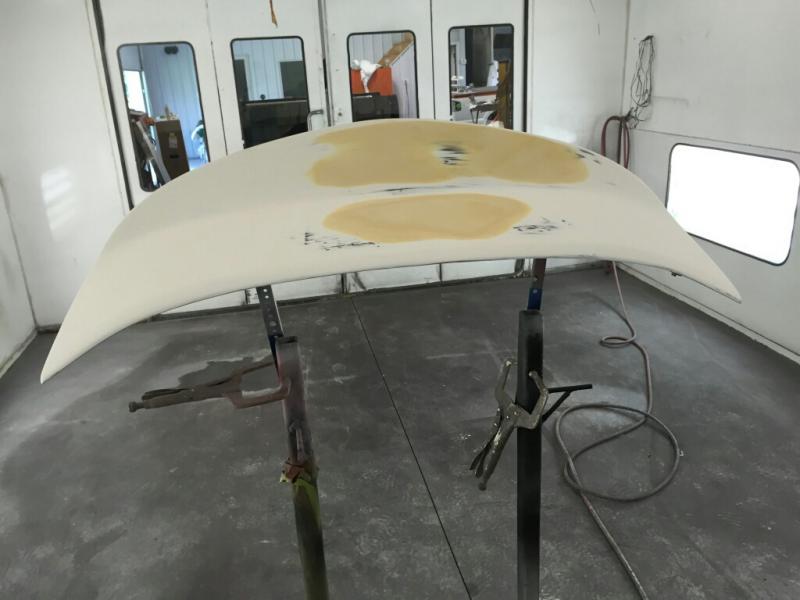
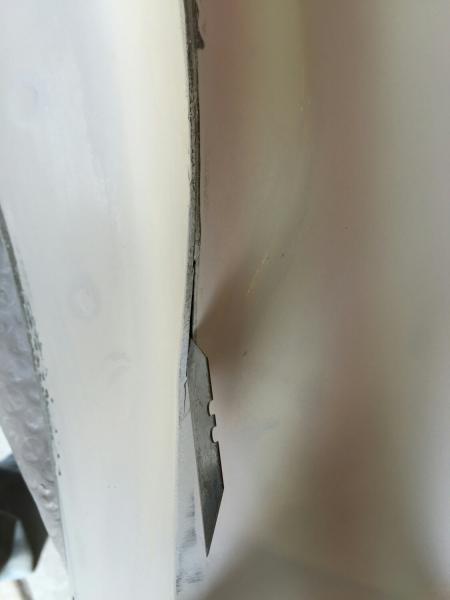
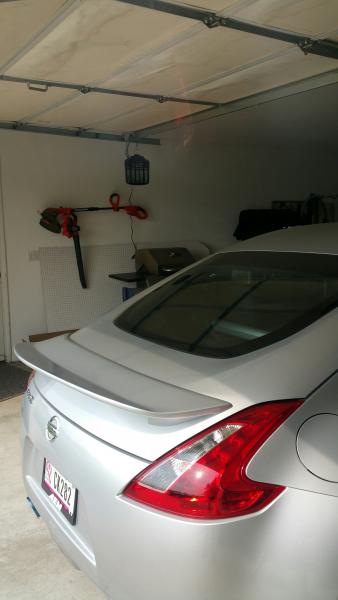
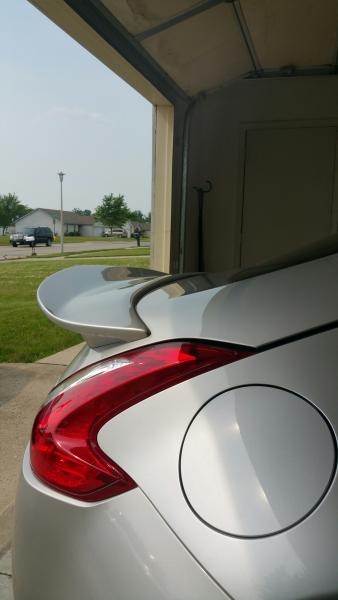
After I was done doing the brackets, my paint guy called me and told me the spoiler was ready for pick up! Here are a few before photos when he was prepping it. It had a low spot he had to knock out. Also (Which I didn't notice.. and it kind sucked ) it had a crack in it. So after gluing and some bondo. He primed and painted it. Came out awesome! I then went home and mounted it.


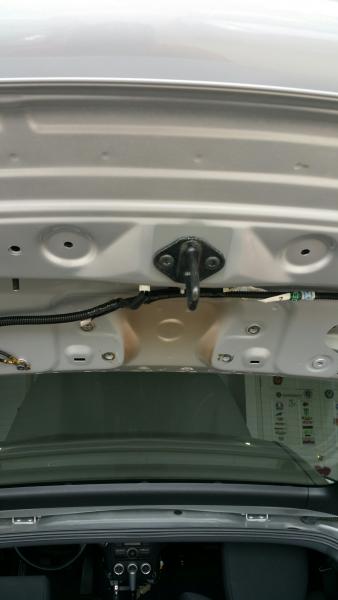
Also, while I was mounting it. I decided to take the extra weight off the trunk since there was no point in having it.


That's about it. A lot more coming this week. Sorry to make these post so short. Never enough time in the day!
Zbrah likes this.
__________________
Instagram: Sean.c
skosmc is offline   Reply With Quote
Old 07-07-2015, 12:33 PM   #24 (permalink)
A True Z Fanatic
 
Zbrah's Avatar
 
Join Date: May 2013
Location: The370Z.com
Posts: 4,956
Drives: 370Z
Rep Power: 5452
Zbrah has a reputation beyond reputeZbrah has a reputation beyond reputeZbrah has a reputation beyond reputeZbrah has a reputation beyond reputeZbrah has a reputation beyond reputeZbrah has a reputation beyond reputeZbrah has a reputation beyond reputeZbrah has a reputation beyond reputeZbrah has a reputation beyond reputeZbrah has a reputation beyond reputeZbrah has a reputation beyond repute
Default

Loving the new spoiler. How much was to prep and painted? Trying to see whether it's worth it get it in frp and paint match it, or I just go for the cf instead.
__________________
Zbrah is offline   Reply With Quote
Old 07-07-2015, 12:42 PM   #25 (permalink)
Base Member
 
Join Date: Apr 2012
Location: Indiana
Posts: 62
Drives: 09 370z
Rep Power: 13
skosmc is just really niceskosmc is just really niceskosmc is just really niceskosmc is just really niceskosmc is just really nice
Default

Quote:
Originally Posted by Zbrah View Post
Loving the new spoiler. How much was to prep and painted? Trying to see whether it's worth it get it in frp and paint match it, or I just go for the cf instead.
Org. it was quoted around $150. But I was still waiting for it to come in. (2 month wait) So he had no real way of telling how much prep work he would have in it. After seeing the low spot (Low enough it would of held about 1/8" of water) and the crack. Fixing those, primer and paint. It cost me $275. A lot more money than I wanted to spend but labor isn't free as we all know. Hope this helps
Zbrah likes this.
__________________
Instagram: Sean.c
skosmc is offline   Reply With Quote
Old 07-07-2015, 12:55 PM   #26 (permalink)
A True Z Fanatic
 
Zbrah's Avatar
 
Join Date: May 2013
Location: The370Z.com
Posts: 4,956
Drives: 370Z
Rep Power: 5452
Zbrah has a reputation beyond reputeZbrah has a reputation beyond reputeZbrah has a reputation beyond reputeZbrah has a reputation beyond reputeZbrah has a reputation beyond reputeZbrah has a reputation beyond reputeZbrah has a reputation beyond reputeZbrah has a reputation beyond reputeZbrah has a reputation beyond reputeZbrah has a reputation beyond reputeZbrah has a reputation beyond repute
Default

Quote:
Originally Posted by skosmc View Post
Org. it was quoted around $150. But I was still waiting for it to come in. (2 month wait) So he had no real way of telling how much prep work he would have in it. After seeing the low spot (Low enough it would of held about 1/8" of water) and the crack. Fixing those, primer and paint. It cost me $275. A lot more money than I wanted to spend but labor isn't free as we all know. Hope this helps
Thanks bro. It sure makes my decision easier. CF all the way!
__________________
Zbrah is offline   Reply With Quote
Old 07-08-2015, 07:50 PM   #27 (permalink)
Base Member
 
Join Date: Apr 2012
Location: Indiana
Posts: 62
Drives: 09 370z
Rep Power: 13
skosmc is just really niceskosmc is just really niceskosmc is just really niceskosmc is just really niceskosmc is just really nice
Default

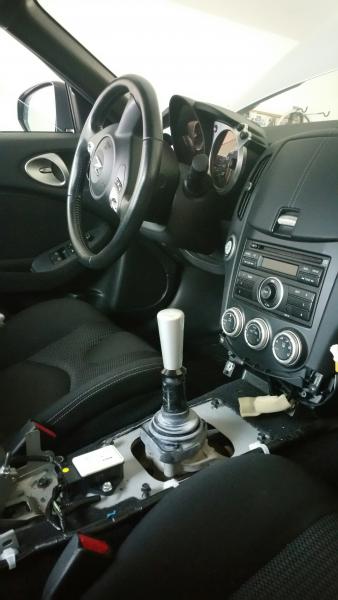
No huge updates tonight. Raining and crappy out. I did put the Z1 shift nob on tonight to see what it looks like. It was originally anodized black. Took it over, sand blasted it, and dropped it off to get painted when I got the spoiler painted. Came out

__________________
Instagram: Sean.c
skosmc is offline   Reply With Quote
Old 07-10-2015, 06:28 PM   #28 (permalink)
Track Member
 
ufoz8mycow's Avatar
 
Join Date: Mar 2012
Location: Vegas
Posts: 536
Drives: Black Cherry '12 Z
Rep Power: 16
ufoz8mycow has a brilliant futureufoz8mycow has a brilliant futureufoz8mycow has a brilliant futureufoz8mycow has a brilliant futureufoz8mycow has a brilliant futureufoz8mycow has a brilliant futureufoz8mycow has a brilliant futureufoz8mycow has a brilliant futureufoz8mycow has a brilliant futureufoz8mycow has a brilliant futureufoz8mycow has a brilliant future
Default

In for tire destruction.. What's the deal with the yaw sensor? Why does that have to come out?
ufoz8mycow is offline   Reply With Quote
Old 07-13-2015, 04:26 PM   #29 (permalink)
Base Member
 
Join Date: Apr 2012
Location: Indiana
Posts: 62
Drives: 09 370z
Rep Power: 13
skosmc is just really niceskosmc is just really niceskosmc is just really niceskosmc is just really niceskosmc is just really nice
Default

Quote:
Originally Posted by ufoz8mycow View Post
In for tire destruction.. What's the deal with the yaw sensor? Why does that have to come out?
This should help explain everything.

YAW Sensor Rocker Switch

Road Atlanta Vid and Report. Plus YAW Sensor Review

Long story short.. Drift car man!
__________________
Instagram: Sean.c
skosmc is offline   Reply With Quote
Old 07-31-2015, 02:55 PM   #30 (permalink)
Base Member
 
Join Date: Apr 2012
Location: Indiana
Posts: 62
Drives: 09 370z
Rep Power: 13
skosmc is just really niceskosmc is just really niceskosmc is just really niceskosmc is just really niceskosmc is just really nice
Default

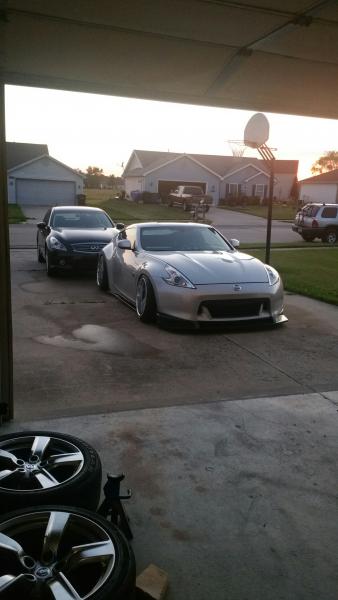
Sorry for the lack of updates guys. Been super busy. Long story short, still waiting for some parts to come in but in the mean time, I couldn't stand not driving the Z. So I tossed everything together and got it on the road. Here are few updates on what the car looks like as of now. Still some adjusting to do. Rears gonna come down slightly and gonna run some less camber. Also need to roll the front fenders cause i'm rubbing like crazy.

First day out of the garage and for a wash. Also the Zs big sister in the background checking things out.

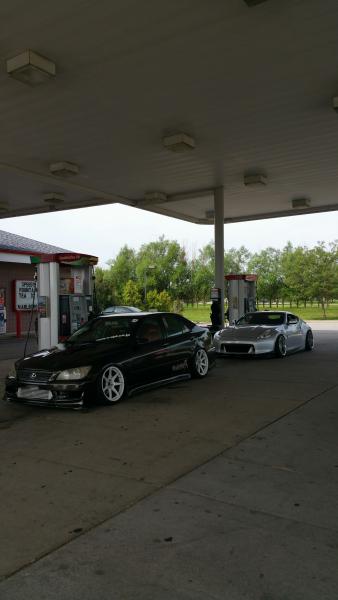
Mandatory gas station pic with my buddy from Alabama.

Before a drift event meeting up with some of my friends.
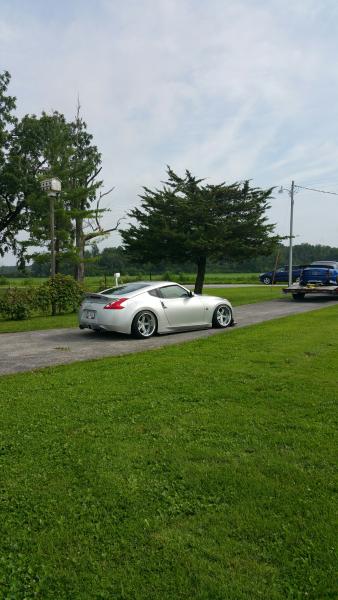

After a car show with my Uncle and one of his many toys. 62 Thunderbird on Boyds.
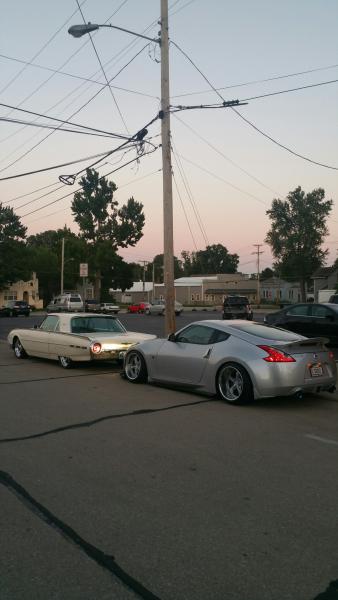

That's it for now. More to come
__________________
Instagram: Sean.c
skosmc is offline   Reply With Quote
Reply

Bookmarks


Posting Rules
You may not post new threads
You may not post replies
You may not post attachments
You may not edit your posts

BB code is On
Smilies are On
[IMG] code is On
HTML code is Off
Trackbacks are On
Pingbacks are On
Refbacks are On


Similar Threads
Thread Thread Starter Forum Replies Last Post
pedZ's Build Journal pedZ Member's 370Z Gallery 131 05-11-2015 05:46 PM
sfearl1's build journal sfearl1 Member's 370Z Gallery 387 04-29-2015 12:00 PM
Stailey's Build Journal Stailey Member's 370Z Gallery 9 02-25-2015 02:37 PM
THE "Lets argue about Bullitt's build with out ruining Bullitt's build thread" THREAD Reaper42 Forced Induction 14 01-22-2011 06:24 PM
AlexPila's Build-Up Journal alexpila Member's 370Z Gallery 43 04-22-2010 08:25 AM


All times are GMT -5. The time now is 10:52 AM.


Powered by vBulletin® Version 3.8.4
Copyright ©2000 - 2025, Jelsoft Enterprises Ltd.
Search Engine Optimization by vBSEO 3.6.0 PL2