
 |
Today I installed my oil cooler from z1 motorsports. I went with their 34 row cooler and thermostatic plate kit. Here is what the kit looks like: You get the
|
|||||||
 |
|
|
LinkBack | Thread Tools | Display Modes |
|
|
#1 (permalink) |
|
A True Z Fanatic
Join Date: May 2009
Location: Toronto, Ontario
Posts: 1,249
Drives: 09 370z Sport 6MT
Rep Power: 19    |
Today I installed my oil cooler from z1 motorsports. I went with their 34 row cooler and thermostatic plate kit. Here is what the kit looks like:
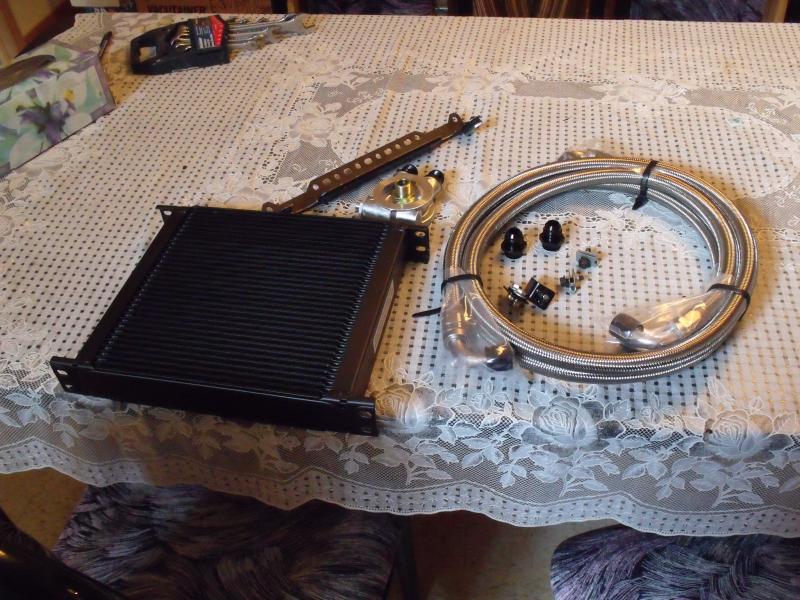 You get the Setrab core, Mocal sandwich plate, two brackets for the core, two braided hoses with an 10 fittings, and the two bolts for the cooler bracket. 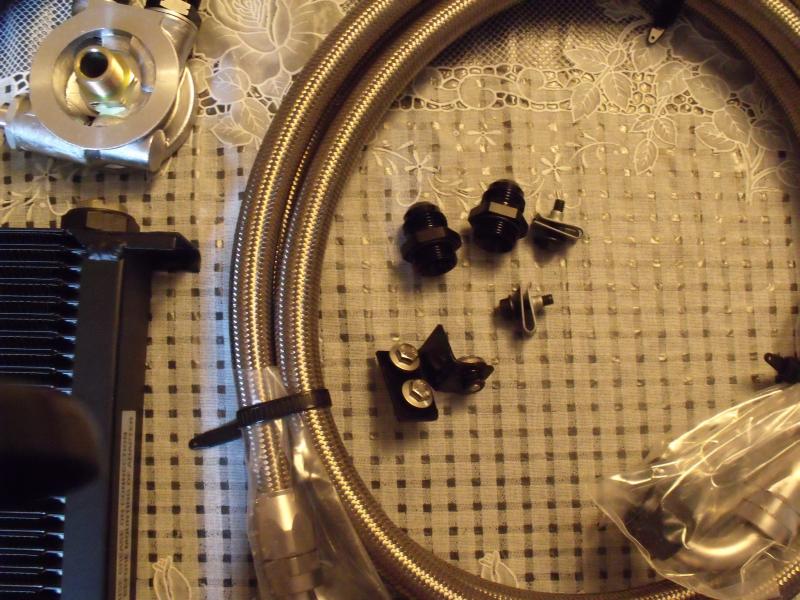 The lower bracket mounted to the core: 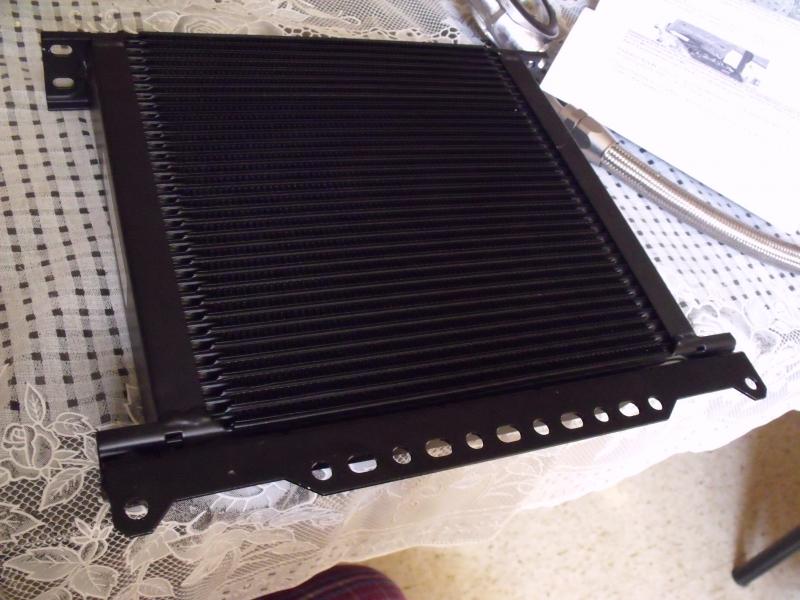 And the upper bracket: 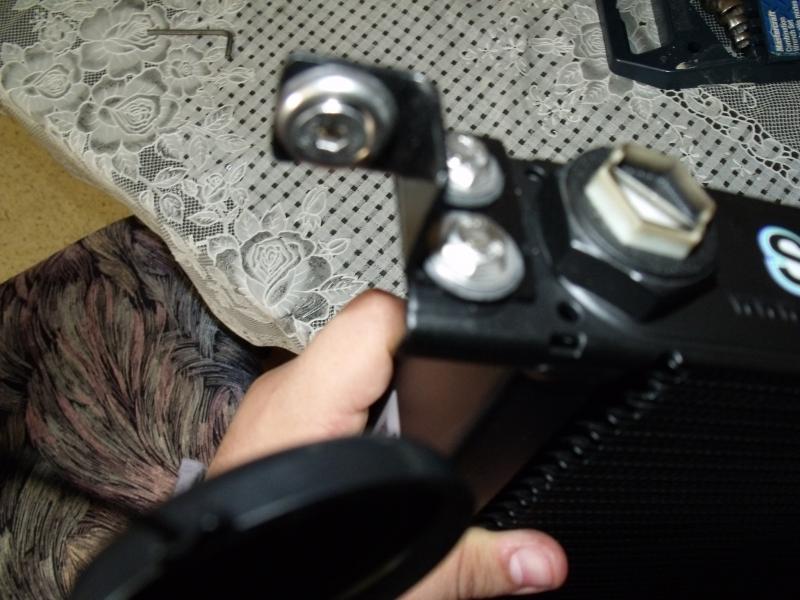 Bumper removed, car jacked up, and ready to go. Note that I didn't need to remove the impact bar. 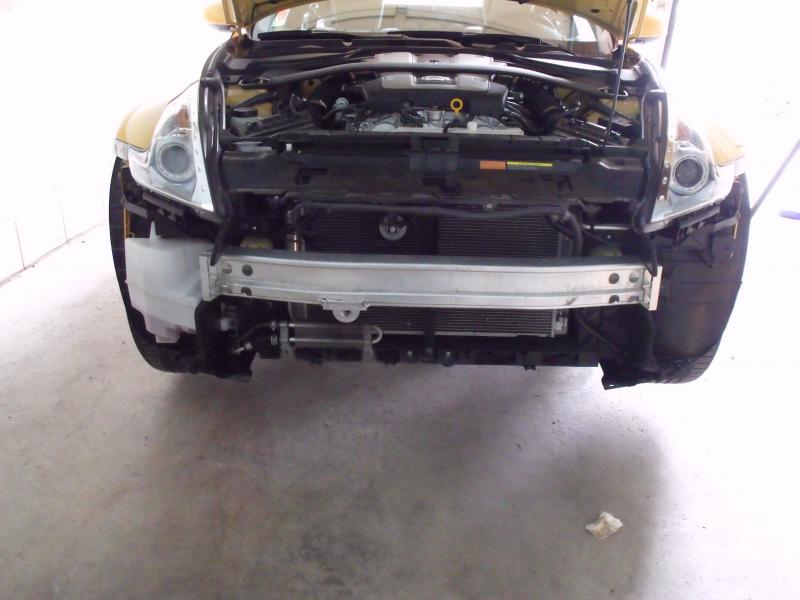 The core is pretty tall and heavy, so the lower bolts alone do not support it enough. That's the reason for the upper bracket. For this bracket, you have to drill a hole in the metal upright. It's thin and easy to drill. Just make sure you have sponge or wood behind it to prevent the drill from going through into the ac condenser and radiator 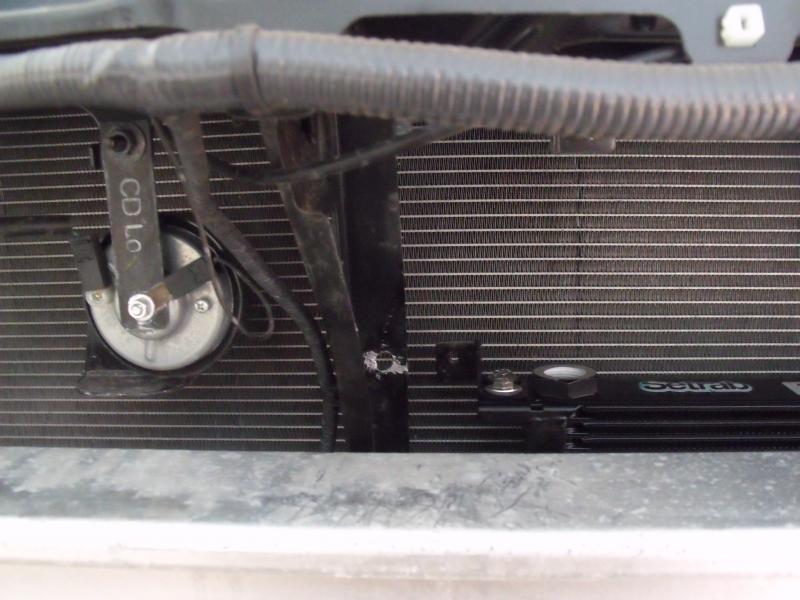 Lined up: 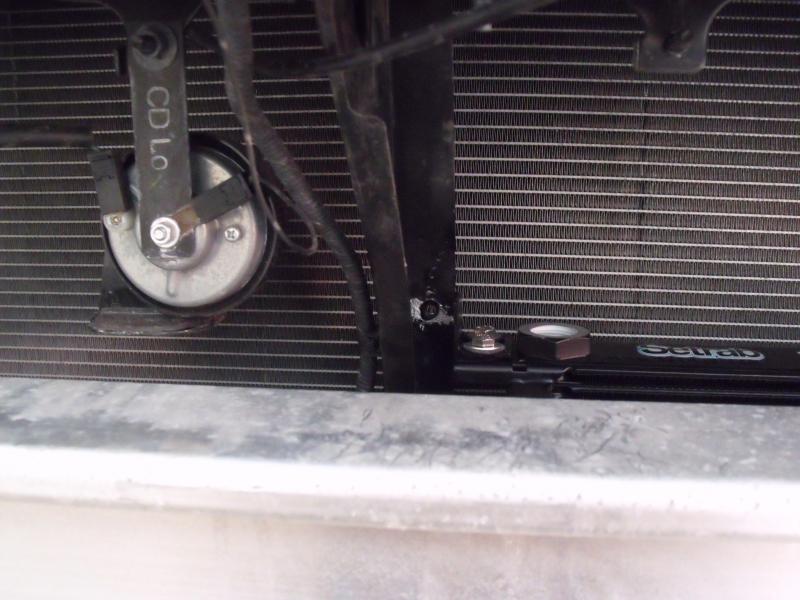 This is a good time to fill the core with oil and then screw the fittings onto it. The 34 row core is pretty big and took almost a whole litre of oil. Lower bracket bolted: 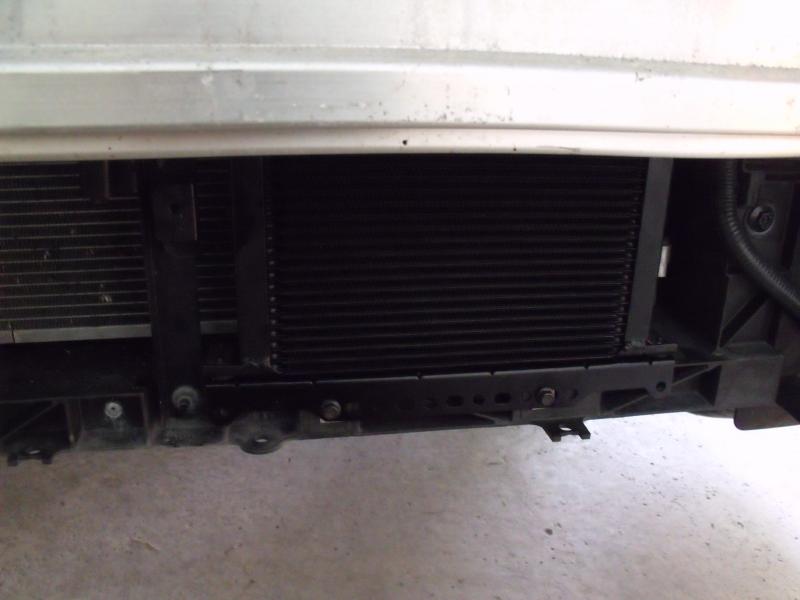 and upper bracket: 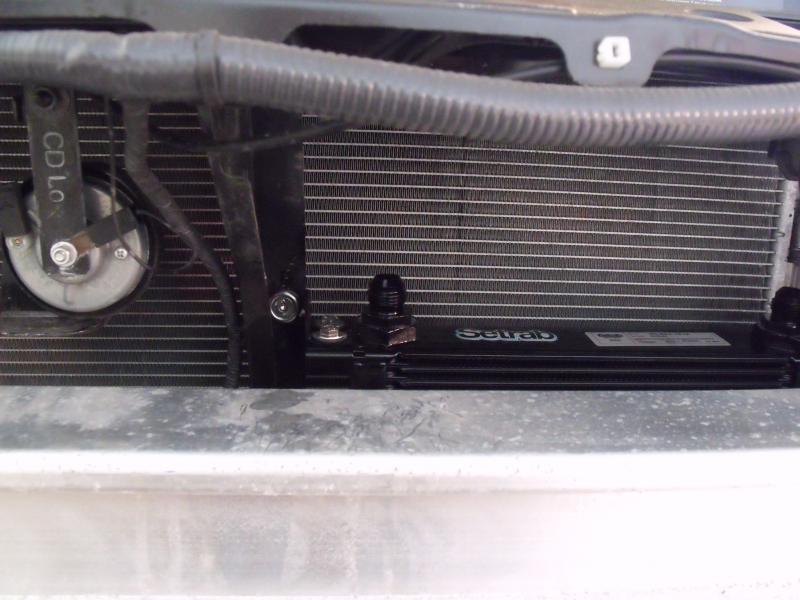 There is no nice, easy clean way for the hoses to go around the radiator to the engine. The easiest way is to drill holes in the thin plastic panels on the passenger side right beside the power steering cooler, and then route the hoses through the holes. A drill with a hole saw does the trick 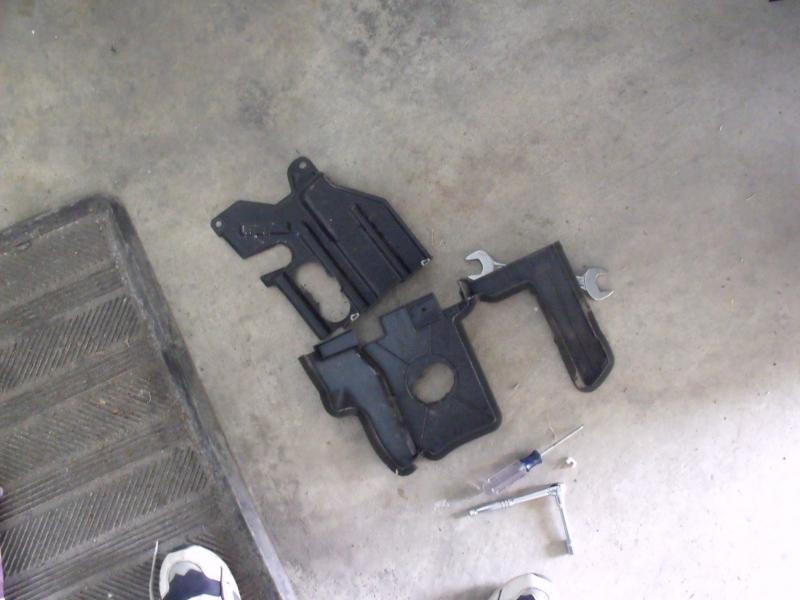 Routing the hoses: 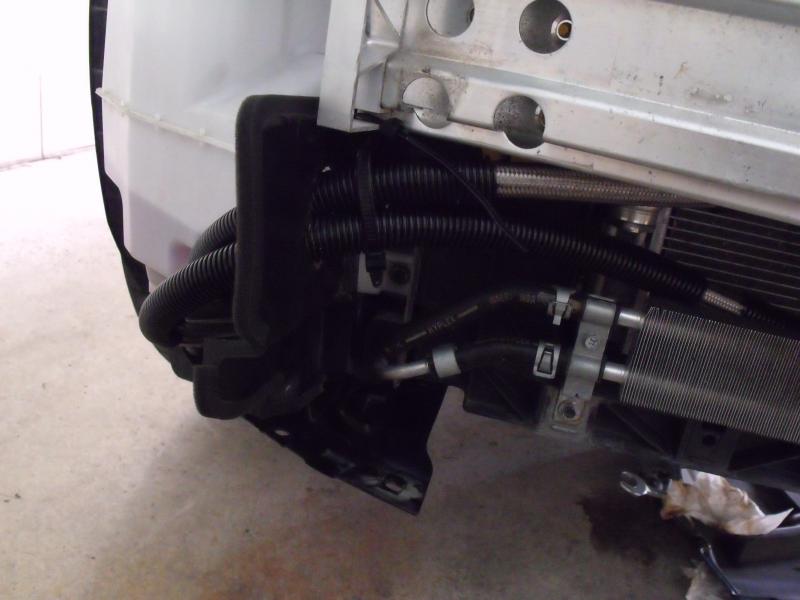 I zip tied the hoses to the impact bar, and wherever there was a chance of friction or rubbing i covered the hoses with this heat resistant plastic covering that's commonly wrapped around electrical wiring in the engine bay to protect it 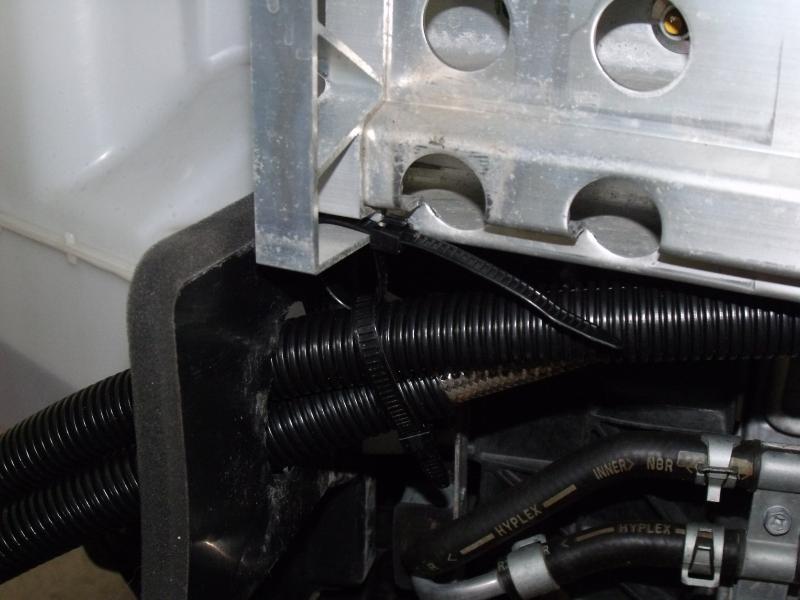 More routing of the hoses: 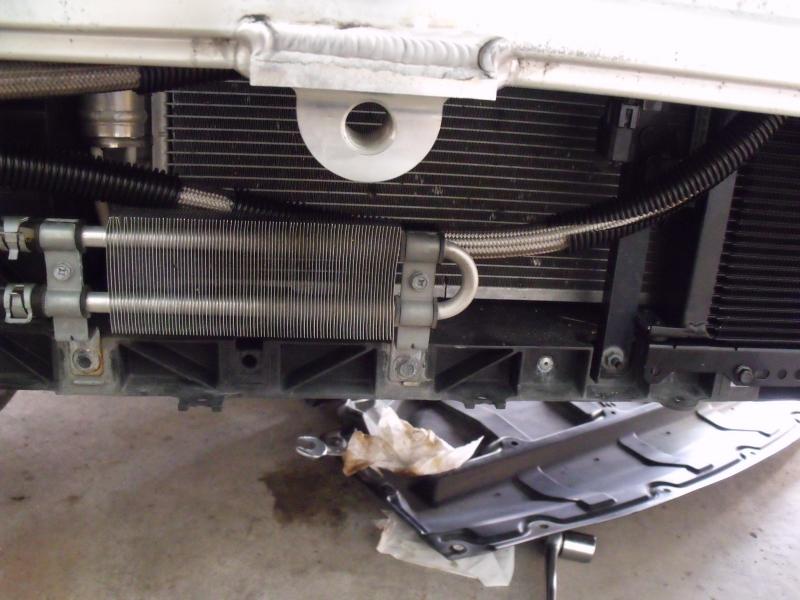 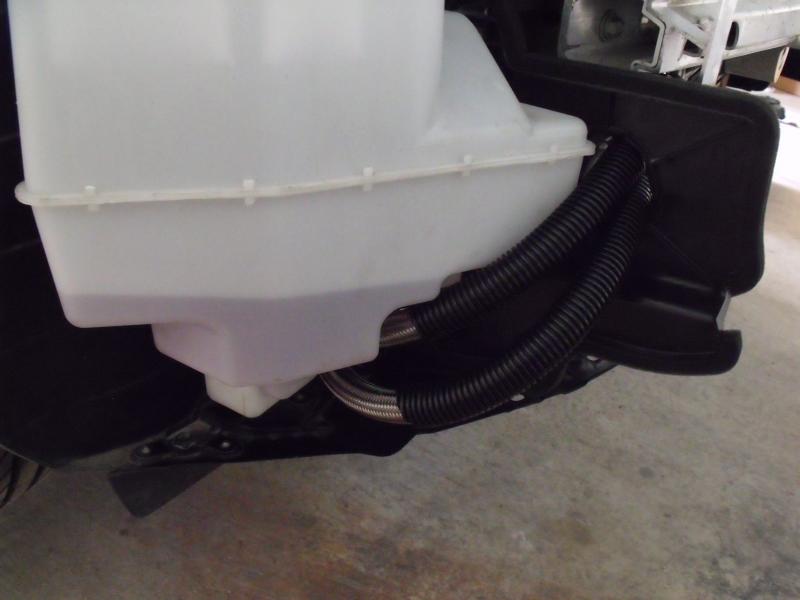 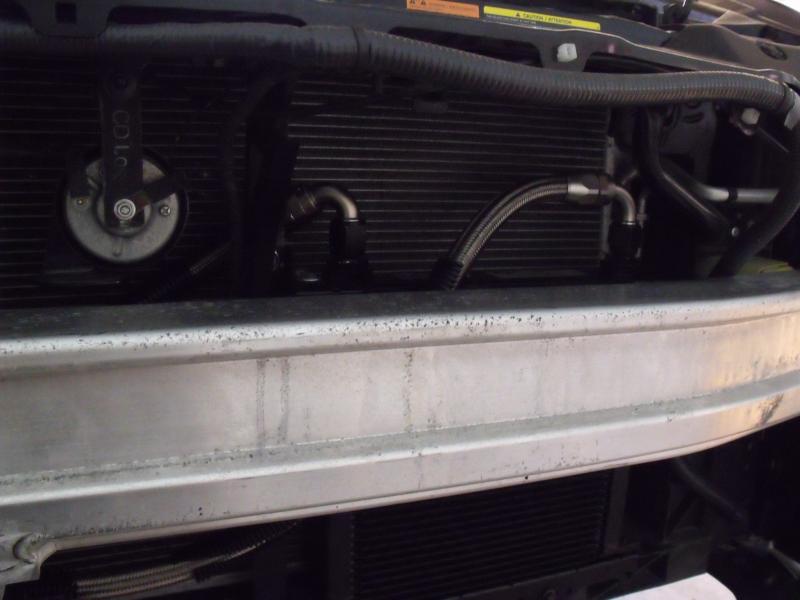 Note that the left hose was much easier to route behind the vertical metal brace. The front of that brace curves forward and is too thick. I tried routing the hose in front of it but it was bent at an awkward angle. The hoses are not the same length. One is much longer than the other. In fact, it's so long that even after fitting it to the far end of the cooler core, there is still a lot of slack in the hose and it is dangling right behind the power steering cooler. Also note that for whatever weird reason, one of the fittings on the shorter hose is bent much sharper than a right angle. It is the one attached to the left side of the core in the above pic. It was practically impossible to attach this terminal to the sandwich plate since the sharp bend caused clearance issues with the sway bar and the oil temp and pressure sensors. I ended up removing the hose and flipping it around so that the sharply bent terminal fit onto the cooler core instead. I have no idea if this terminal was bent like this for a reason or if it was a manufacturing glitch. It just doesn't seem to serve any purpose and just caused a headache for me. Here are the hoses fit to the sandwich plate 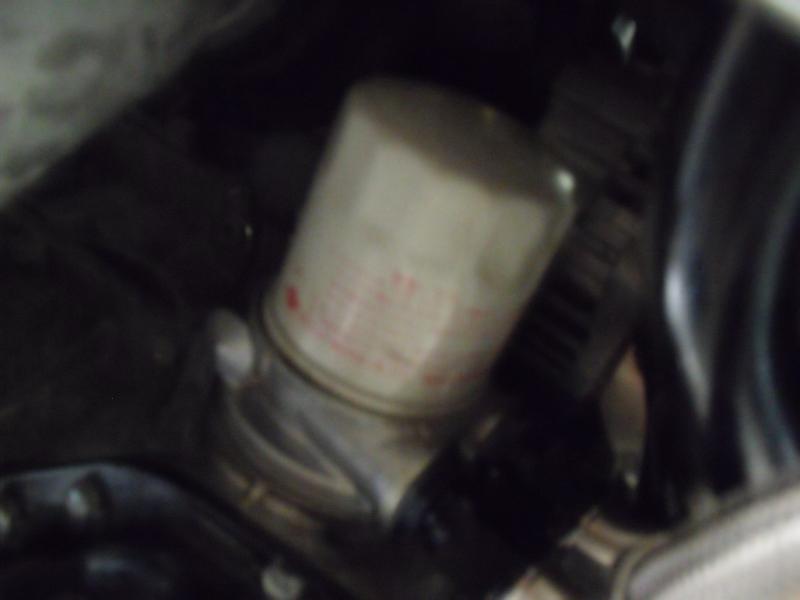 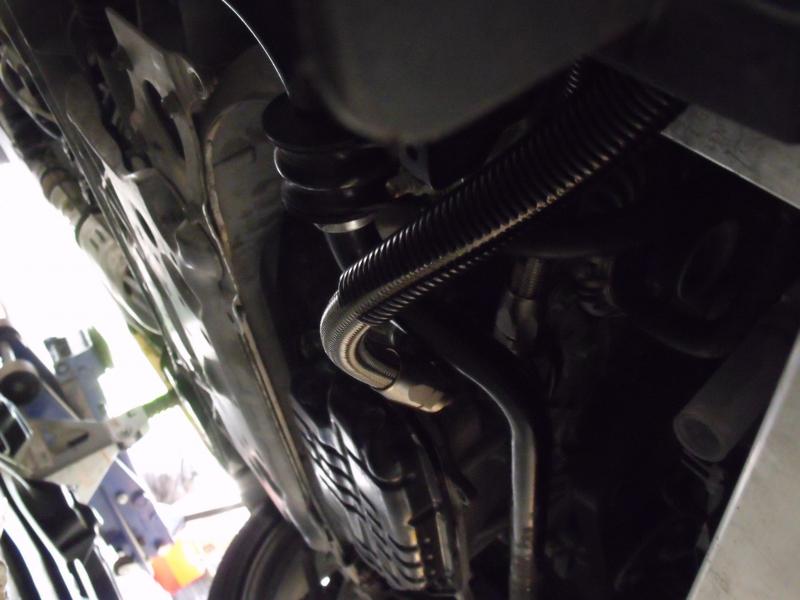 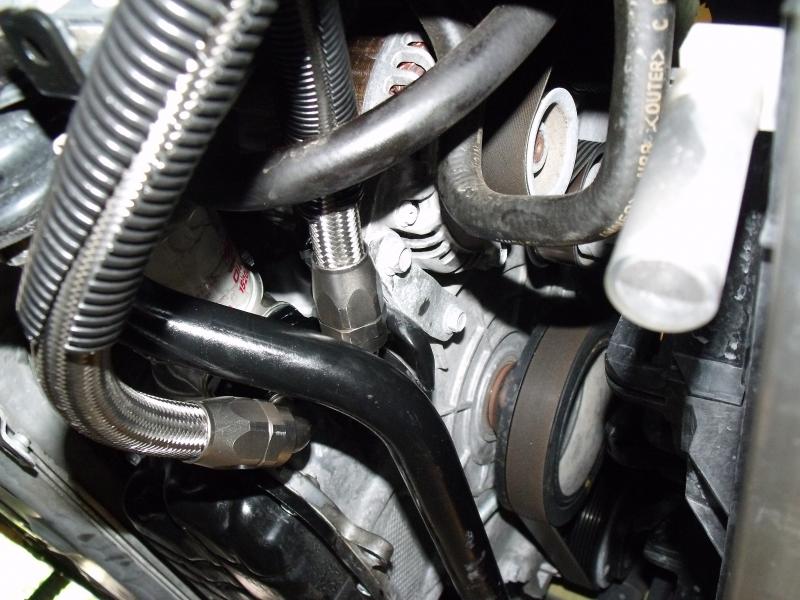 you will notice the over/under set up i used. one hose went over the sway bar and over another hose which i'm not sure but i believe is an AC line. the other hose went under the sway bar. ideally i would have loved to fit both hoses above the sway bar, but there just isn't enough room. the sway bar, alternator, and oil temp and pressure sensors gobble up all of the space there. it was hard enough to get one hose there. the second hose just had no room whatsoever. routing both hoses under the sway bar was not an option either. the hoses and their an fittings are thick and big enough to prevent the plastic undertray from bolting back on. it took me over an hour of trial and error and test fitting to figure out this layout that i used as this was the layout that had the least interference with surrounding structures. however, i do wonder if the hose under the sway bar might experience tension or pressure due to the swaybar movement. Finally, i started the engine and warmed it up, checked for leaks, and topped off the oil. The large core and large hoses gobbled up a lot of oil. I actually had to add a whole 1.5 litres of oil to make up for it. From the outside: 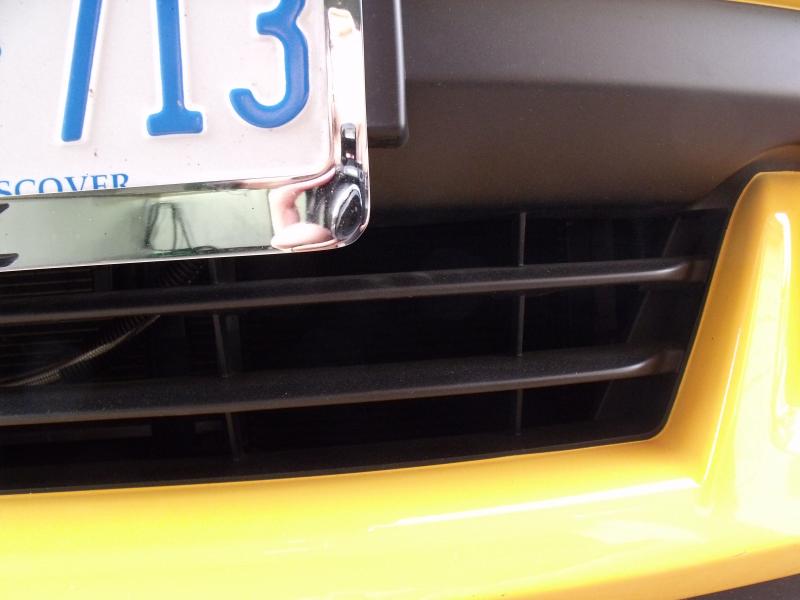 total time taken: 4.5 hours Final thoughts: The cooler seems to be working good. I drove on the street for half an hour very hard and aggressive on the engine, staying in low gear, full throttle pulls, redlining it, and the temp did not get higher than 100 degrees C. i would say that the cooler kit gave at least 10 to 20 degrees drop in temp on the street. i look forward to trying it on the track and see if it can prevent the dreaded limp mode. I'm somewhat worried about the hose under the sway bar. Is there a risk of the sway bar flexing and ripping out the hose? After adding the cooler the engine bay now has that characteristic whoosh sound on revving the engine, the same sound most people with oil coolers seem to experience. No biggie I guess. The kit seems to be decent quality and workmanship. However, a couple of issues annoyed me. The hoses were thick and inflexible, so routing them through tight space was a chore. Also, can someone from Z1 explain to me why in the hell that fitting on the shorter hose had such a sharp bend to it? And why was one hose so much longer than the other one? Speaking of which, the instruction manual that came with the kit was absolutely worthless. It lacked detail, skipped several steps, was very lacking in terms of pictures (nor did it make up for that with thousands of words either), and even worse, the manual had the wrong information on assembling the setrab core! The core in the manual had an upper bracket that was identical to the lower bracket. The large wide bracket that is as wide as the core. The upper bracket in my kit was much much smaller and completely different design. Z1, UPDATE YOUR INSTRUCTION MANUAL!!!!! Soooo, 800 bucks, 4.5 hours, and several scratches and bruises later, I finally have my oil cooler installed!  Thanks for nothing Nissan Thanks for nothing Nissan 
__________________
2009 370z Sport Touring/Nismo shift Knob/Z1 motorsports 34 row oil cooler Last edited by Pharmacist; 08-17-2010 at 09:19 PM. |
|
|

|
|
|
#2 (permalink) |
|
Enthusiast Member
Join Date: Jul 2009
Location: san diego
Age: 39
Posts: 285
Drives: 370zMT touring sport
Rep Power: 16   |
How much oil did you use total?
__________________
FI non resonated test pipes, CBE. Stillen G3 intakes, Amuse Kit, KW V3 coilovers, SSR Type F, Blackout headlights. 3M clear bra, UpRev tune, 320whp, 260 wtq http://www.the370z.com/members-370z-...ect-raven.html |
|
|

|
|
|
#5 (permalink) | ||
|
A True Z Fanatic
Join Date: May 2009
Location: Central Florida
Posts: 1,884
Drives: '12 Corvette GS 6M
Rep Power: 20      |
Awesome writeup. Was hoping that the review would be more positive because I was planning on getting their kit.
Hopefully someone at Z1 can respond about these issues... Quote:
Quote:
__________________
Current Ride: 2012 Chevrolet Corvette Grand Sport Centennial Edition Carbon Flash 6M Previous Ride: 2009 Nissan 370Z Sport Platinum Graphite 7AT Last edited by flashburn; 08-18-2010 at 07:19 AM. |
||
|
|

|
|
|
#6 (permalink) |
|
A True Z Fanatic
Join Date: Nov 2008
Location: Edmonton, Alberta ...eh
Posts: 1,171
Drives: 2017 Touring auto
Rep Power: 19      |
Hmm great minds think alike?
I too, was installing my Z1 oil cooler (25 row) yesterday. Originally Posted by Pharmacist Note that the left hose was much easier to route behind the vertical metal brace. The front of that brace curves forward and is too thick. I tried routing the hose in front of it but it was bent at an awkward angle. The hoses are not the same length. One is much longer than the other. In fact, it's so long that even after fitting it to the far end of the cooler core, there is still a lot of slack in the hose and it is dangling right behind the power steering cooler. I believe the longer house is to accommodate the length of the oil cooler as the hose from the drivers side as to travel further to the thermostatic plate. <TABLE border=0 cellSpacing=0 cellPadding=6 width="100%"><TBODY><TR><TD style="BORDER-BOTTOM: 1px inset; BORDER-LEFT: 1px inset; BORDER-TOP: 1px inset; BORDER-RIGHT: 1px inset" class=alt2>Originally Posted by Pharmacist Also note that for whatever weird reason, one of the fittings on the shorter hose is bent much sharper than a right angle. It is the one attached to the left side of the core in the above pic. It was practically impossible to attach this terminal to the sandwich plate since the sharp bend caused clearance issues with the sway bar and the oil temp and pressure sensors. I ended up removing the hose and flipping it around so that the sharply bent terminal fit onto the cooler core instead. I have no idea if this terminal was bent like this for a reason or if it was a manufacturing glitch. It just doesn't seem to serve any purpose and just caused a headache for me. </TD></TR></TBODY></TABLE> I too had to flip the oil line with the 135 degree fitting to the oil cooler as the fitting didn't fit well on the thermostat plate for the oil filter. But it did fit originally on the plate but I didn't like the orientation of the lines and changed the orientation and that required a line swap. I placed the lines entering the thermostatic plate upwards towards the motor and motor mount with plenty of clearance on the sway bar. The lines enter the plate just by the alternator. Believe or not, there is just enough room. I'll have to take a picture today. I wound up routing the lines under the impact bar, beside the washer fluid bottle and found space between the frame and fender. I only had to trim a little material in that area and cut one of the thin plastic panels to make room for the lines. Protecting the lines with rubber hoses will be required. The install instructions from Z1 are lacking. I installed the upper support bracket on the backwards but it still works. Took a long break after that one. Not one mention of the support bracket in the instructions. Plus these 10 AN hoses are a bitch to maneuver and handle in this install. I like the idea of the electrical looms as today is wrapping the oil cooler lines to protect everything. Some areas of my install will require a little more protection and I will using some rubber hose in those areas. I didn't mean to hijack your DIY thread but hopefully offered some more feedback on your install. Actually, I really could have used this DIY yesterday afternoon to help me out 
__________________
[B]2009 & 2017 370Z Touring Sport Autos SOLD |
|
|

|
|
|
#7 (permalink) |
|
A True Z Fanatic
Join Date: May 2009
Location: Toronto, Ontario
Posts: 1,249
Drives: 09 370z Sport 6MT
Rep Power: 19    |
The issue with the longer hose is that it is just too long. As you can see in my pics, there is still too much slack left and it's just dangling behind the power steering cooler. I believe it can stand to lose 20 cm or so.
I'm curious as to how you fit the lines into the sandwich plate and around the washer bottle. Post pics! lol
__________________
2009 370z Sport Touring/Nismo shift Knob/Z1 motorsports 34 row oil cooler |
|
|

|
|
|
#9 (permalink) |
|
The370Z.com Sponsor
|
great writeup!
__________________
 Rocky @ Vivid ♦ 480.966.3040 x236 ♦ Rocky@vividracing.com Email, PM, or call me directly for aggressive The370Z.com member pricing!!! |
|
|

|
|
|
#10 (permalink) |
|
The370Z.com Sponsor
Join Date: Jun 2009
Location: NLA
Posts: 1,313
Drives: NLA
Rep Power: 18    |
Pharmacist PM sent sir!
Based on what I have read here, I will be re-evaluating our oil cooler kit immediately. I take pride into the products we list on our website, especially when it bears the Z1 name. I will be pulling the line kits off of the shelf to verify the correct line lengths. There should only be about a 6 to 8 inch difference in the lines to accommodate for the bends and to reach across the oil cooler itself. Any additional length in the line outside of that range is something I need to address with our manufacturer. We have factored in an additional bit of line to accommodate the installation of most aftermarket Forced Induction Setups (like the GTM TT or Stillen Super Charger). I will admit, I composed the installation manual and would like to hear any and ALL critiques you (the installers) may have. It is one thing to do something 100 times and be comfortable with it, however trying to explain to someone else can be quite challenging. I see now that I have apparently omitted a few steps. I will be revising our Oil Cooler Kits installation manual today. I apologize for the inconvenience and issues you two ran into. This is the first time that this has been brought to my attention. Again, I greatly appreciate the both of you documenting your thoughts and installs. Last edited by Dustin@Z1; 08-18-2010 at 12:42 PM. |
|
|

|
|
|
#12 (permalink) |
|
A True Z Fanatic
Join Date: May 2009
Location: Toronto, Ontario
Posts: 1,249
Drives: 09 370z Sport 6MT
Rep Power: 19    |
i didn't measure the length of the hoses, but the longer hose must have had more than 8 inches over the shorter one. If you look at my first pic above, the difference seems more like 15 inches or so. You can also see in my pics how the longer hose is dangling behind the power steering cooler due to the extra slack in it. Not a big deal but something to reconsider in future revisions of the kit. Also why did the shorter hose have a 135 degree bent fitting on one of its terminals as opposed to 90 degrees like the others? It doesn't seem to have a purpose as far as i can tell, and it does cause clearance issues if someone tried to connect it to the sandwich plate.
The instruction manual had a few omissions. For example, it didn't mention the need to remove the engine undertray, or the need to remove the side and lower bolts that hold the bumper cover. Most importantly had no mention at all of the small upper bracket for the core. Instead it mentions a different upper bracket that is large and identical to the lower bracket. I guess this was how the kit was set up before and was later updated to include the smaller bracket. Also, the manual kind of glossed over the routing of the hoses front to back and into the mocal plate, even though in my opinion that is the trickiest and most time consuming step due to the tight clearance. In addition, some pics of the routing of the hoses, and the fitting to the sandwich plate would have been helpful.
__________________
2009 370z Sport Touring/Nismo shift Knob/Z1 motorsports 34 row oil cooler |
|
|

|
|
|
#13 (permalink) |
|
A True Z Fanatic
Join Date: May 2009
Location: Central Florida
Posts: 1,884
Drives: '12 Corvette GS 6M
Rep Power: 20      |
Yep,
 to Z1. They definitely seem to care about their customers. to Z1. They definitely seem to care about their customers.
__________________
Current Ride: 2012 Chevrolet Corvette Grand Sport Centennial Edition Carbon Flash 6M Previous Ride: 2009 Nissan 370Z Sport Platinum Graphite 7AT |
|
|

|
|
|
#15 (permalink) | |
|
WFLYIDNNE
 Join Date: Jul 2009
Location: In The Fastlane
Posts: 50,648
Drives: 02 GDB WRX
Rep Power: 452            |
Quote:
First thought, excellent write up! I look forward to getting mine installed soon as well. My only point of question for your OP is the fact your talking in degrees Centigrade when our (US) gauges read in degrees Fahrenheit. I know its surely easy to go to a conversion website to do the math, but I know some people would rather jump to flaming you for posting in *C rather than looking it up themselves... No hate, just a thought. Other then that, excellent job! Repped.  (And for those who haven't done the math - 100*C = 212*F)
__________________
 Bonnie - Stage 2, Audio build coming this fall! R.I.P. Abby 3/29/10 - 3/30/14 |
|
|
|

|
 |
| Bookmarks |
|
|
 Similar Threads
|
||||
| Thread | Thread Starter | Forum | Replies | Last Post |
| DIY: Oil Cooler (scratch built install, lottsa pics).....>. | Modshack | DIY Section (Do-It-Yourself) | 307 | 08-09-2021 02:31 AM |
| DIY: Oil Cooler Installation on a Nismo (Damper Included!) - vipor | vipor | DIY Section (Do-It-Yourself) | 100 | 05-31-2013 05:24 PM |
| iPad Installation [pics] | Rockstar | Audio & Video | 52 | 10-07-2012 05:17 PM |
| Oil cooler installation | sminky63 | Nissan 370Z General Discussions | 24 | 11-23-2009 07:58 PM |
| Oil Cooler Installation DIY Request. | spearfish25 | DIY Section (Do-It-Yourself) | 3 | 05-16-2009 02:58 PM |