
 |
Subscribed looking forward to some DIY insight and process explanation.
|
|||||||
 |
|
|
LinkBack | Thread Tools | Display Modes |
|
|
|
|
#1 (permalink) |
|
Base Member
Join Date: Feb 2012
Location: port hueneme ca
Posts: 70
Drives: 2011 Silver 370Z
Rep Power: 14  |
Subscribed looking forward to some DIY insight and process explanation.
__________________
Eric Z. Myers 2011 370Z, Silver, Sport, K&N short ram intake, Fast Intentions Exhaust, Pioneer AVIC, ORACLE Lighting LED Halo Kit, Tinted. |
|
|

|
|
|
#2 (permalink) |
|
A True Z Fanatic
 Join Date: Dec 2011
Location: Pensacola Florida
Posts: 1,696
Drives: Awesome Car
Rep Power: 27            |
Thanks for the confidence building, I hope to not disappoint.
 What I am using: G35 Clear Lenses size 2 5/8 – TRS (THERETROFITSOURCE.COM) Halo 90mm from (THERETROFITSOURCE.COM) Halo 70mm from (THERETROFITSOURCE.COM) No need for resistors the halos already come wired to 12V resistors.. Sledge Hammer if I mess it all up ! 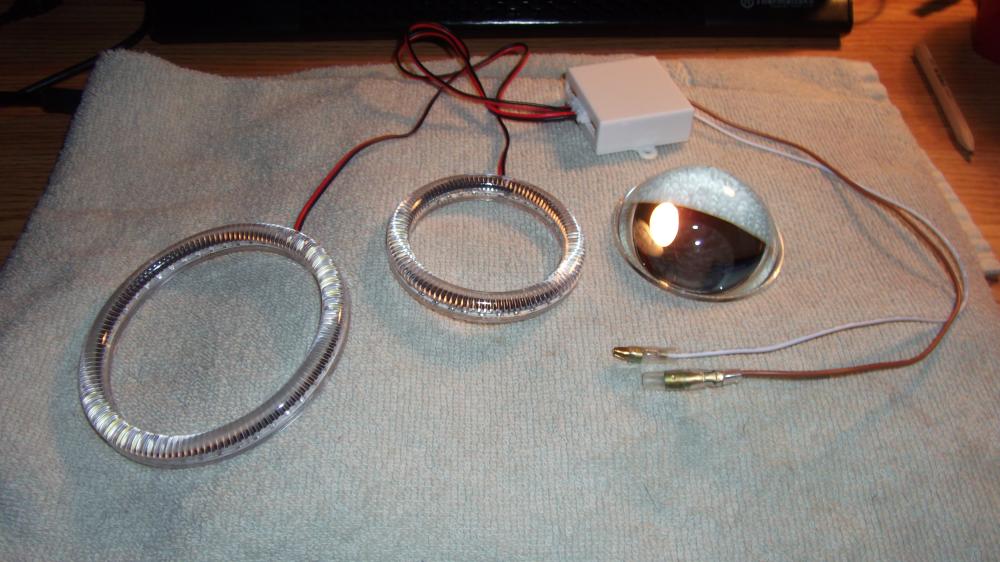 What I am thinking: (Not a hole lot) The Turn signal mod I am trying to stay with the stock bulb but I will remove the turn signal shroud and take off the stock plastic lens and replace it with the G35 lens. Some modification to the shroud will be needed to get the lens to fit. The Halo will mount on the outside and should be small enough to fit into the shroud. The reason for the G35 lens is its shaped like a bubble so when inserted into the shroud there is a void the Halo ring can rest in with a little 2 part epoxy to hold it in place. Not sure what needs to be cut out and modified, not sure how to do it. I am working through this as I go and will post the details. The projection light mod, the halo should fit perfectly in the valley of the projection light shroud based of DIY’s already done in the forum. Using a little 2 part epoxy will hold it in place. Both Halo’s are wired into the control box provided by LightWurkz and the control box will be wired into the parking light harness. This seems to be how others have done it, there have been some issues with LED flickering or burning out I don't think its were they are wired but how. Using resisters seems to get the power supply at its optimal level for the LEDs. I am curious what LightWurkz is using. 200 ohm 1 watt seems to be a good bet, others have used 150 ohm 1/8 watt & 200 ohm 1/8 watt resisters. I will go with 200 ohm 1 watt and see what happens.. I am not a smart guy but Javier seems to be. Quote from Javier: Hi. I'm thinking of doing the same to my headlights but my numbers indicate that I should be using 200 OHM resistors at 1 watt. The LEDs are runnung at 26mA not the 20mA that they are designed for so the current draws .762 watts. Therefore you should us at least a 1 watt resistor not 1/4 or 1/2. My numbers are as follows: 12 v devided .060mA (3 leds in series) = 200 ohms. Please let me know what you think. I just do not want to be opening these headlights once a year. The way I see it the current is greater than the resistor can handle and they may burn up. DIY: Headlight LED's and blackout The Shroud mod, To split apart the head lights I have a cardboard box all taped up and will stick a heat gun into to warm them up enough to pull apart. If it doesn’t work it’s off to the oven.. I am planning on filling in the squares were people insert LEDs as run way lights; using body filler and sand paper to smooth it all out. I have Carbon Fiber Vinyl I want to run in place of LED’s. Also thinking of wrapping the shrouds and painting the rest Black Satin. Then Carbon Fiber wrap the reflector. Not sure yet. Worried about the heat from the lights. .. Total mod: If I mess it up I will be looking for a 370Z donor car anyone live in Tampa   I have to work Monday but planing on posting updates each night with pictures.
__________________
Did new cool science stuff to the car !!!
http://www.the370z.com/mazoc/99606-z...y-14-17-a.html http://www.the370z.com/diy-section-d...-w-videos.html Last edited by Nut_N_Much; 02-03-2013 at 10:09 AM. |
|
|

|
|
|
#3 (permalink) |
|
A True Z Fanatic
 Join Date: Dec 2011
Location: Pensacola Florida
Posts: 1,696
Drives: Awesome Car
Rep Power: 27            |
Here is a picture of what I got from Pep-boys. Some 2 part epoxy, clear, good up to 180 degrees. Some sealant just in case I need it. Some body filler and 180,220 grit sand paper to smooth it out.
 Picture of the stock light: 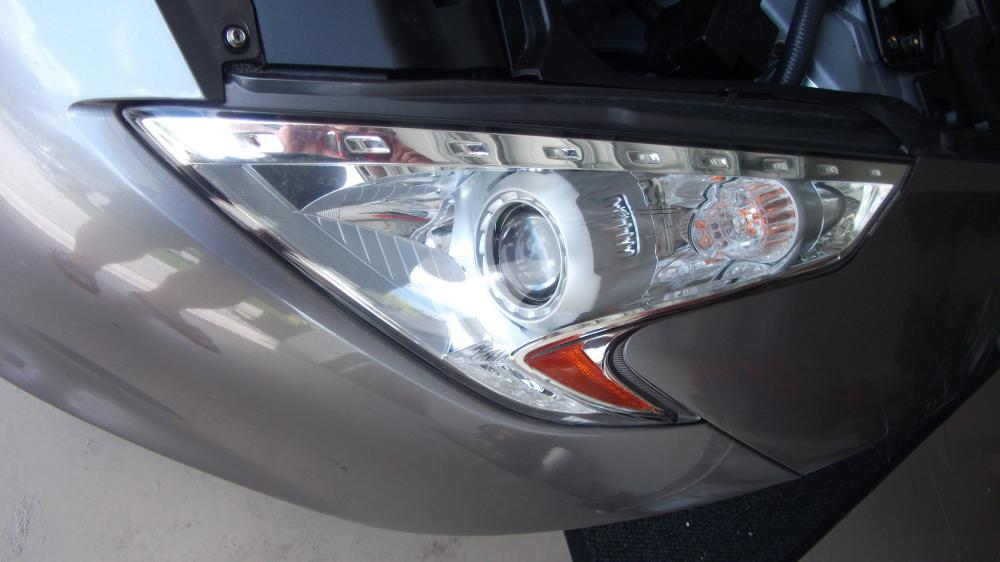 To pull it all apart I used existing DIYs: DIGItonium awesome DIY thanks for the hard work: DIY: Front Bumper Removal DIY: Headlight Removal Bumper Off, still looks sexy!!!  Lights Off, not sexy, i hope I never wreck:  DON'T HATE ON THE BOX.. its the only thing that was FREE !!!! I could easily cook these in the oven but I wanted to try the box. If i can do it (Mentally Challenged Person) then anyone can do it.  Tapped it up using clear cheap scotch wrapping tape. I closed off all the tears, holes and seams. I laid a towel in the bottom put the light in with clear side down and taped it all up.. Once I had it sealed up real good I cut a hole in the top of the lid than stuck a heat gun (Wagner Sears $25.00) in a hole. I didn't bother taping the gun in place as it would only melt off. 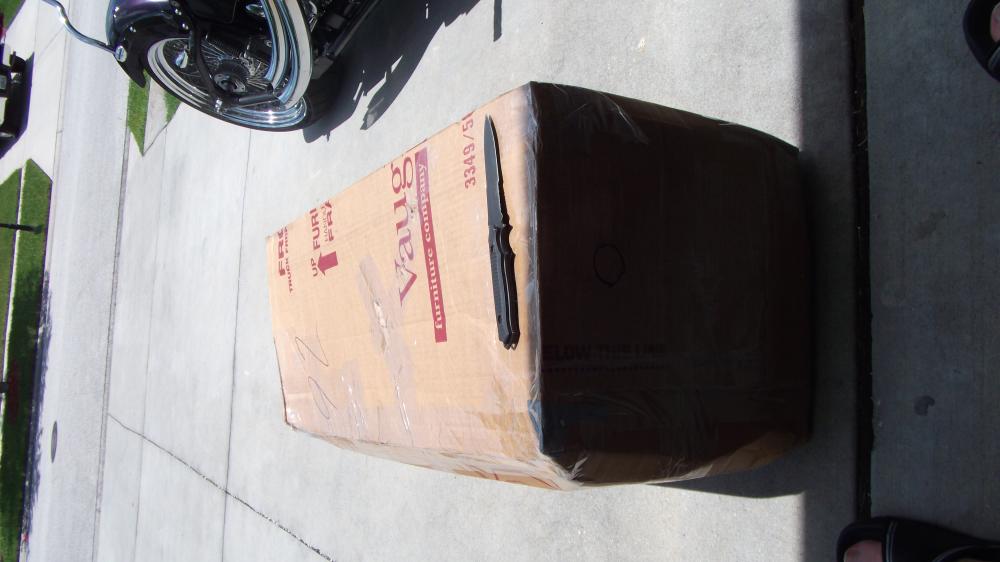 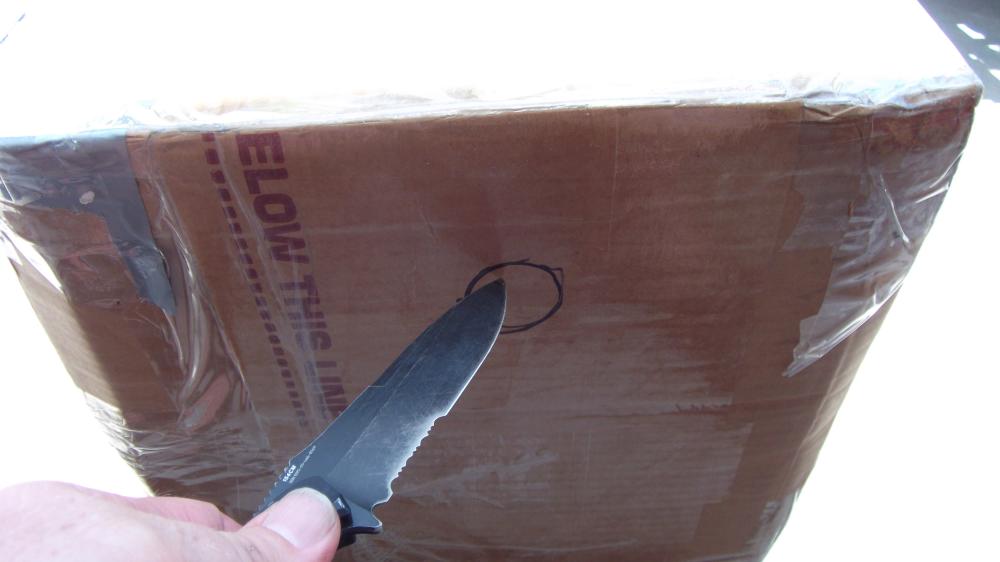 Sorry about the sideways pics.. 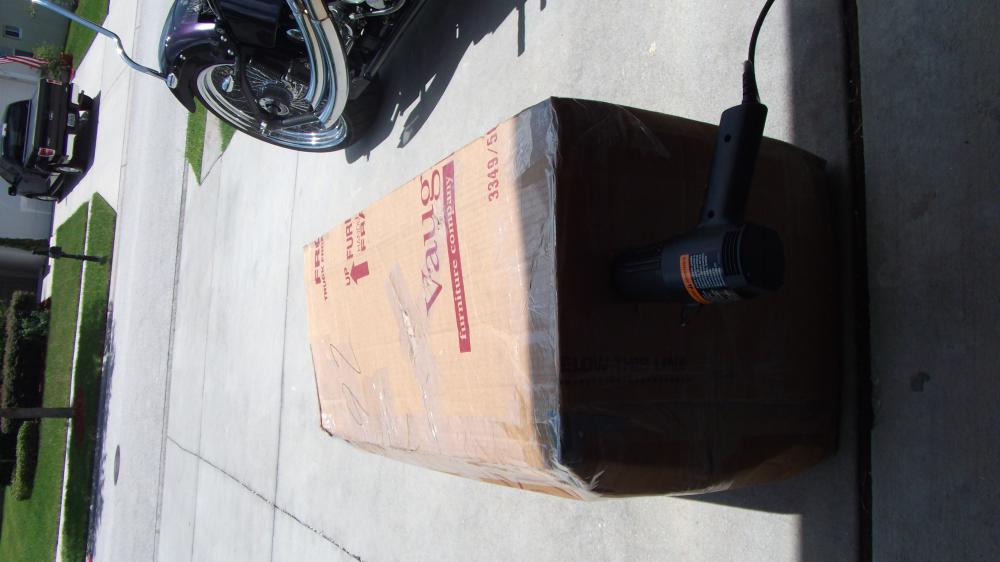 For Sh--s and giggles I set the other light on top while the heat gun ran its little heart out !!!! Its 90 degrees outside I want to see if it will soften the seal up.  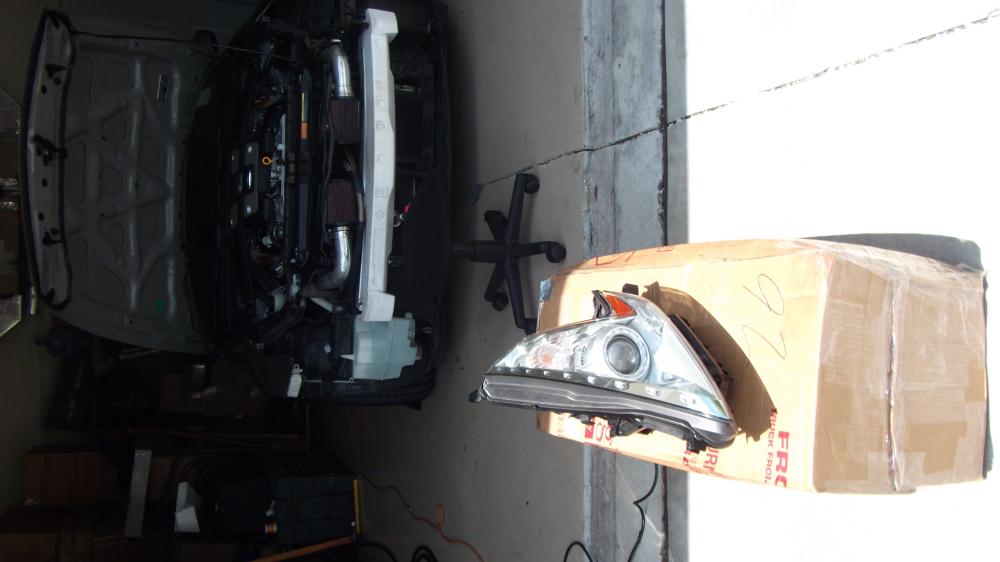
__________________
Did new cool science stuff to the car !!!
http://www.the370z.com/mazoc/99606-z...y-14-17-a.html http://www.the370z.com/diy-section-d...-w-videos.html Last edited by Nut_N_Much; 07-07-2012 at 01:51 PM. |
|
|

|
|
|
#4 (permalink) |
|
A True Z Fanatic
 Join Date: Dec 2011
Location: Pensacola Florida
Posts: 1,696
Drives: Awesome Car
Rep Power: 27            |
It worked awesome.. I ran the heat gun about 30 min while I played with the car. I tried pulling them out bare handed NOT!!! Use gloves, make sure you are light to the touch, there are little plastic pieces all over these things that could bend or brake off due to the heat.
The light I set in the sun got so hot I needed gloves to move it. I tried pulling apart and could do it but the sealant was still tacky, using the heat gun while pulling it came apart. I was worried about cracking the cover while pulling that's why I used the heat gun, I wanted to soften it up enough to pull apart with out using the box. Cool 2 confirmed ways to do it without an oven!  Set it in my lap, popped the plastic tabs and pulled it apart, Easy day!!  My Man Cave !!!!!  Will get to work on pulling the rest apart and painting.. Update tonight if I haven't had a heat stroke!! 
__________________
Did new cool science stuff to the car !!!
http://www.the370z.com/mazoc/99606-z...y-14-17-a.html http://www.the370z.com/diy-section-d...-w-videos.html Last edited by Nut_N_Much; 07-07-2012 at 02:06 PM. |
|
|

|
|
|
#5 (permalink) |
|
Track Member
 Join Date: Jun 2012
Location: Lexington, SC
Posts: 932
Drives: 2012 Nismo TT
Rep Power: 3398            |
Amazing DIY and the results are fantastic.
One question, as a sanity check: For the main projector halos, is that 90mm? Haven't taken mine apart to measure, so wanted to be sure. Thanks again! |
|
|

|
|
|
#6 (permalink) |
|
Base Member
Join Date: Jul 2012
Location: Montreal
Age: 39
Posts: 10
Drives: 370z 40th Edition
Rep Power: 13  |
Hello Nut_N_Much!
First off thank you very much for taking the time to write up on these DIYs  I'm sure everyone appreciates it at this forum~ I'm sure everyone appreciates it at this forum~I have a few questions to ask you as I'm a complete newbie when it comes to angel eyes/orb rings etc lol I wanted to ask you if I'm painting my headlight housing and wanted to add the sexy Single Orb Rings, do I have to purchase the parts that you used? 1. G35 Clear Lenses size 2 5/8 – TRS (THERETROFITSOURCE.COM) 2. Halo 90mm from (THERETROFITSOURCE.COM) I'm not too sure why you had to buy the G35 Clear lenses....would the Halo 90mm not fit the stock lights? Also, wouldn't it be alot simpler if you just purchased the product at Nissan 370Z (2008+) Headlight LED ORB RING 5000K PURE WHITE halo angel eyes - LuceProdukt.com Thank you for your time! |
|
|

|
|
|
#7 (permalink) |
|
Base Member
Join Date: Jul 2012
Location: Montreal
Age: 39
Posts: 10
Drives: 370z 40th Edition
Rep Power: 13  |
Hello Nut_N_Much!
First off thank you very much for taking the time to write up on these DIYs I'm sure everyone appreciates it at this forum~ I have a few questions to ask you as I'm a complete newbie when it comes to angel eyes/orb rings etc lol I wanted to ask you if I'm painting my headlight housing and wanted to add the sexy Single Orb Rings, do I have to purchase the parts that you used? 1. G35 Clear Lenses size 2 5/8 – TRS (THERETROFITSOURCE.COM) 2. Halo 90mm from (THERETROFITSOURCE.COM) I'm not too sure why you had to buy the G35 Clear lenses....would the Halo 90mm not fit the stock lights? Also, wouldn't it be alot simpler if you just purchased the product at Nissan 370Z (2008+) Headlight LED ORB RING 5000K PURE WHITE halo angel eyes - LuceProdukt.com Thank you for your time! |
|
|

|
|
|
#8 (permalink) | |
|
A True Z Fanatic
 Join Date: Dec 2011
Location: Pensacola Florida
Posts: 1,696
Drives: Awesome Car
Rep Power: 27            |
Quote:
 That pair they sell you will have a warranty and already has 12V resisters attached to it. Like VDC said, don't order the G35 lens, also order some sealant. I thinks its at the bottom of the accessories area. Last thing you want is moisture in your lights after there all closed up. Guys will tell you that all you need to do is push the factory sealant back into the grove with a knife or something. It works, but not all the time, the money you spend on the sealant is worth it!!! 
__________________
Did new cool science stuff to the car !!!
http://www.the370z.com/mazoc/99606-z...y-14-17-a.html http://www.the370z.com/diy-section-d...-w-videos.html |
|
|
|

|
 |
| Bookmarks |
|
|
 Similar Threads
|
||||
| Thread | Thread Starter | Forum | Replies | Last Post |
| Halo kit | rikkiphan1506 | Exterior & Interior | 3 | 01-31-2013 11:31 PM |
| Halo 4 | The Dimer | The Lounge (Off Topic) | 6 | 03-05-2012 03:41 PM |
| Z elininator drag Video's | Z eliminator | Canada | 0 | 08-15-2010 03:41 PM |
| How To detailing video's | Kyle@STILLEN | Detailing / Washing / Waxing / Cosmetic Maintenance and Repair | 2 | 03-02-2010 12:07 AM |
| Video's of the new arrival? | Shortbus | Nissan 370Z General Discussions | 1 | 01-04-2009 05:14 PM |