
 |
I have seen some awesome DYI's on lights and I have done some searches and can't find info on the size of light shroud. The inside circumference of the valley
|
|||||||
 |
|
|
LinkBack | Thread Tools | Display Modes |
|
|
#1 (permalink) |
|
A True Z Fanatic
 Join Date: Dec 2011
Location: Pensacola Florida
Posts: 1,696
Drives: Awesome Car
Rep Power: 27            |
I have seen some awesome DYI's on lights and I have done some searches and can't find info on the size of light shroud. The inside circumference of the valley is what I'm looking for. I want to install dual Halo in that valley, I have the size of the upper and G35 clear lenses. But don't know the size of the projection light shroud.
Doing the lights myself, but don't want to pull them and wait for the Halo order to show up. Would rather get it done over a weekend with all my parts ready to go. Does anyone know or are they trade secrets...  I finished making a few YouTube videos to take you through the process. I had to keep the video's short due to YouTube time limitations. I did a set with a single Halo install and paint matched to the car. I will do a video to show how to modify the turn signal lens as soon as I get a new set of lights to work on. Thanks for watching and please LIKE and REP if this helps you out. YouTube Vids to help out!!! V0 Intro - YouTube V0 Tools - YouTube V0 PaintWiring Tips - YouTube V1 Bumper Off - YouTube V2 Warming Lights - YouTube V3 Cracking Lights Open - YouTube V4 Prepping for paint - YouTube V5 Wiring Up - YouTube V6 Reassembly - YouTube V7 Continued Assembly - YouTube V7 Continued - YouTube V8 Finished - YouTube V9 Dual Halo Notes - YouTube What I found to be helpful Links: Links Tested 12 Feb 2015 To convert Turn Signal in to a glass lens: Warning: Do this modification at your own risk I used a 2.5 FX-R lens from (2.5") FX-R - Clear Lenses from The Retrofit Source Inc If you want to convert the turn signal to a lens here are some things you need to know before deciding to do it. 1. Glass amplifies light and we have had reports of shroud melting just in front of the lens. 2. Stock turn isgnal bulb (dual fulfillment) give off ton of heat. Glass absorbs that heat. Convert turn sig bulb to LED bulb, cooler (less heat) nust be the shortest bulb you can find. 3. You will cut the stock turn signal cover, no going back after that. Helpful Links: Morimoto XB's-LED Angel Eyes (What I use, 5 year warranty, comes with resistors White or Yellow only): http://www.theretrofitsource.com/led...l#.VN1EIi6GPhU Colored COB Angel Eyes: Made with RGB LED's, not as reliable as XB's but come in diffrent colors and fit inside the 370Z Shroud LED Angel Eyes | Accent Lighting | Super Bright LEDs DRLs: Side Emitting Audi Style LED strips - Accessories from The Retrofit Source Inc Rubber Glue to reseal if necessary: http://www.theretrofitsource.com/acc...l#.VN1E5C6GPhU Cool Switch: http://www.ebay.com/itm/16mm-12V-Blu...a44192&vxp=mtr Paint to color match Car paint code: http://www.automotivetouchup.com/ ****Also found a link from a guy that put an amazing write up on Demon Eyes, Halos, DLRs****:06 Headlight mods-the Thread of all Threads-many pix - MY350Z.COM Forums My Summery List Of What I Used: Clear Lenses size 2 1/2 – TRS or FX-R (THERETROFITSOURCE.COM) Sold in sets - Halo 90mm for the large light (THERETROFITSOURCE.COM) Sold in sets - Halo 70mm for the mod to turn signal (THERETROFITSOURCE.COM) Automotive GOOP - to glue halos on 180 and 220 sand paper Roll of heat shrink A saw thats able to cut plastic clean. File or something to fine tun your cuts 10 MM Socket Wire cutters Soldering Gun and 18 gauge wire Heat Gun - For the box to warn up lights Lizard Skin Body Filler - any filler will work for the dimples if you want smooth look Cardboard Box - Heat 15 min, make hole for heat gun and hole for air escape on opposite side of the box. What ever paint you want, as long as it bonds with plastic Wired to Parking Light - Parking light uses a Blue, Black and Yellow wire at the plug. 1st: Take the 4 wires from the (2) Halos and match them up color to color. Connect them to make 2 wires. 2nd: The (2) wires can be connected to the Parking Light wiring inside the light. The parking light wires I used is the Black (Ground) and Blue (Power) that run to the circuit board. Strip the coverings off so you can solder your wires to the Blk & Blue. ****I don't Recommend Cutting Wires**** Depending on the type of Halos you have usually one wire is power and one is ground. Use a 9V or battery to test your halos and find which is which. XB's halos are awesome, it doesn't matter which wire you use for power as long as the second wire is used as a ground. 3rd: Take your ground Halo wire and solder it to the ground wire (black) on the inside of the light. 4th: Take your power halo wire and solder it to the Blue wire (Positive) inside the light. Take your light and plug it into the car harness and test it. If all is okay repeat steps 1 through 4 on the other light and your good. * Run the wires under the projection lamp. Use some glue or 3 mil tape if you have too to keep the wires from flopping around and manage your resisters. You will have some slack you will need to keep away from the heat.. So PM me if you have any questions, feel free to bash.... Thanks Last edited by Nut_N_Much; 02-12-2015 at 06:29 PM. Reason: Update |
|
|

|
|
|
#2 (permalink) | |
|
A True Z Fanatic
Join Date: Jul 2009
Location: 2amr.net
Posts: 1,756
Drives: a car I know about..
Rep Power: 19  |
as a DRL it's a cool mod...
__________________
07 Silver Alloy Nissan 350Z Nismo #0191 "Lin'da" 2amR--------------------> VQ I.N.C. - Like us! Quote:
|
|
|
|

|
|
|
#3 (permalink) |
|
Track Member
Join Date: May 2012
Location: Unknown
Posts: 538
Drives: PG 09 Nissan 370z
Rep Power: 14  |
+1 for this thread, I have been wondering the same thing and in the same predicament. In for end results! good luck!
__________________
очень быстро ...
Stillen Gen 3 CAI// Stillen CBE// B&M SS with PWJDM Shift Knob// Custom OCC// Drilled/Slotted Rotors//Halo/painted Headlights// Under-hood dress up |
|
|

|
|
|
#4 (permalink) |
|
A True Z Fanatic
 Join Date: Dec 2011
Location: Pensacola Florida
Posts: 1,696
Drives: Awesome Car
Rep Power: 27            |
Thanks,
I've done a bunch of DYIs for off road stuff, but this is a tough crowd will try not to disappoint..
__________________
Did new cool science stuff to the car !!!
http://www.the370z.com/mazoc/99606-z...y-14-17-a.html http://www.the370z.com/diy-section-d...-w-videos.html |
|
|

|
|
|
#5 (permalink) |
|
Base Member
Join Date: Feb 2012
Location: Brunei
Posts: 131
Drives: 09 370z TG M6
Rep Power: 14  |
I always wanted to redo my headlight to dual orb halo ring just don't know what size to order. Hope to get some info here once you done..
Good luck on your project bro.... 
|
|
|

|
|
|
#6 (permalink) |
|
Track Member
Join Date: May 2011
Location: Walhalla/Clemson, SC
Posts: 874
Drives: 09 BS 370z
Rep Power: 15  |
Nice subscribed to see how this works!
__________________
 Avant Garde M310 gloss black/ Nitto Invo/ black fangs and rear diffuser/ gloss black roof/ tinted tail lights/ GT-R start button |
|
|

|
|
|
#9 (permalink) |
|
Track Member
Join Date: Oct 2011
Location: Jacksonville FL
Posts: 586
Drives: '10 370Z PW Auto
Rep Power: 15  |
sub'd, looks promising. Would love to do this at the same time as blacking out the chrome part of the headlights. If I ever get the courage...
__________________
 2010 Pearl White Touring
Sport Package | Navigation | 7 Speed Automatic |
|
|

|
|
|
#10 (permalink) |
|
Track Member
Join Date: May 2011
Location: Walhalla/Clemson, SC
Posts: 874
Drives: 09 BS 370z
Rep Power: 15  |
Agree. I'm too scared
__________________
 Avant Garde M310 gloss black/ Nitto Invo/ black fangs and rear diffuser/ gloss black roof/ tinted tail lights/ GT-R start button |
|
|

|
|
|
#11 (permalink) |
|
A True Z Fanatic
Join Date: Jun 2011
Location: Houston
Posts: 1,115
Drives: 10 Nissan 370Z 7AT
Rep Power: 16  |
im in for pic's
__________________
 Litespeed Racing Titanium Cold Air intake// GT Haus Axle// GarageLine combo// Nismo sway bars// Nismo Spoiler // Berk TP's Litespeed Racing Titanium Cold Air intake// GT Haus Axle// GarageLine combo// Nismo sway bars// Nismo Spoiler // Berk TP's
|
|
|

|
|
|
#12 (permalink) |
|
Base Member
Join Date: Feb 2012
Location: port hueneme ca
Posts: 70
Drives: 2011 Silver 370Z
Rep Power: 14  |
Subscribed looking forward to some DIY insight and process explanation.
__________________
Eric Z. Myers 2011 370Z, Silver, Sport, K&N short ram intake, Fast Intentions Exhaust, Pioneer AVIC, ORACLE Lighting LED Halo Kit, Tinted. |
|
|

|
|
|
#13 (permalink) |
|
A True Z Fanatic
 Join Date: Dec 2011
Location: Pensacola Florida
Posts: 1,696
Drives: Awesome Car
Rep Power: 27            |
Thanks for the confidence building, I hope to not disappoint.
 What I am using: G35 Clear Lenses size 2 5/8 – TRS (THERETROFITSOURCE.COM) Halo 90mm from (THERETROFITSOURCE.COM) Halo 70mm from (THERETROFITSOURCE.COM) No need for resistors the halos already come wired to 12V resistors.. Sledge Hammer if I mess it all up ! 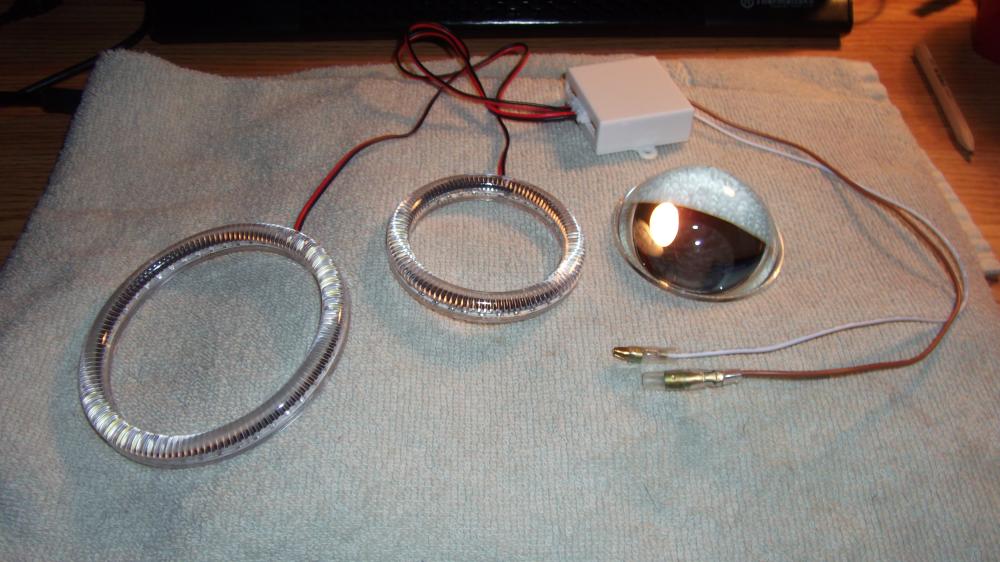 What I am thinking: (Not a hole lot) The Turn signal mod I am trying to stay with the stock bulb but I will remove the turn signal shroud and take off the stock plastic lens and replace it with the G35 lens. Some modification to the shroud will be needed to get the lens to fit. The Halo will mount on the outside and should be small enough to fit into the shroud. The reason for the G35 lens is its shaped like a bubble so when inserted into the shroud there is a void the Halo ring can rest in with a little 2 part epoxy to hold it in place. Not sure what needs to be cut out and modified, not sure how to do it. I am working through this as I go and will post the details. The projection light mod, the halo should fit perfectly in the valley of the projection light shroud based of DIY’s already done in the forum. Using a little 2 part epoxy will hold it in place. Both Halo’s are wired into the control box provided by LightWurkz and the control box will be wired into the parking light harness. This seems to be how others have done it, there have been some issues with LED flickering or burning out I don't think its were they are wired but how. Using resisters seems to get the power supply at its optimal level for the LEDs. I am curious what LightWurkz is using. 200 ohm 1 watt seems to be a good bet, others have used 150 ohm 1/8 watt & 200 ohm 1/8 watt resisters. I will go with 200 ohm 1 watt and see what happens.. I am not a smart guy but Javier seems to be. Quote from Javier: Hi. I'm thinking of doing the same to my headlights but my numbers indicate that I should be using 200 OHM resistors at 1 watt. The LEDs are runnung at 26mA not the 20mA that they are designed for so the current draws .762 watts. Therefore you should us at least a 1 watt resistor not 1/4 or 1/2. My numbers are as follows: 12 v devided .060mA (3 leds in series) = 200 ohms. Please let me know what you think. I just do not want to be opening these headlights once a year. The way I see it the current is greater than the resistor can handle and they may burn up. DIY: Headlight LED's and blackout The Shroud mod, To split apart the head lights I have a cardboard box all taped up and will stick a heat gun into to warm them up enough to pull apart. If it doesn’t work it’s off to the oven.. I am planning on filling in the squares were people insert LEDs as run way lights; using body filler and sand paper to smooth it all out. I have Carbon Fiber Vinyl I want to run in place of LED’s. Also thinking of wrapping the shrouds and painting the rest Black Satin. Then Carbon Fiber wrap the reflector. Not sure yet. Worried about the heat from the lights. .. Total mod: If I mess it up I will be looking for a 370Z donor car anyone live in Tampa   I have to work Monday but planing on posting updates each night with pictures.
__________________
Did new cool science stuff to the car !!!
http://www.the370z.com/mazoc/99606-z...y-14-17-a.html http://www.the370z.com/diy-section-d...-w-videos.html Last edited by Nut_N_Much; 02-03-2013 at 10:09 AM. |
|
|

|
|
|
#14 (permalink) |
|
A True Z Fanatic
 Join Date: Dec 2011
Location: Pensacola Florida
Posts: 1,696
Drives: Awesome Car
Rep Power: 27            |
Here is a picture of what I got from Pep-boys. Some 2 part epoxy, clear, good up to 180 degrees. Some sealant just in case I need it. Some body filler and 180,220 grit sand paper to smooth it out.
 Picture of the stock light: 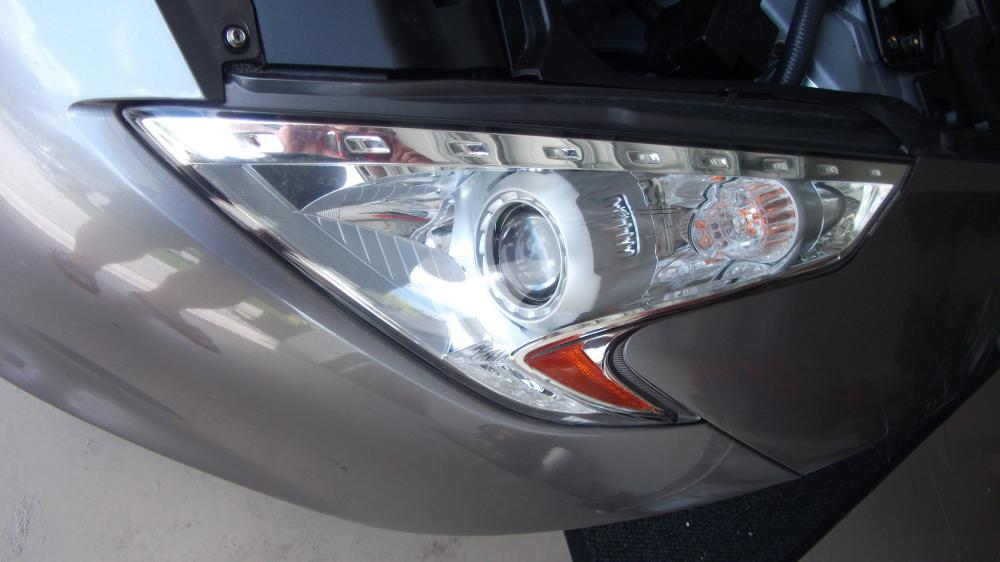 To pull it all apart I used existing DIYs: DIGItonium awesome DIY thanks for the hard work: DIY: Front Bumper Removal DIY: Headlight Removal Bumper Off, still looks sexy!!!  Lights Off, not sexy, i hope I never wreck:  DON'T HATE ON THE BOX.. its the only thing that was FREE !!!! I could easily cook these in the oven but I wanted to try the box. If i can do it (Mentally Challenged Person) then anyone can do it.  Tapped it up using clear cheap scotch wrapping tape. I closed off all the tears, holes and seams. I laid a towel in the bottom put the light in with clear side down and taped it all up.. Once I had it sealed up real good I cut a hole in the top of the lid than stuck a heat gun (Wagner Sears $25.00) in a hole. I didn't bother taping the gun in place as it would only melt off. 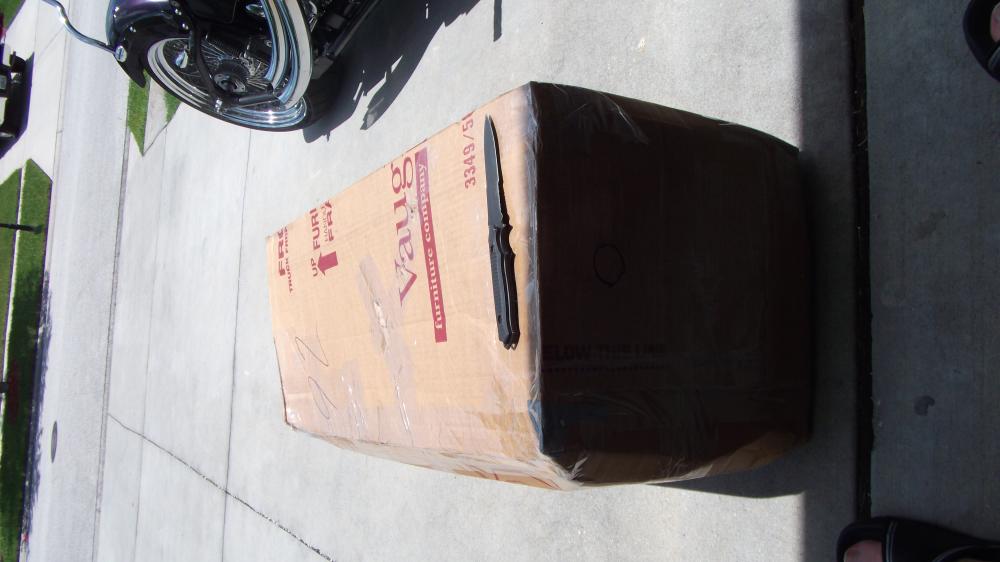 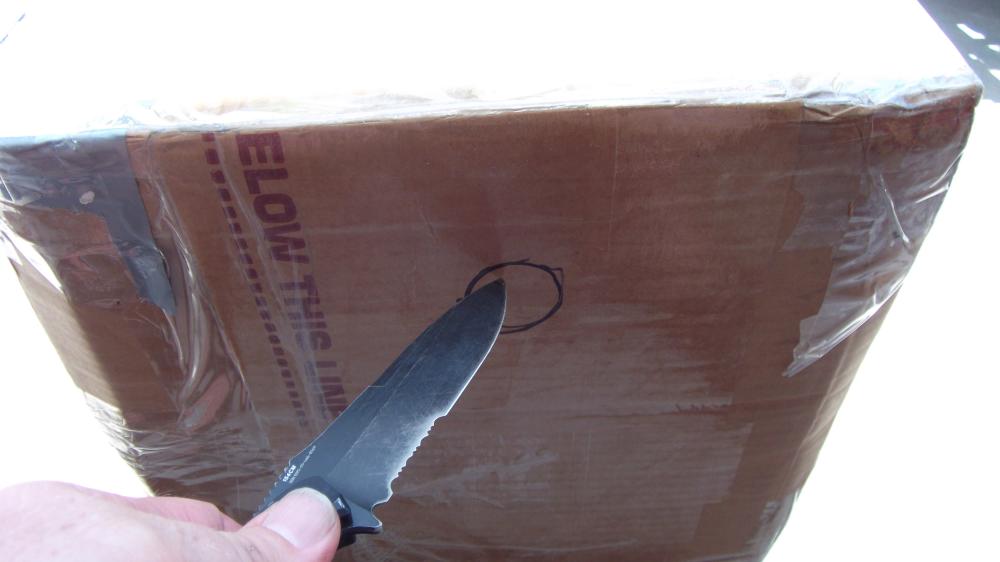 Sorry about the sideways pics.. 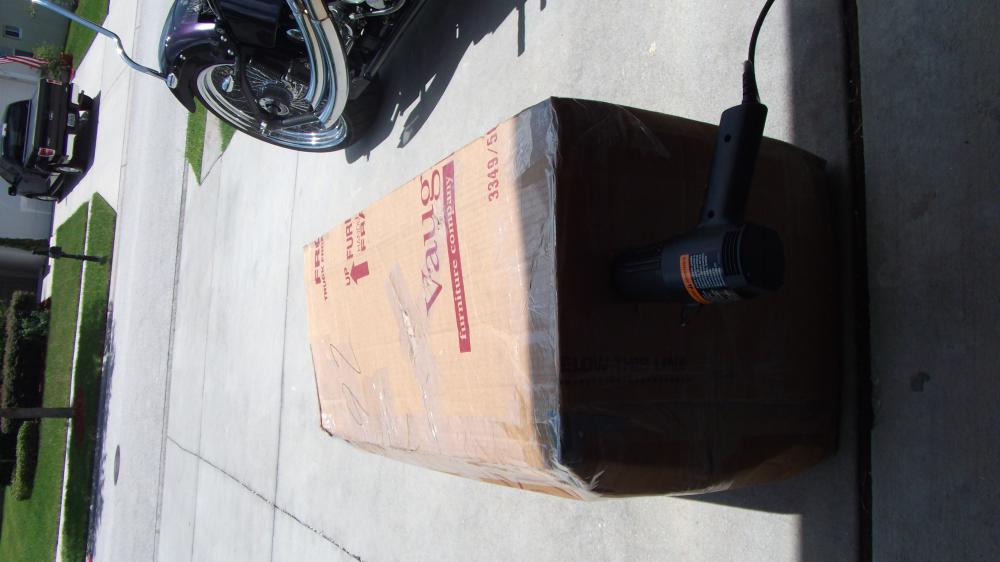 For Sh--s and giggles I set the other light on top while the heat gun ran its little heart out !!!! Its 90 degrees outside I want to see if it will soften the seal up.  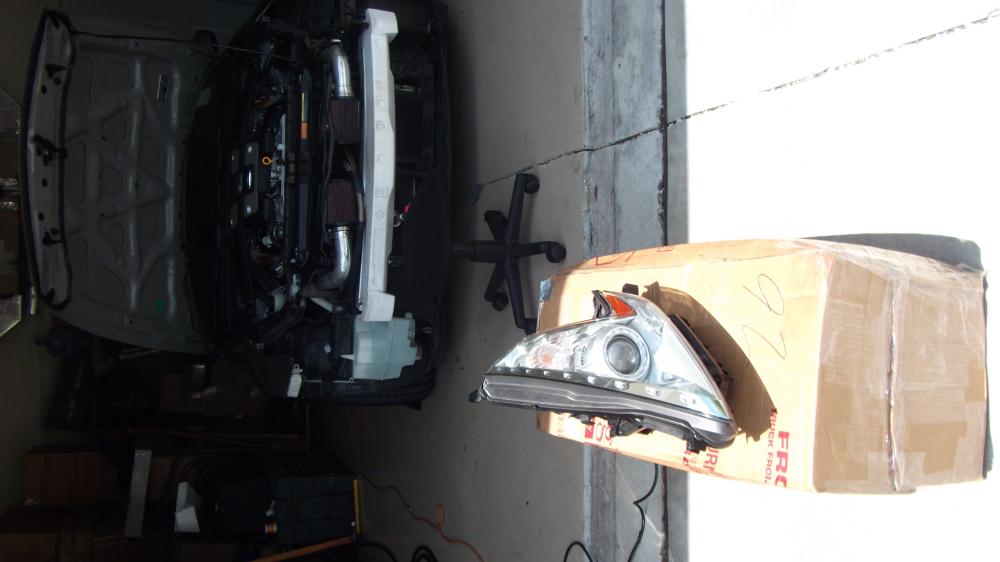
__________________
Did new cool science stuff to the car !!!
http://www.the370z.com/mazoc/99606-z...y-14-17-a.html http://www.the370z.com/diy-section-d...-w-videos.html Last edited by Nut_N_Much; 07-07-2012 at 01:51 PM. |
|
|

|
|
|
#15 (permalink) |
|
A True Z Fanatic
 Join Date: Dec 2011
Location: Pensacola Florida
Posts: 1,696
Drives: Awesome Car
Rep Power: 27            |
It worked awesome.. I ran the heat gun about 30 min while I played with the car. I tried pulling them out bare handed NOT!!! Use gloves, make sure you are light to the touch, there are little plastic pieces all over these things that could bend or brake off due to the heat.
The light I set in the sun got so hot I needed gloves to move it. I tried pulling apart and could do it but the sealant was still tacky, using the heat gun while pulling it came apart. I was worried about cracking the cover while pulling that's why I used the heat gun, I wanted to soften it up enough to pull apart with out using the box. Cool 2 confirmed ways to do it without an oven!  Set it in my lap, popped the plastic tabs and pulled it apart, Easy day!!  My Man Cave !!!!!  Will get to work on pulling the rest apart and painting.. Update tonight if I haven't had a heat stroke!! 
__________________
Did new cool science stuff to the car !!!
http://www.the370z.com/mazoc/99606-z...y-14-17-a.html http://www.the370z.com/diy-section-d...-w-videos.html Last edited by Nut_N_Much; 07-07-2012 at 02:06 PM. |
|
|

|
 |
| Bookmarks |
|
|
 Similar Threads
|
||||
| Thread | Thread Starter | Forum | Replies | Last Post |
| Halo kit | rikkiphan1506 | Exterior & Interior | 3 | 01-31-2013 11:31 PM |
| Halo 4 | The Dimer | The Lounge (Off Topic) | 6 | 03-05-2012 03:41 PM |
| Z elininator drag Video's | Z eliminator | Canada | 0 | 08-15-2010 03:41 PM |
| How To detailing video's | Kyle@STILLEN | Detailing / Washing / Waxing / Cosmetic Maintenance and Repair | 2 | 03-02-2010 12:07 AM |
| Video's of the new arrival? | Shortbus | Nissan 370Z General Discussions | 1 | 01-04-2009 05:14 PM |