
 |
I don't see a Catback exhaust DIY in the DIY index, is it too simple to do to deserve its own DIY article? I should be getting my ARK catback
|
|||||||
 |
|
|
LinkBack | Thread Tools | Display Modes |
|
|
#1 (permalink) |
|
Base Member
Join Date: Jun 2011
Location: Morgan Hill, CA
Posts: 32
Drives: 11 370Z Nismo
Rep Power: 14  |
I don't see a Catback exhaust DIY in the DIY index, is it too simple to do to deserve its own DIY article? I should be getting my ARK catback from the good people at Tunerzstore tomorrow and I'm planning on attempting the install myself over the weekend. A DIY article would have been nice, but in any case, any pointers would be awesome. I'm installing on an '11 Nismo. I've already read everything I could find on the forum about exhaust installs on Nismos -- including the issue on the Nismo driver side muffler hanger that's supposedly different from regular 370 muffler hangers. Looks like the ARK doesn't have this hanger so I'm hoping I won't have that issue. I also read that I should start from the back (muffler section) and work my way to the front to make alignment easier, etc.,
Anyhow, any advice would be appreciated. I'm gonna jack the car up unto 4 rhino ramps, hopefully that'll give me enough room to work with. Last thing... do you guys use a torque wrench to tighten the exhaust bolts or just tighten by feel? If torque wrench, what ft-lbs? thanks much! |
|
|

|
|
|
#2 (permalink) |
|
A True Z Fanatic
 Join Date: May 2011
Location: Toms River, NJ
Posts: 1,904
Drives: 2010 40th
Rep Power: 17  |
There is no DIY for two reasons... it is honestly kind of a pain to do it without a lift due to not having much leverage on the ground and second the install/removal is very simple assuming you can get under everything. Basically all you have to do is...
Unbolt Y pipe from cats Unbolt mid pipe from Y pipe Unbolt mid pipe from muffler The trickiest part is removing the muffler... I chose to remove the entire brackets instead of the rubber hangers... I found it hard to remove the hangers while stabilizing the mufflers (I worked solo). There are 3 hangers I believe if I remember correctly. You might want to take it to a shop just because it is easier to maneuver... I was lucky enough to have a friend with a lift so it didn't take me too long. They shouldn't charge you that much though because the job is incredibly straight forward. There was a bit of trimming and a metal shield that needed to be removed with the CNT system... not sure about the ARK one. |
|
|

|
|
|
#3 (permalink) | |
|
Base Member
Join Date: Jun 2011
Location: Morgan Hill, CA
Posts: 32
Drives: 11 370Z Nismo
Rep Power: 14  |
Quote:
|
|
|
|

|
|
|
#4 (permalink) |
|
Enthusiast Member
Join Date: Jan 2009
Location: SF Bay Area, CA
Posts: 271
Drives: '09 370Z
Rep Power: 17  |
It's not too hard, I don't have a Nismo so I can't tell you how different it is. It is probably one of the easier things you can do. Just lift up the front of the car first (obviously use jack stands) to unbolt the Y-pipe from the cats and the Y-pipe from the mid pipe, then lower it back down and raise up the rear to do the rest.
Like Mike said, the hardest part was getting the rubber hangers off the exhaust. If you have a friend that can help you lift the muffler up as you're doing this (or maybe even a jack with a piece of wood in between) that'll make it easier. Everything else though is something you can easily do yourself. I ended up spraying some liquid wrench in between for extra lube and helped to pry it apart with a flathead screwdriver. Wear goggles if you're doing this. Actually wear goggles anyways cuz you'll be under the car and the quarters are tight. Don't want **** flying in your eye, or tightening down or loosening up a bolt and the wrench slipping and hitting you in the face. Ask me how I know... When you're putting the new exhaust on, don't tighten all the bolts down just yet. Get them bolted up so they hold but have room to play and adjust, then use a jack with wood again to align the different pipes in place, and then tighten it all down while it's being held up properly. You'll want to do this to make sure your pipes clear the rear crossmember. I'm not sure how it is with the ARK exhaust but the Stillen exhaust's first run had a lot of crossmember clearance problems. They fixed that one (they sent me a new mid-pipe) and it cleared just fine.
__________________
GTM Stg II SC w/ Aquamist methanol injection, GTM oil cooler, Berk HFC, Stillen CBE, BC ER coilovers, Hotchkis sways, TWM short shifter, Clutch spring mod, CarboTech XP8s |
|
|

|
|
|
#5 (permalink) | |
|
Base Member
Join Date: Jun 2011
Location: Morgan Hill, CA
Posts: 32
Drives: 11 370Z Nismo
Rep Power: 14  |
Quote:
Did you use a torque wrench to tighten the bolts on the flanges or just tightened by feel? |
|
|
|

|
|
|
#6 (permalink) |
|
Enthusiast Member
Join Date: Jan 2012
Location: TN
Posts: 390
Drives: check my signature
Rep Power: 14  |
Installing a cat back is cake even on jack stands.
WD40 or the like is your friend on the rubber hangers. There is also a special tool used to remove mounts from those rubber hangers as well you can pick up cheap if you think you need it, but I just use a small pry bar. I may do a DIY when my FI gets here, but it'll be about 3 months according to Tony. |
|
|

|
|
|
#7 (permalink) |
|
A True Z Fanatic
Join Date: Apr 2010
Location: Long Island NY
Posts: 3,277
Drives: 2010 Z Coupe M6 SPT
Rep Power: 21     |
I backed mine up on ramps and jacked the front up a little to get to the Y-Pipe bolts. If you can get the mufflers off the rubber hangers just do what I did. Remove the whole arm that holds the rubber hanger and muffler together, then while its off the car just pull the rubber hangers off and just install it back on the car.
__________________
2010 Base+Sport 6spd: Stillen G3, FI Non-Resonated CBE, FI Non-Resonated Test Pipes, UpRev Tuned, Custom 24R Oil Cooler, JDM Rear Fog-OEM Harness. ???Whp ???WTQ (Will find out come spring time) |
|
|

|
|
|
#8 (permalink) | |
|
A True Z Fanatic
 Join Date: May 2011
Location: Toms River, NJ
Posts: 1,904
Drives: 2010 40th
Rep Power: 17  |
Quote:
Maybe it was just my car but I used a ton of liquid wrench and couldn't get the bolts by hand... I have to admit I gave up pretty quickly though (after I started rounding a bolt). Good luck. |
|
|
|

|
|
|
#9 (permalink) |
|
Base Member
Join Date: Jun 2011
Location: Morgan Hill, CA
Posts: 32
Drives: 11 370Z Nismo
Rep Power: 14  |
Thanks for all the advice, folks... FedEx dropped off my exhaust earlier this afternoon. Will attempt the install this weekend... I'm pretty confident I can do the install... just hope everything will line up without too much trouble.
|
|
|

|
|
|
#11 (permalink) |
|
Base Member
Join Date: Jun 2011
Location: Morgan Hill, CA
Posts: 32
Drives: 11 370Z Nismo
Rep Power: 14  |
The install took me about 6 hours to do on my own (I had to make adjustments after a test drive), but it's on and it looks good and sounds awesome! The passenger side tip is a tad lower, probably by 1/8 inch, but the cans look perfectly leveled. The Ark logos on the cans are leveled perfectly -- I've seen a bunch of pics online that have the cans/logos crooked, so I'm pretty happy with how mine turned out.
I was getting some rattle on the first test drive -- the exhaust was hitting the cross brace -- so I had to raise the car again, loosened the bolts that connect the mid-pipes to the x-pipe section, used a scissor jack to raise that part as high as it could go and re-tightened the bolts. Plus I tried to bend the brace a bit, but that sucker won't bend. I ended up with about 3/8 inch space between the brace and the exhaust. No more rattles... hope it stays that way... Anyhow, it sounds awesome... quiet when cruising and screams when you step on it... sweet! |
|
|

|
|
|
#12 (permalink) |
|
A True Z Fanatic
 Join Date: May 2011
Location: Toms River, NJ
Posts: 1,904
Drives: 2010 40th
Rep Power: 17  |
See I was hesitant to understand why someone would say it was "cake" on jackstands since it obviously isn't... it wasn't even "cake" when I used a lift. Probably took me between 45min to an hour.
Congrats on getting everything together though! |
|
|

|
|
|
#13 (permalink) |
|
Enthusiast Member
Join Date: Jan 2012
Location: TN
Posts: 390
Drives: check my signature
Rep Power: 14  |
I did the one on my Challenger in about an hour and it was easy. Unless the Z has some crazy hangers or something, I can't see it being any more difficult.
I'll find out in a couple months when I get my FI Catback. I do use power tools and liberal amounts of WD40 though LOL. They also make a special wrench for removing exhaust hangers from the rubber grommets that would make things faster I'd say. |
|
|

|
|
|
#14 (permalink) |
|
Base Member
Join Date: Jun 2011
Location: Morgan Hill, CA
Posts: 32
Drives: 11 370Z Nismo
Rep Power: 14  |
Few pics from my install... back breaking work, but all worth it!
Ark exhaust 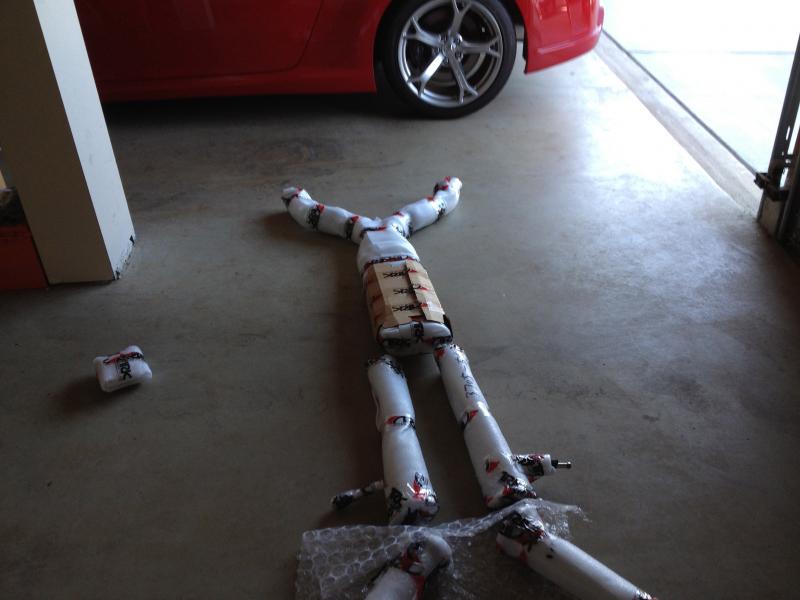 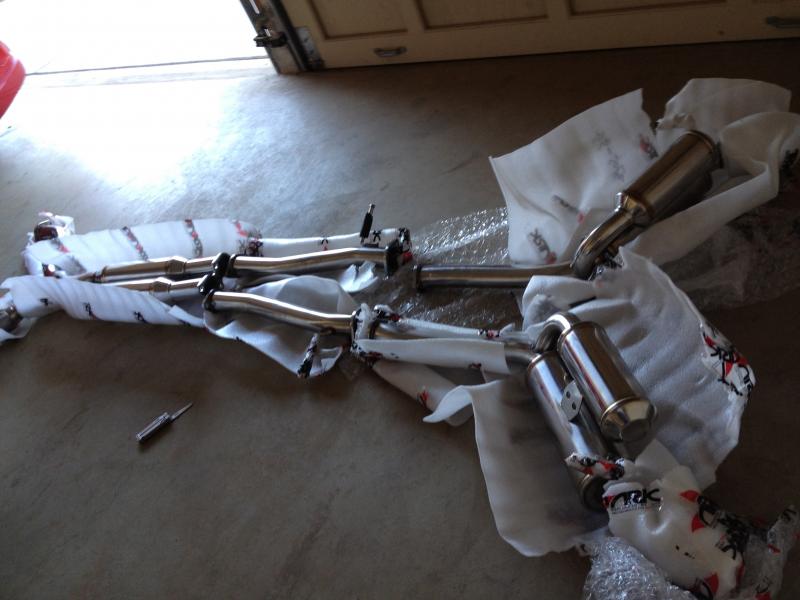 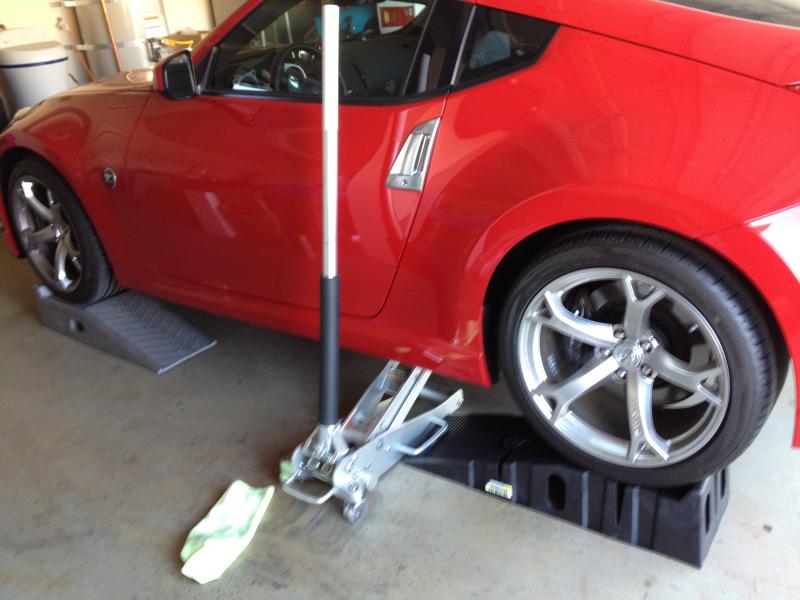 Used 2 sets of rhino ramps (4 ramps) and 2 floor jacks... 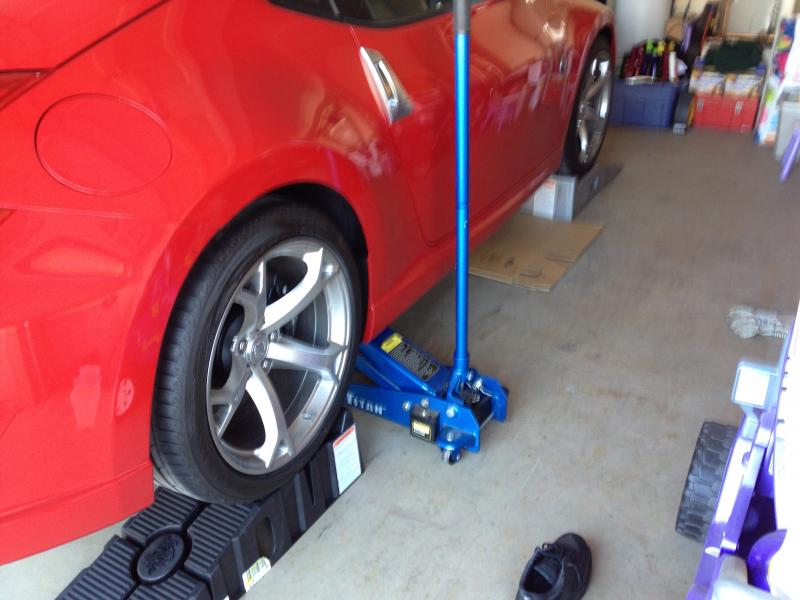 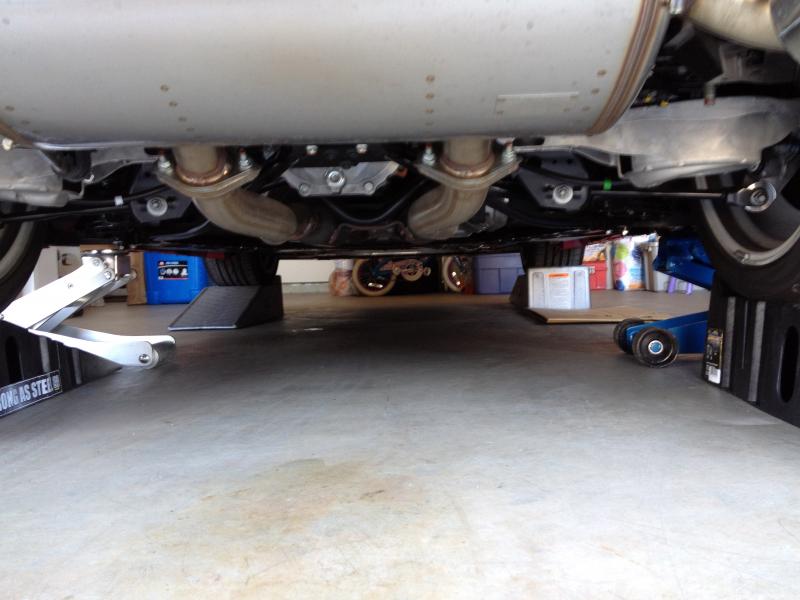 I used that scissor jack to hold the ark high over the cross brace during install...  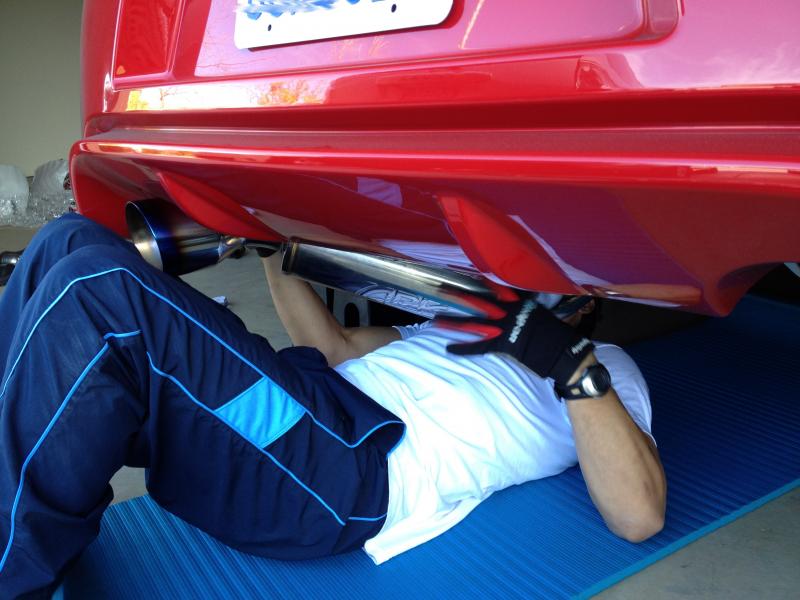 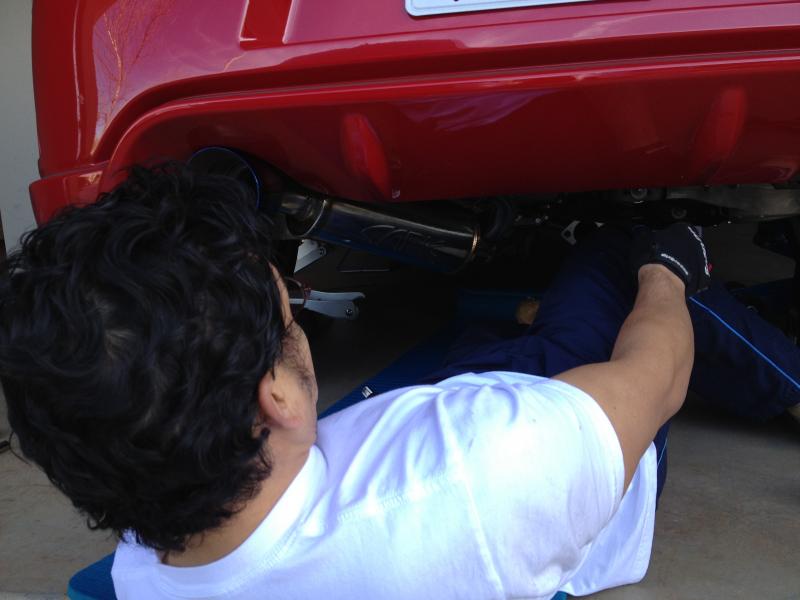 Nismo Stock exhaust 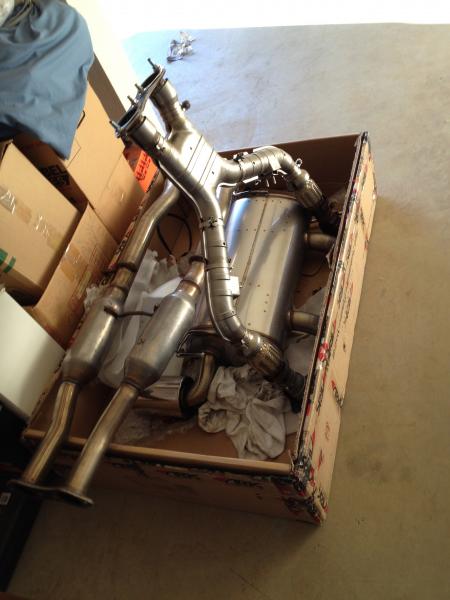
|
|
|

|
 |
| Bookmarks |
|
|
 Similar Threads
|
||||
| Thread | Thread Starter | Forum | Replies | Last Post |
| catback exhaust | Axelsc1 | Wanted | 1 | 11-27-2011 10:14 PM |
| [WTB] Exhaust or catback | Axelsc1 | Parts for sale (Private Classifieds) | 4 | 11-17-2011 09:07 PM |
| Catback exhaust and HFC in CA | JapanLio | Northern California Region | 11 | 04-02-2011 01:03 PM |
| MXP catback exhaust!! | vividracing | Vivid Racing | 8 | 05-05-2010 07:31 PM |
| Catback Exhaust vs. Exhaust System | DinoJ | Engine & Drivetrain | 3 | 05-07-2009 04:18 PM |