
 |
I have had so many requests for info on my roadster spoiler install that I wanted to write up DIY. Hope this helps some of you out there. It really
|
|||||||
 |
|
|
LinkBack | Thread Tools | Display Modes |
|
|
#1 (permalink) |
|
Track Member
Join Date: Jul 2009
Location: Colorado
Posts: 746
Drives: '10 BC ZR T/S/Nav
Rep Power: 17     |
I have had so many requests for info on my roadster spoiler install that I wanted to write up DIY. Hope this helps some of you out there. It really changes the shape of the back of the car and in my opinion remedies the "bubble butt" that so many dislike.
It was purchased off of eBay from Spoiler Solutions. Spoiler Solutions.com Just under $325 shipped. I sent them an email before I purchased and asked a few questions. The were great to work with and it was on my doorstep inside a week. I can not say enough about the quality of this item! Paint, fit, in installation were right on. The installation instructions were a bit vauge (and no cartoons). If you you can't figure out what you need to be doing, you probably shouldn't be drilling holes in your car...you should have it done by someone that can. I didn't take many pictures because it was early (started at 5:30 a.m.) and humid. When I brought the camera out from the AC, the lens fogged up and took a while to normalize. I was to impatient to stall the process. Sorry. This process will be much easier with two sets of hands! Tools Needed: Socket to fit kit bolts 1/4" drive 4" extension 1/4" drive ratchet (I used a round palm ratchet) Roll of 1" wide painters tape (I used the 3M blue stuff and regular masking tape) 1/8" drill bit 5/16" drill bit Unibit (for access holes inside the trunk) Cordless drill In the spoiler kit: Alignment Tabs Foam weather stripping Wing (factory color already applied) Instruction sheet Installation Process: 1) Tape the trunk lid to ensure that you don't scratch the paint while test fitting the spoiler. 2) I applied the stripping/seal to avoid fiberglass to paint contact. (I stayed off of the edge about 3/4") 3) I also left small gaps at the lowest areas of the back to ensure moisture would not sit under the spoiler. 4) Test fit, MEASURE, and mark the location of the spoiler in the tape. 5) Remove the spoiler. 6) Place the spoiler back to the marks and MEASURE again to ensure you MEASURED right the first time. 7) Remove the spoiler. 8) Remove the carpeted cover on the inside of the trunk lid. 9) Verify the location of the 4 holes in the spoiler that you will use for the installation. (there were about 8 holes in my spoiler) 10) I believe that I used the 4 outer most but I can't be 100% sure. 11) Make sure that there is enough fiberglass thickness in the holes you choose to get a bite with the bolts. 12) Make sure that you now where the access holes will have to be drilled in the inside of the trunk lid before you drill holes on the outside! 13) Put the alignment tabs into the holes you selected on the spoiler and use a small piece of tape hold them in. (make sure the boss is not to tight in the holes or you will have a difficult time getting them to stay on the deck when you remove the spoiler) 14) Place the spoiler back on the deck lid in the location previously marked and MEASURE again. 15) Tape down the tabs to the trunk lid so that you can remove the spoiler with that tabs in that exact location in the trunk lid. 16) With the 1/8" drill bit, drill through the boss on the tabs and through only the outside of the trunk lid. 17) After all four pilot holes are drilled, remove the alignment tabs. 18) Using the 5/16" drill bit, carefully drill through the 1/8" holes. 19) You can mark the location of the access holes on the inside of the trunk lid by sight. You could also use a small magnetic pick up tool through the outside holes and a small drill bit or the metal chips/shavings from your first holes to locate the inside holes. 20) Use the unibit to drill the access holes just big enough to allow the socket through. 21) Once all of the holes are drilled, remove all of the tape from the trunk lid. 22) Deburr the holes just enough to take off the sharp edges. 23) I used a small model brush and some black model paint to cover the bare exposed metal in the inside of the holes. This will prevent corrosion in the future. 24) Use clear silicone to completely envelope the four holes on the outside of the trunk lid so that when you put the bolt through from the inside, a seal will be created. 25) I used several small pieces of tape around the inside of the socket to ensure I did not drop the bolt into the inside of the trunk lid. 26) Put a bead of silicone around the shoulder of the bolt once you have it snugly secured in the socket. 27) Prop the trunk at approximately 45% (I used a cardboard poster tube). 28) Hold the spoiler just above the trunk lid and put the first bolt carefully through the silicone and into the hole in one end. (I used a piece of 1" square foam to hold the other end of the spoiler off of the lid because I didn't have another set of hands) 29) Carefully install the other three bolts loosely and verify alignment as you tighten them down. Do not over tighten. These are not head bolts! It's fiberglass! 30) I purchased black interior trim buttons at the local auto parts store to cover the two holes that fell outside the carpeted cover inside the trunk. I found the flushest ones that I could because those two holes fell within the trunk sealing area. I used a small bead of silicone to hold them in place. 31) Replace the carpeted cover inside the trunk. 32) Close the trunk lid and stand back to admire your new custom body work! 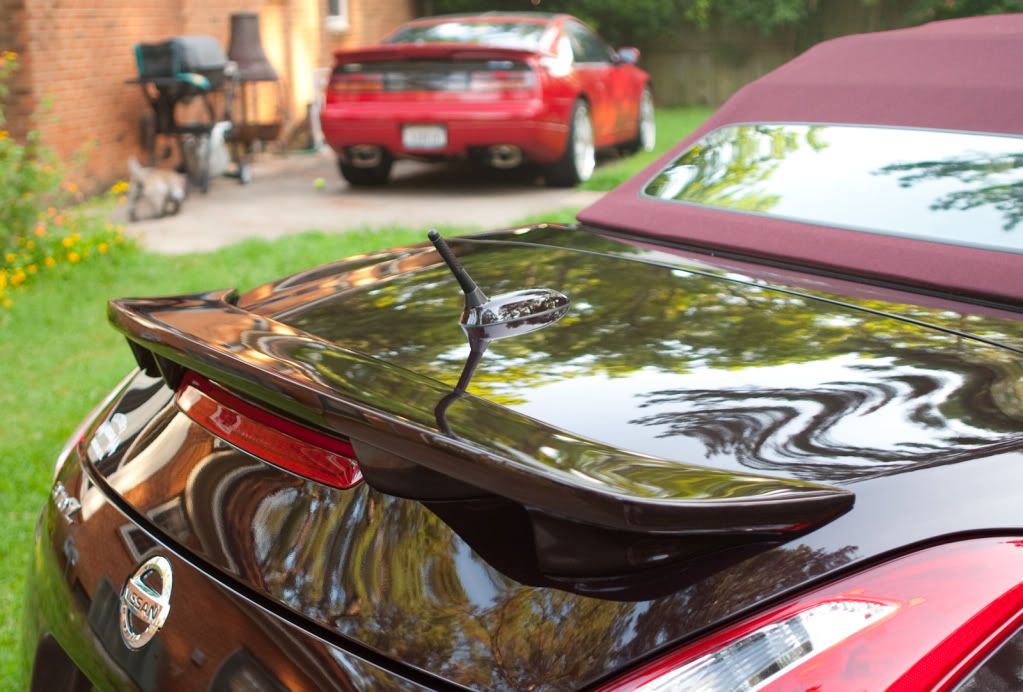 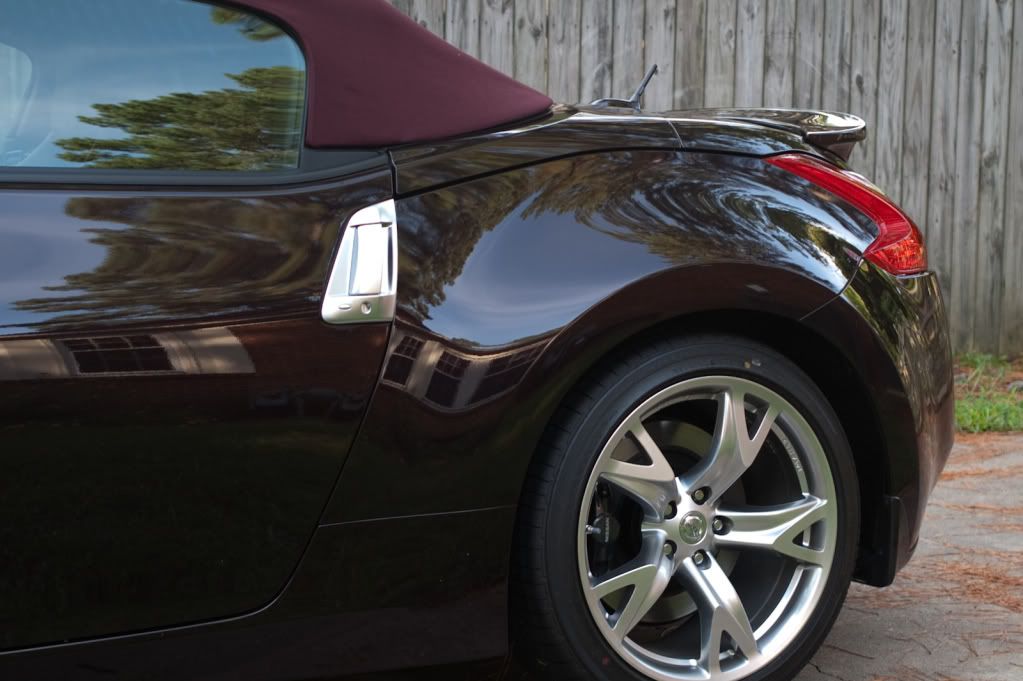 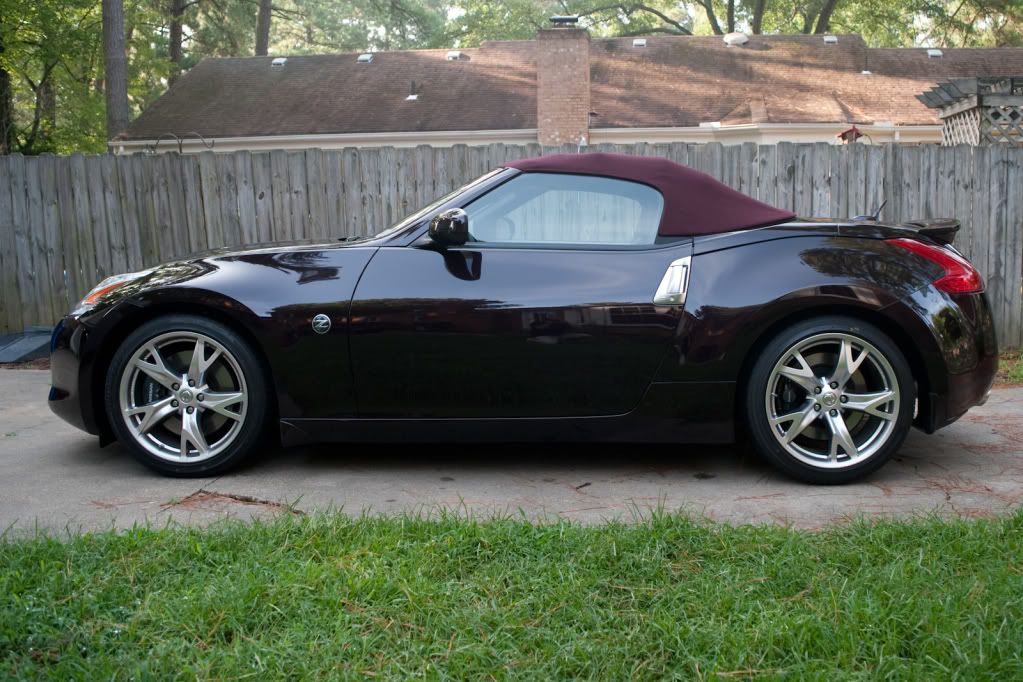
__________________
'10 ZR Black Cherry Sport/Touring/Nav, Swift Springs, Stillen G3s, 15mm-F 20mm-R Spacers, SPC, Spoiler Solutions Rear Wing, Stubby Antenna 
|
|
|

|
|
|
#4 (permalink) |
|
Track Member
Join Date: Jul 2009
Location: Colorado
Posts: 746
Drives: '10 BC ZR T/S/Nav
Rep Power: 17     |
These are the only shots I took from the back. I will get some from a lower perspective and post them too.
  Thanks! I am really happy with it.
__________________
'10 ZR Black Cherry Sport/Touring/Nav, Swift Springs, Stillen G3s, 15mm-F 20mm-R Spacers, SPC, Spoiler Solutions Rear Wing, Stubby Antenna 
|
|
|

|
|
|
#6 (permalink) |
|
A True Z Fanatic
Join Date: Sep 2009
Location: Mod Capital of Canada
Age: 58
Posts: 7,354
Drives: cars. lots of cars.
Rep Power: 40182            |
Did you get any shots of the trunk with just the holes drilled for position?
__________________
 H&R / Stillen / Berk / HKS / Swift / Michelin / UpRev / SPC / Amuse Rep / Seibon / Fringe XVO / TWM / more... My Journal |
|
|

|
|
|
#7 (permalink) |
|
Base Member
Join Date: Jan 2013
Location: Lake Martin, Alabama
Posts: 138
Drives: 2013 370Z 6 speed
Rep Power: 249            |
That looks excellent! It really does cure the bubblebutt look.
Is it the same spoiler that is stock on the coupes, or is it modified ? 
__________________
"Take the cannollis..." |
|
|

|
|
|
#9 (permalink) |
|
Base Member
Join Date: Sep 2012
Location: Morgantown, WV
Posts: 217
Drives: 2010 Z Roadster
Rep Power: 30            |
Mine arrived this week. Might heat up the garage this Sunday.
uploadfromtaptalk1363790588787.jpg --Sent from Galaxy Note while driving with eyes closed. |
|
|

|
|
|
#11 (permalink) |
|
Base Member
Join Date: Aug 2015
Location: Minneapolis
Posts: 3
Drives: 2010 370Z Roadster
Rep Power: 10  |
Looks beautiful! Question: Did you leave the kind of rubber gasket material along the perimeter of the mounting surface of the spoiler when you installed?
|
|
|

|
|
|
#14 (permalink) |
|
A True Z Fanatic
Join Date: Jun 2015
Location: Central Florida
Age: 65
Posts: 8,409
Drives: 21 Supra -Blk/Red
Rep Power: 2684380            |
I just checked eBay and the red spoiler for mine was on sale for $274 shipped.... Heck what could I do?
Decisions, decisions.... Anyhow its supposed to arrive next Friday... Last edited by Spoiler; 01-29-2016 at 05:13 PM. |
|
|

|
|
|
#15 (permalink) |
|
A True Z Fanatic
 Join Date: Jan 2016
Location: Indian Lake Estates Fl
Posts: 1,049
Drives: 14 370Z TS Roadster
Rep Power: 19128            |
Spoiler, I have a Blackcherry one on the way also. Should be here sometime this coming week. Now all I have to do is get up enough nerve to drill those holes in the trunk lid.
Dan |
|
|

|
 |
| Bookmarks |
|
|
 Similar Threads
|
||||
| Thread | Thread Starter | Forum | Replies | Last Post |
| Rear Spoiler on the Roadster | tigershak | Nissan 370Z Roadster (Convertible) | 94 | 05-14-2012 01:35 PM |
| 2010 370z OEM Front Spoiler Install | yodaz | Nissan 370Z General Discussions | 12 | 04-01-2010 12:03 PM |
| Brand spankin' new rims for the 2010 370Z Roadster?? (spoiler) | AK370Z | Nissan 370Z Roadster (Convertible) | 33 | 11-21-2009 01:09 PM |
| New promo Roadster video from Japan! (spoiler! new rims from Nissan) | AK370Z | Nissan 370Z General Discussions | 0 | 09-12-2009 04:38 AM |