 |
First off, thanks to ENT-Z for his DIY Install Procedures on his unit. Instead of installing the unit on the bottom of the vehicle, this thread covers the option of
|
|||||||
|
|
LinkBack | Thread Tools | Display Modes |
|
|
#1 (permalink) |
|
A True Z Fanatic
Join Date: Feb 2009
Location: SATX
Posts: 2,813
Drives: 09 370Z TT 6MT
Rep Power: 30            |
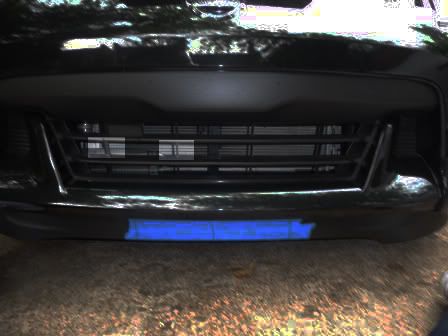
First off, thanks to ENT-Z for his DIY Install Procedures on his unit. Instead of installing the unit on the bottom of the vehicle, this thread covers the option of mounting the unit in the grill area of the stock front bumper.
I found the unit at Yates Performance for $119.95 with free shipping. 2008-2010 Dodge Challenger Show-N-Go Retractable License Plate Frame  These kits are universal for the most part, so I just used the Dodge Challenger kit as it was one of the cheapest (for some reason, the Corvette kits cost more). In addition to the kit I used the following tools:
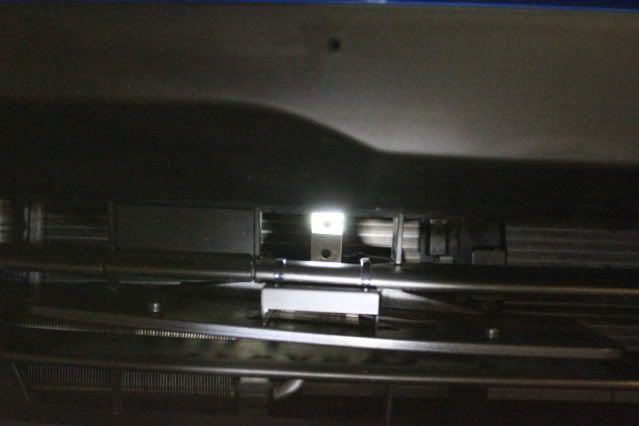
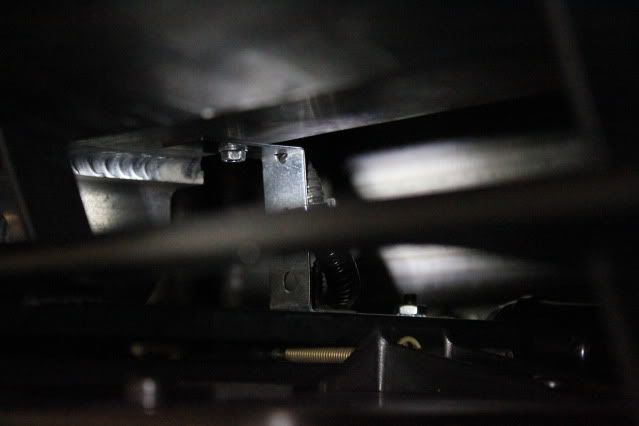
------------- First remove the plastic undertray. I used AK's DIY for the oil change. If you need the car higher, feel free to jack the vehicle up, or use ramps. I did this install with the car on the ground, but it would have been easier if the car was raised. Installing in the grill area will require cutting of the black plastic in the center area of the grill. I had to cut 2 of the small vertical beams on the bumper, which is can barely be seen when looking at the car. I borrowed a pic from ENT-Z to show which beams were cut. (Beams are in the lightened boxes)  Just use your hack saw or equivalent to cut these pieces. I tried to cut them as flush as possible on the bottom. Slide your show-n-go assembly in through the grill area. If you need a little more room to work with, you can always pop out the tow hook cover. I used some plastic ties for the front support of the bracket to the horizontal black grill piece. I mounted mine to the right of the tow hook access plate. This allows the tow hook to still be functional with the plate in the down/hidden position.  Since the black ties are used, there is hardly any noticeable evidence if the unit is removed from the car in the future (no screw holes etc). If you'd like to use screws or double sided tape feel free, but I felt that the zip ties offered a more reliable option with less hassle. (Note: If you need to slide the plate frame from the hidden to exposed position, you can do this manually with you hands, but be sure to slide the plate slowly) Once the front of the assembly if secure to the horizontal grill beam, we need to mount the rear. For the rear support of the bracket, I made a Z-shaped bracket out of their supplied metal and drilled a small self tapping screw into the bottom of the aluminum bumper beam. I attached the bottom of the bracket to the assembly using the supplied hardware.  After this is secured, simply screw your license plate on with the supplied screws. Of course, you may need a few test fits to get everything just right. The clearance spaces are small, but there is enough to work with, trust me. This is what the unit looks like in the hidden position.   All that is left is the wiring. Wiring is very simple for this kit and instructions are included. They can also be downloaded here. I mounted the control box in the battery compartment so it is hidden from view. I ran the wires behind the engine compartment side trim, and all the way down to the show-n-go assembly. The unit instructions say that you can get power straight from the battery since it uses an extremely low current draw. I used the neg terminal ground, and tapped power off of the alternator fuse (which is also located in the battery compartment). The plate is very secure and works flawlessly. It is mounted in a recessed part of the grill, so it doesn't protrude out very much. Unless someone is carefully looking, they will not notice the plate and bracket in the hidden position. Plus, since it is mounted in the grill area, there no chance of bottoming out the front end and scraping your license plate  Here's a video of the operation, just click on the picture. (sorry for the low lighting, photobucket darkened it quite a bit)  Rep if you find this useful 
|
|
|

|
| Bookmarks |
|
|
 Similar Threads
|
||||
| Thread | Thread Starter | Forum | Replies | Last Post |
| DIY: Front license plate bracket Install | AK370Z | DIY Section (Do-It-Yourself) | 51 | 09-22-2020 12:38 PM |
| DIY: Power Retractable Front License Plate Install | ENT-Z | DIY Section (Do-It-Yourself) | 36 | 09-27-2012 02:20 AM |
| Front License Plate | SBZ | Southern California Region | 24 | 03-23-2010 10:23 AM |
| Please put your front license plate on | AK370Z | North East Region | 36 | 08-24-2009 02:30 PM |
| custom license plate show off | thispecialk | Nissan 370Z General Discussions | 1 | 08-04-2009 10:56 AM |