
|
OK!!! I know everyone wants to get the scoop on this so let's get started. First of all, this is a VERY easy mod, no troubles what-so-ever! I won't cover
|
|||||||
|
|
LinkBack | Thread Tools | Display Modes |
 04-10-2010, 02:28 PM
|
#1 (permalink) |
|
A True Z Fanatic
Join Date: Sep 2009
Location: Mod Capital of Canada
Age: 58
Posts: 7,354
Drives: cars. lots of cars.
Rep Power: 40182   |
OK!!! I know everyone wants to get the scoop on this so let's get started.
First of all, this is a VERY easy mod, no troubles what-so-ever! I won't cover the basics like wheel or brake caliper removal as they're already covered in other DIY articles. http://www.the370z.com/diy-section-d...ent-front.html http://www.the370z.com/diy-section-d...r-install.html Let's focus on the stud replacement! 1) Get a good set of wheel spacers and studs like these H&R 20mm's from Josh at Stillen 2) Remove the wheel and brake caliper and then remove the adjustment cover on your rotor. ** If your wheel rotates freely with the hand brake off, you do not need to adjust this star adjuster** If it does not move freely, back off the star adjuster a couple of clicks with a screwdriver to loosen the park brake. Count the clicks so you can reset it on re-assembly! 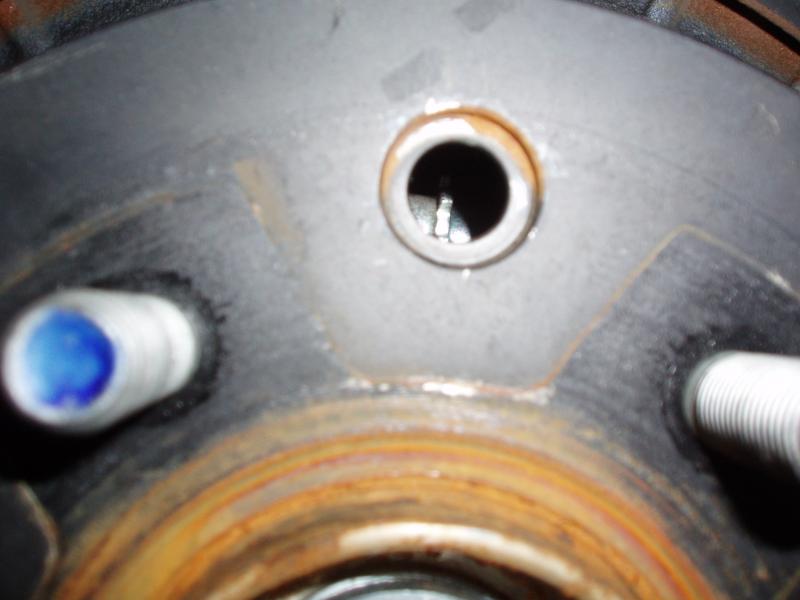 3) Remove the rotor and your rear brake assembly should look like this. 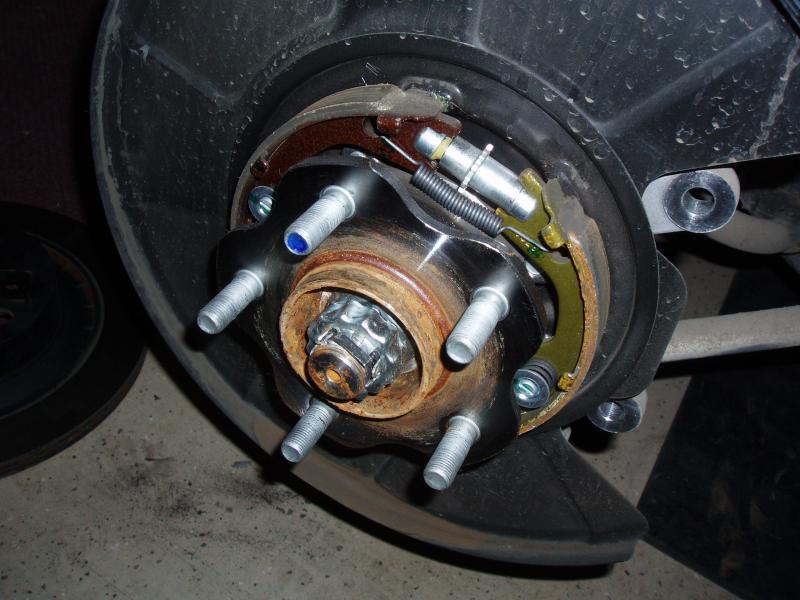 4) Remove the tensioning spring holding the brake shoes together. 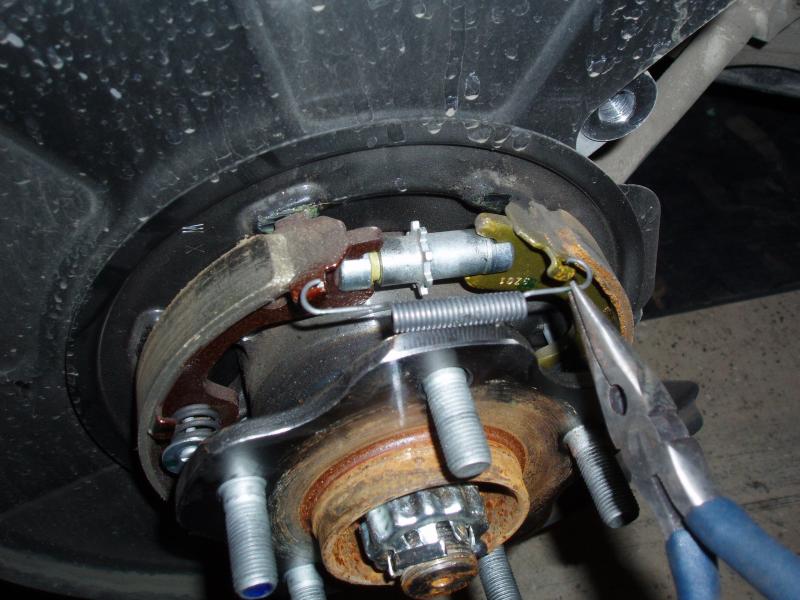 5) Remove the star wheel assembly carefully, it is two pieces and will fall apart. 6) Screw on the M12 x 1.25 open ended lug nut and tap out the old studs. This is a pic from the front rotor but same idea.... 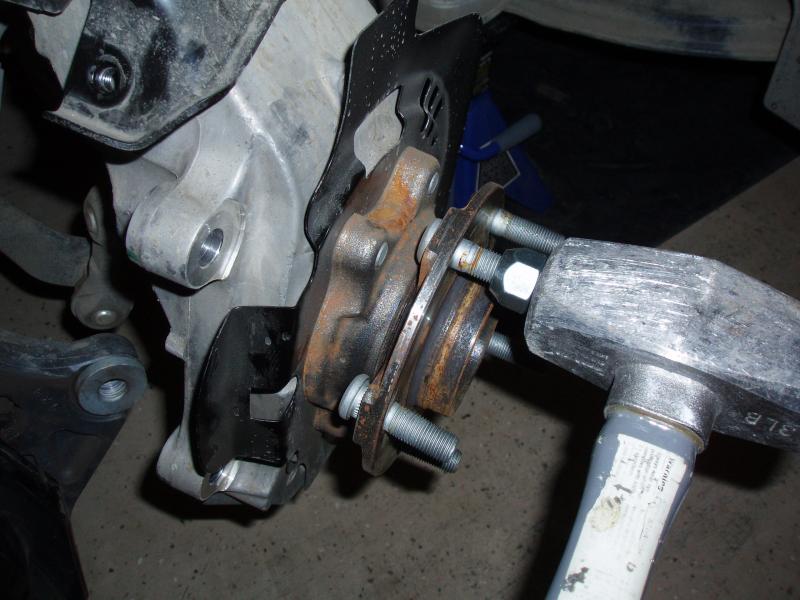 Slide new studs through from the rear and on a slight angle into the hub. 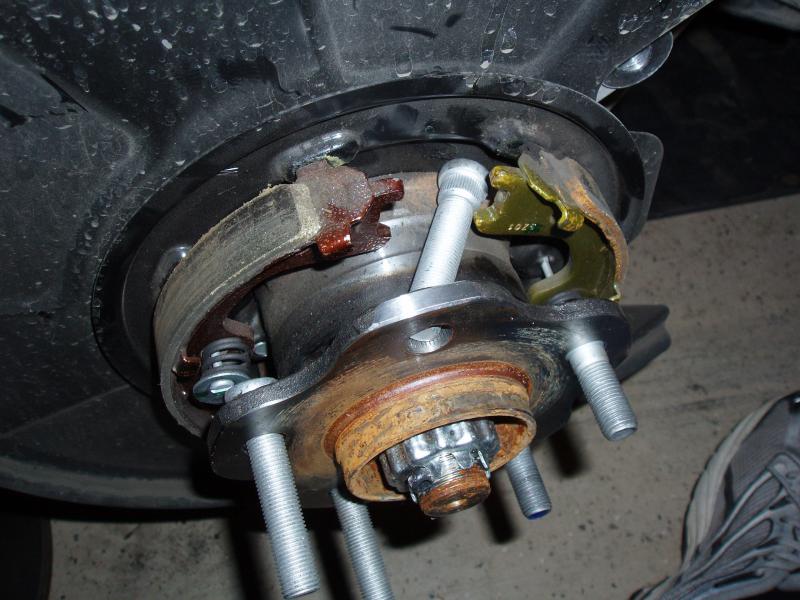 7) Tighten down the studs as you replace them. Use a bunch of washers and and open ended lug nut to pull them into seated position on the hub. M12 x 1.25 nut is required. Use an electric impact drill to seat them easily. This picture is from the front assembly, but you get the idea! 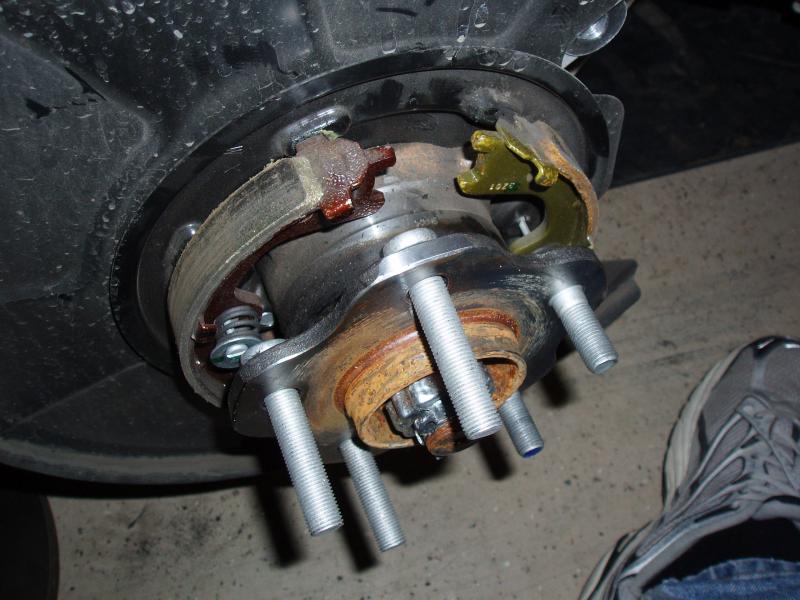 8) Reinstall the star wheel and spring tensioner. 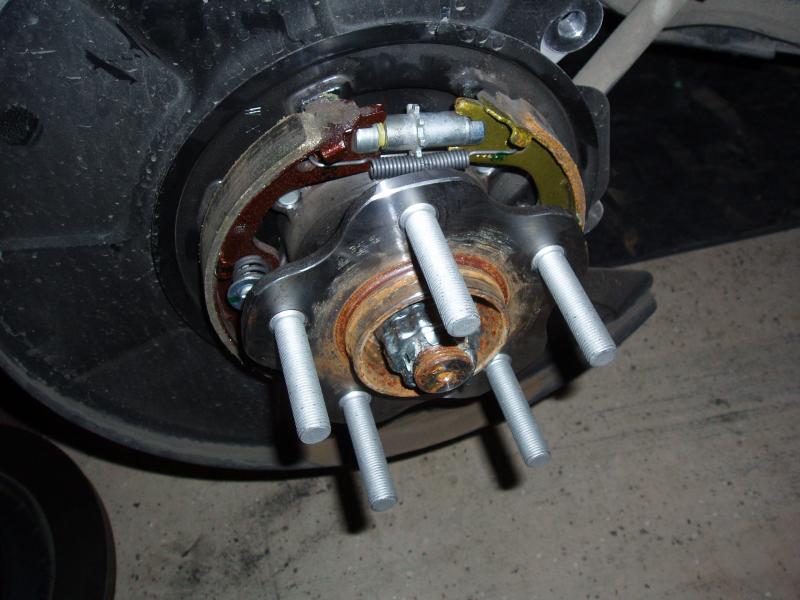 9) Replace the rotor and readjust the star wheel for proper tension. Add a layer of 'never-seize' to the back of the spacer and mount it on the rotor. Use two open ended nuts with washers to tighten the rotor into place. Replace the brake caliper. 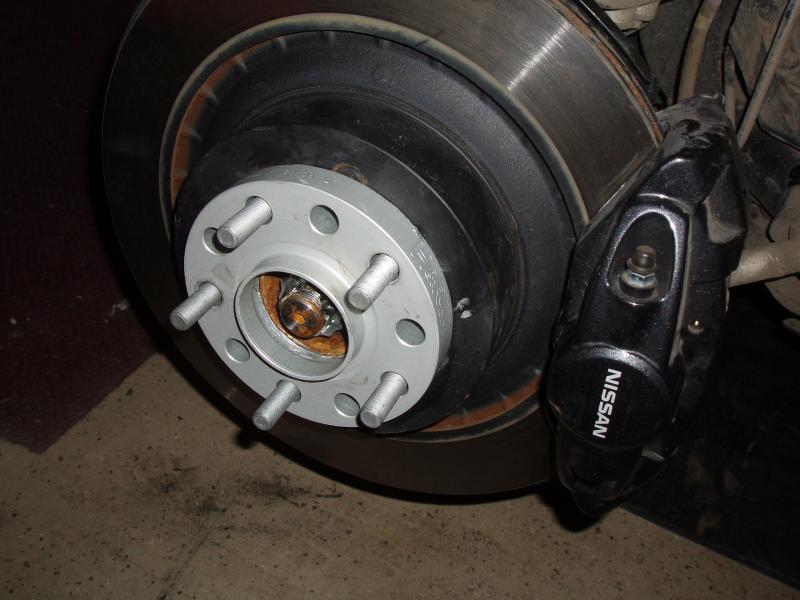 10) Remount the wheel!! 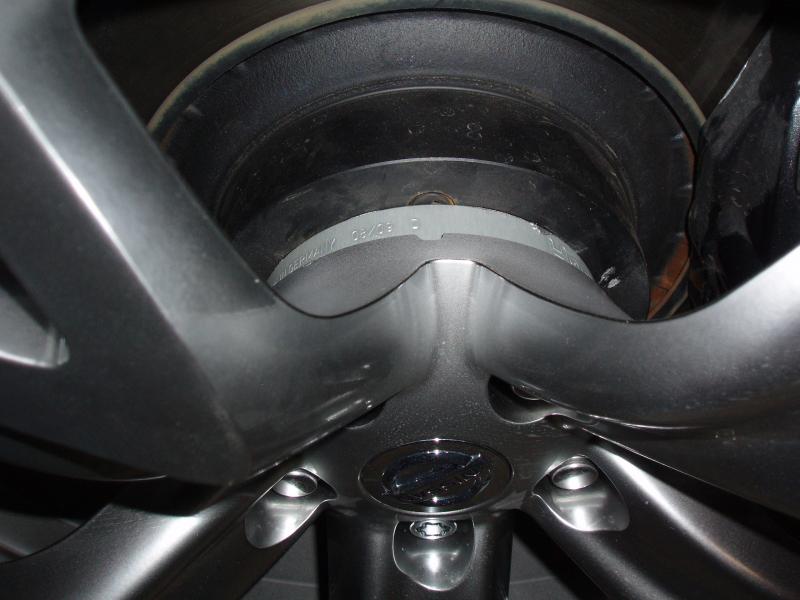 That is it! No big deal at all. Rep points appreciated if you found this helpful! Finished shots: 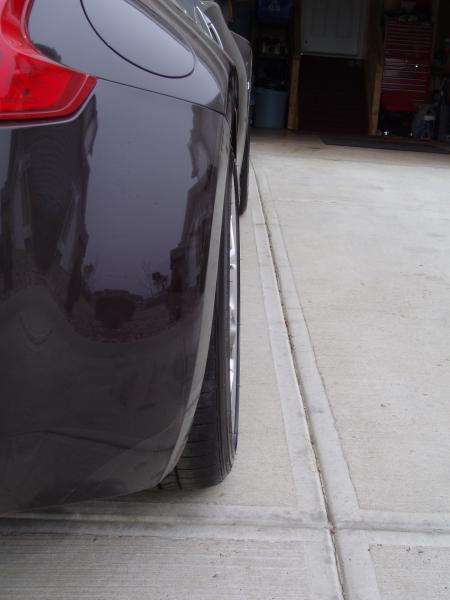  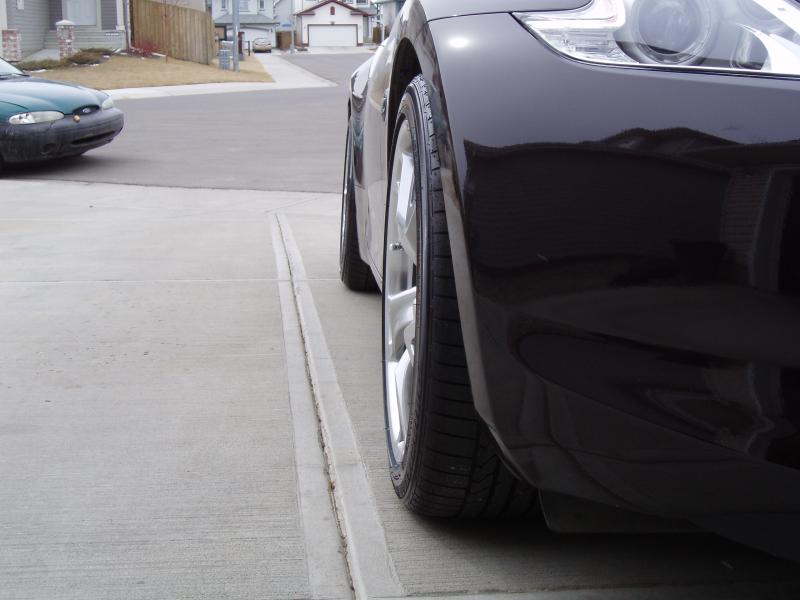
__________________
 H&R / Stillen / Berk / HKS / Swift / Michelin / UpRev / SPC / Amuse Rep / Seibon / Fringe XVO / TWM / more... My Journal Last edited by wheee!; 01-29-2013 at 07:30 AM. |

|

|
| Bookmarks |
|
|
 Similar Threads
|
||||
| Thread | Thread Starter | Forum | Replies | Last Post |
| H&R 20mm Stud-Replacement Front Spacer Install | Alstann | Wheels & Tires | 8 | 03-03-2019 05:39 PM |
| [WTB] 20mm DRS spacers!! (stud replacement) | ts-c63 | Parts for sale (Private Classifieds) | 2 | 03-25-2013 10:47 PM |
| [FOR SALE] 20mm h&r built in stud spacers | memorylasts | Parts for sale (Private Classifieds) | 5 | 02-27-2012 05:29 PM |
| LTT H&R 10mm Stud Replacement Spacers for 15mm stud replacement H&R | chuckd05 | Parts for sale (Private Classifieds) | 5 | 02-16-2011 05:05 PM |
| FS: Ichiba V1 Stud Replacement 20mm Wheel Spacers | toxik | Parts for sale (Private Classifieds) | 9 | 01-19-2011 05:11 PM |


 10Likes


 Threaded Mode

