
|
I know I know, there are 13,000 threads on how to hard wire these things in. This is partially a log for myself, as well as to help anyone who
|
|||||||
|
|
LinkBack | Thread Tools | Display Modes |
 03-02-2010, 06:38 PM
|
#1 (permalink) |
|
Base Member
Join Date: Mar 2010
Location: 370z
Posts: 178
Drives: 09 Touring
Rep Power: 16  |
I know I know, there are 13,000 threads on how to hard wire these things in. This is partially a log for myself, as well as to help anyone who had to try and find all the information between each of those threads just to get it working right.
So I called v1, asked for a refurb as MANY formus said to do. Unlike others they told me they had a refurb in stock and sent it right away. $370.41 shipped, so ~10% off, not bad. Parts: Valentine 1 $370.41Cap Screw Socket (5mm x 20mm) to fix countryjoycrafts 3/4" mount $.66 Tools: Phillips & Straight screw driverReferences: Fuse tap: Easy & Clean Radar InstallInstall: ----------------------------------------------------------------- To start, I got the Z mount for the V1 off of another forum for half price. It was from a G37 owner who said it didn't fit his car, but it would a 370z. Well, although I thought that could be wrong, at half price I did it anyways. Well, I was wrong, it didn't fit. But with new bolts (see parts) and a dremel, you can make anything happen. The screws I got were longer, but didn't have the correct thread count. They only went in a little bit, but it was enough to make it work. See picture! 1. Remove the rear-view mirror (see references). This will make running the cable easier. 2. Now with the rear view mirror gone, run the phone cable up to the head liner and to the driver side A pillar. 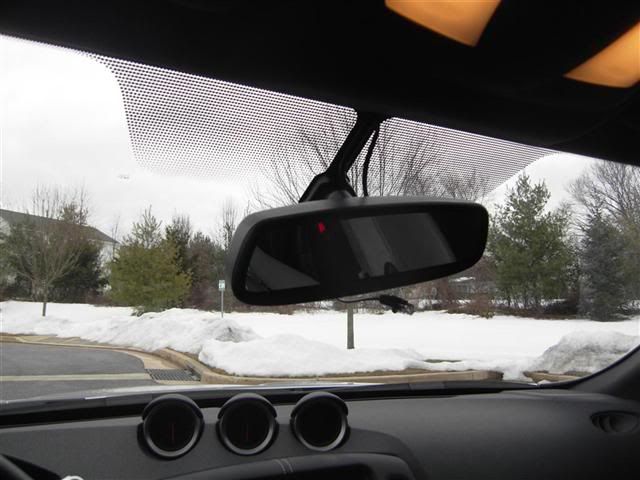  You want your cable to go PAST the rear view mirror cable (homelink) power cable, and under it. 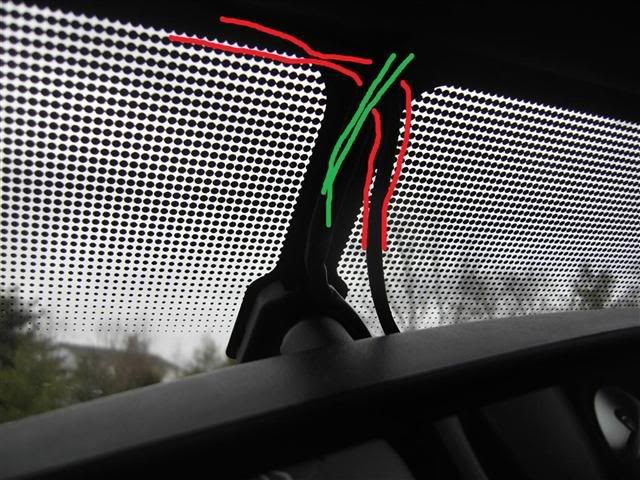 3. Attach your v1 mount to the rear view mirror. In my case if you bought the one that is too small, some m5 replacements that are longer are ~.66$ at Home Depot. Although there is still a gap, its functional, and no one ever sees back there. 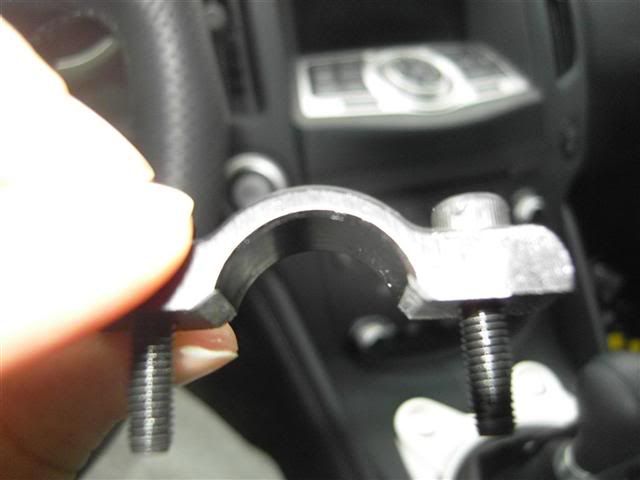  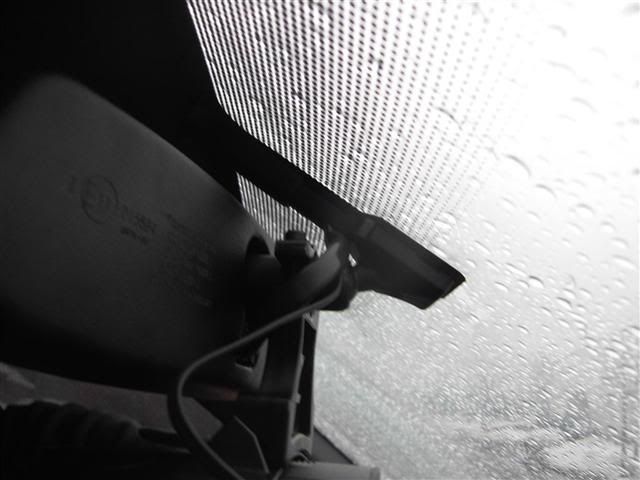 (notice how i dremeled the curve out a little on the bottom, and have longer screws. 4. Re-attach the rear view mirror, and when putting the black plastic cable management piece back on, run your phone cable the same way the homelink cable is. 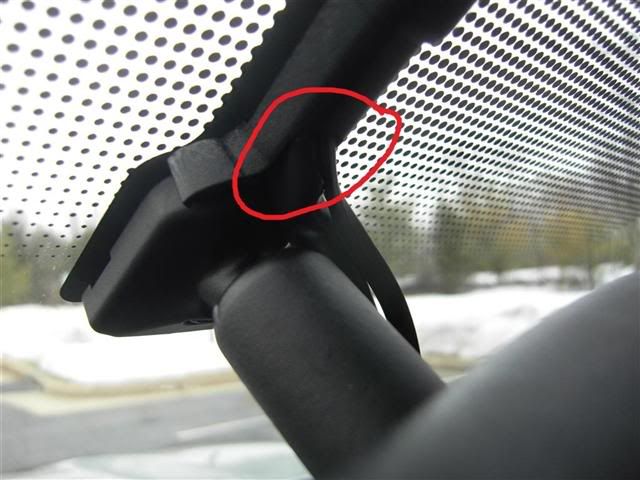 5. Now, slightly detach your a-pillar, you can do this with your hands, just grab and tug/rock it, you only need a little clearance. Run your cable to the weather stripping. 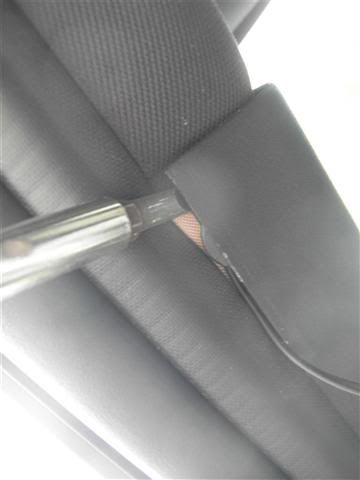 6. With a flat head, run your cable down the weather stripping to the bottom corner molding. 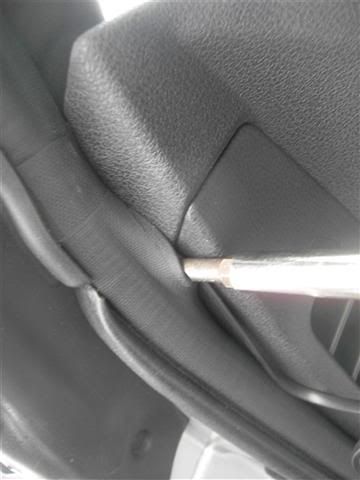 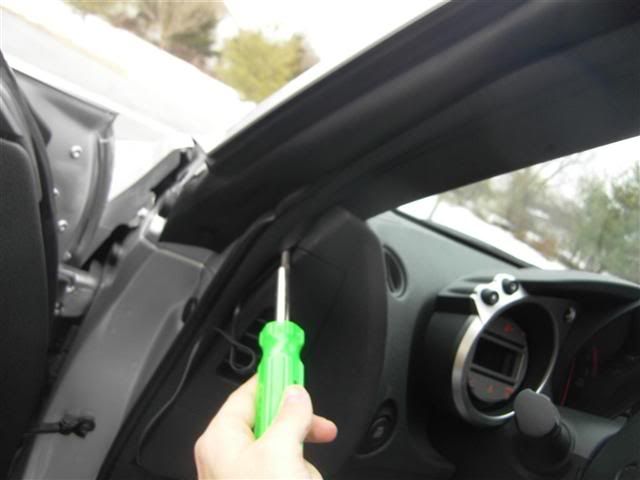 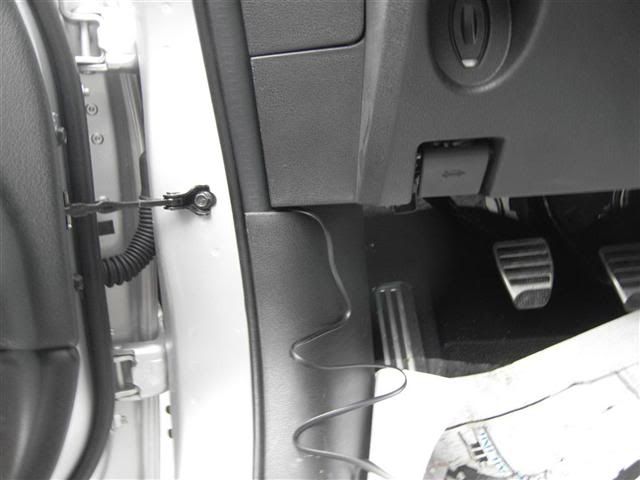 7. Remove this bottom corner molding, there is a plastic type nut by the clutch, then it has 2 clips that pop off just by tugging. You have to detach the door sill plastic piece from this corner piece to get it free. 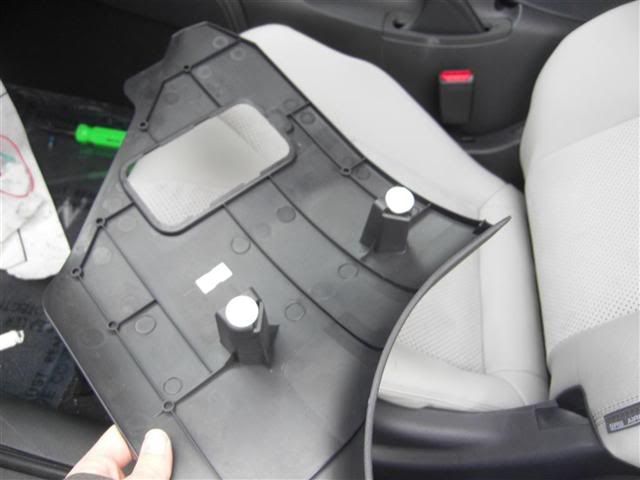 8. I mounted my hardwire kit on a piece of white plastic above the fuse box by the feet. There is enough room there so it is out of the way, yet still accessible. 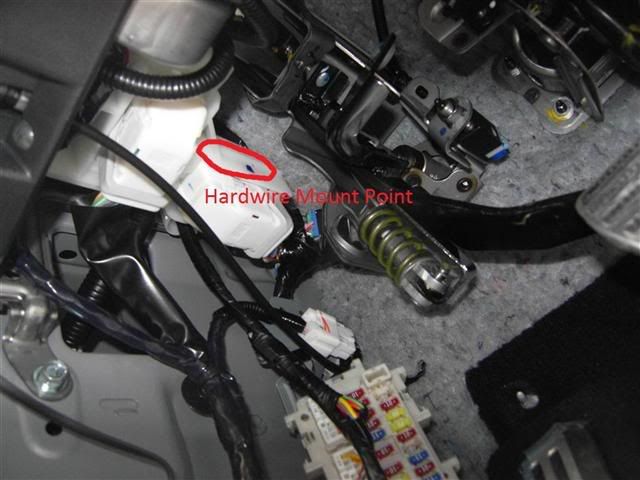 9. Mount the piece, and run your phone cable behind all of the wiring there to the cylinder. 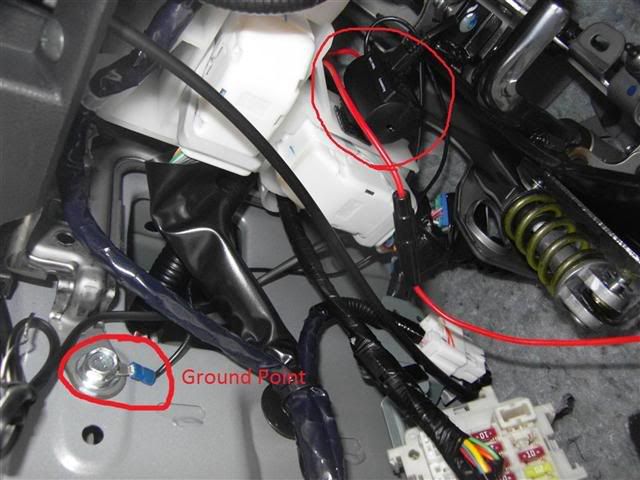 10. Run your ground wire the same way the phone cable is, and there is a bolt that can be used as a ground. You will have to expand the prong on the ground wire, but no biggy. Bolt is a size 12mm. 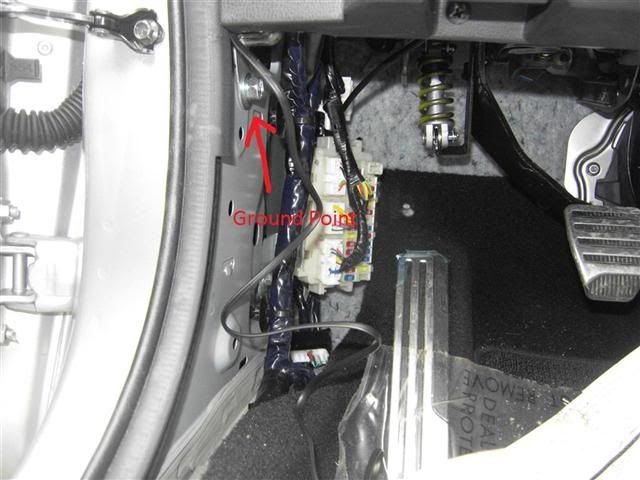 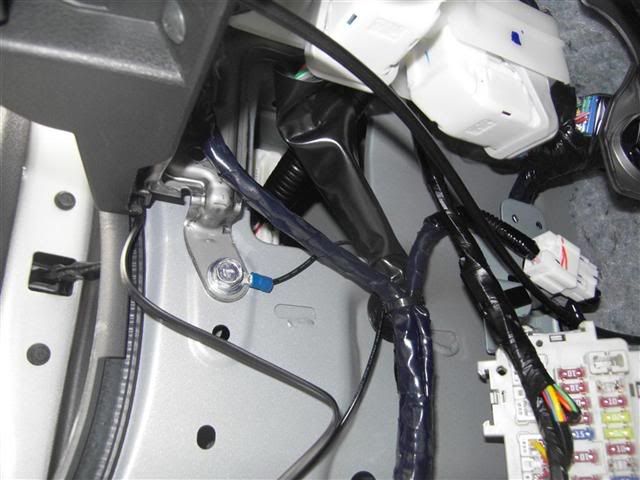 11. Cut the end off of the red cable from the hardwire kit, it is not needed. 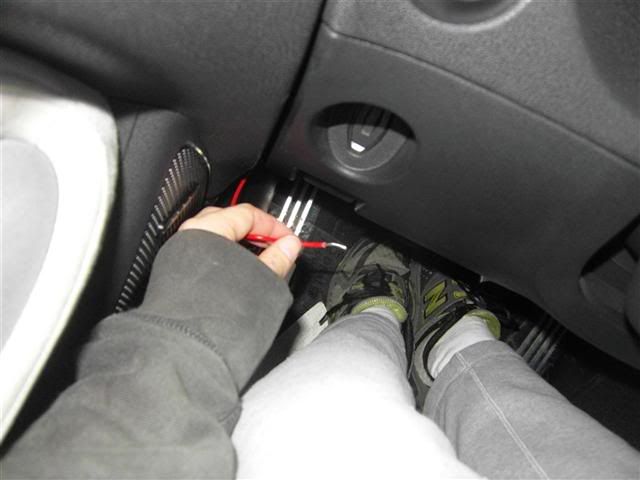 12. With fuse add-a-line kit, put the 2 fuse in the top, section by the wire that comes off, and now crimp the end of the wire to the red wire from the hardwire kit. 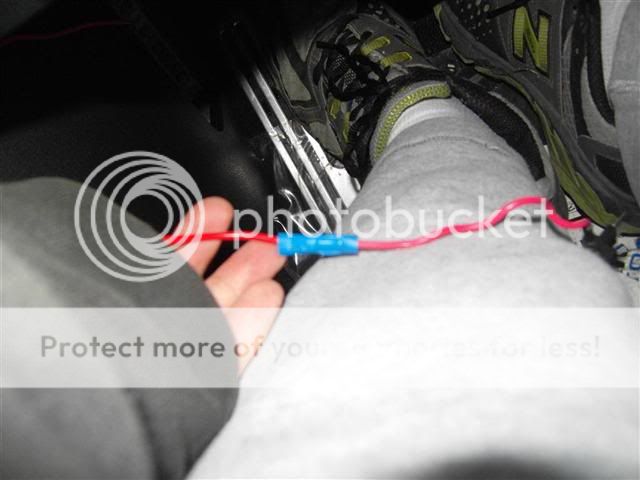 13. Remove the 15 mini-fuse from the right side of the fuse box; it should be the 5th down (cigarette lighter). Put in your add-a-line kit so the wire goes to the LEFT.  14. Turn on the car (acc), and your radar should start up. If it doesn't, check your fuse is in, not blown, in the correct spot, and not with the cable going to the clutch. 15. Remove your add-a-line kit, and add put a 15 mini-fuse in the bottom spot of the add-a-line kit. Plug the kit back in, and put everything back on, you’re done! 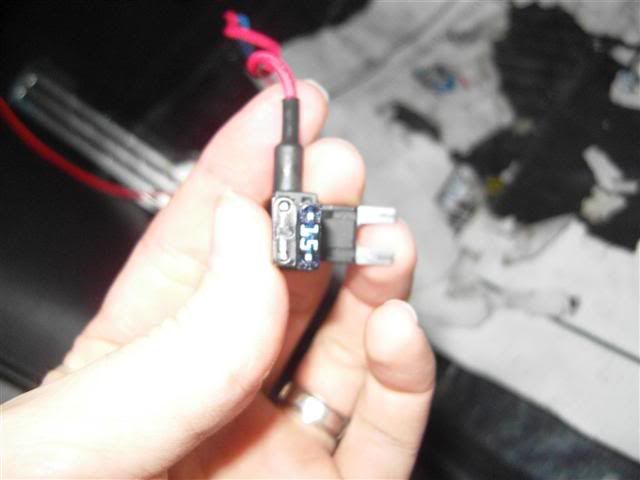 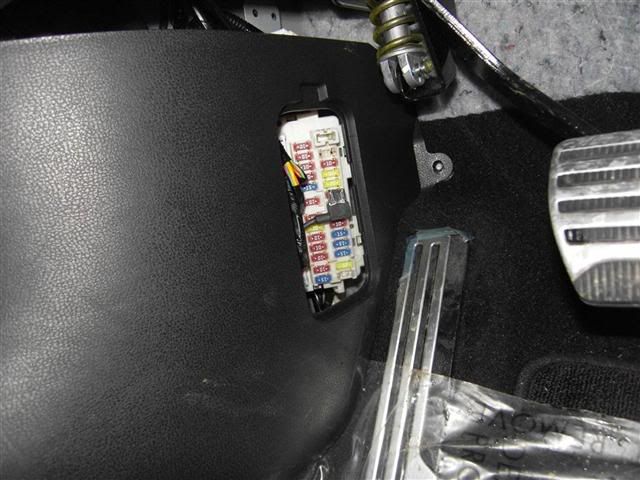 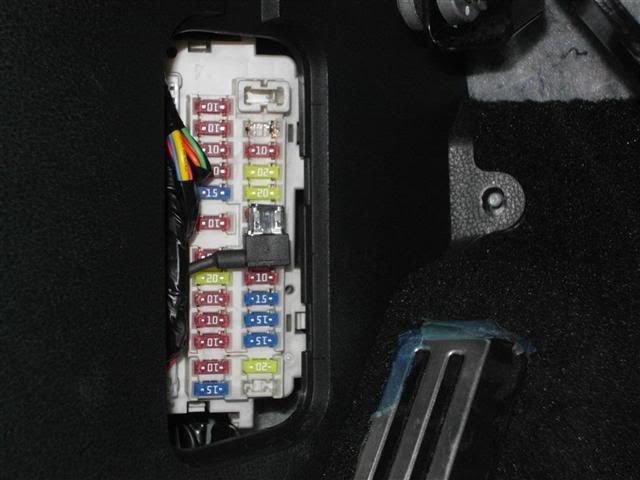 Finished Product: 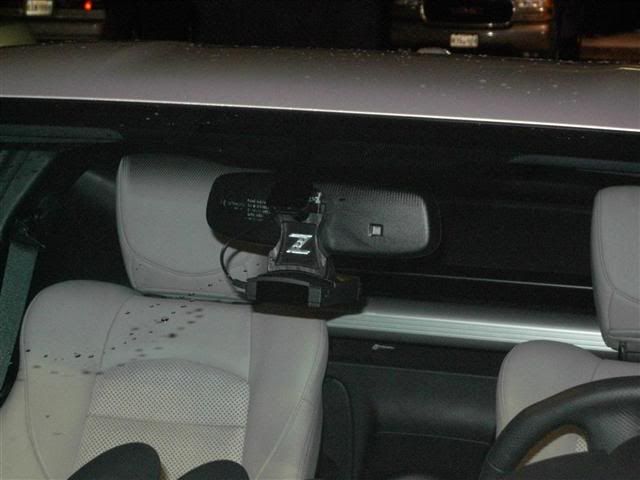 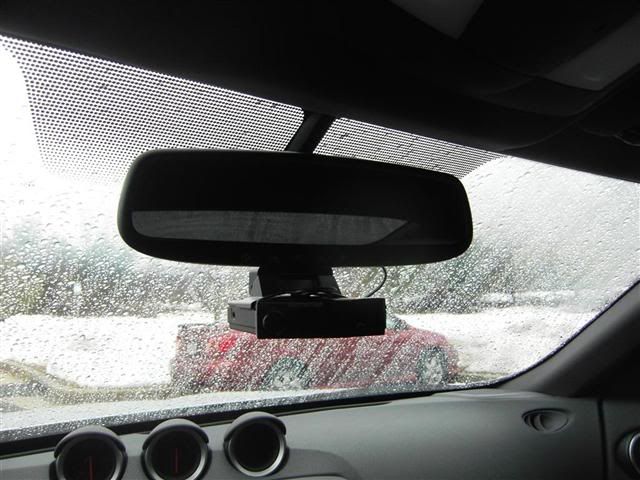
Last edited by rarwz; 03-03-2010 at 08:06 AM. Reason: added $ to prices, changed to photobucket to have pix inline |

|

|
| Bookmarks |
|
|
 Similar Threads
|
||||
| Thread | Thread Starter | Forum | Replies | Last Post |
| Escort vs Valentine | AndyZ | Nissan 370Z General Discussions | 13 | 02-10-2010 12:50 AM |
| WTT: Valentine 1 + Metal Z Bracket for your 9500ix | molamann | Parts for sale (Private Classifieds) | 1 | 02-04-2010 02:30 PM |
| Valentine One | CrownR426 | Wanted | 3 | 08-28-2009 01:49 AM |
| Valentine one | armensti | The Lounge (Off Topic) | 13 | 04-06-2009 08:59 PM |
| Hardwire Radar Detector | zero610 | Audio & Video | 7 | 03-04-2009 07:52 PM |


 Threaded Mode

