
 |
Hello everyone! I happen to have an early set of the Finite Element Design front fender vent inserts and thought it might be good to share my experience with the
|
|||||||
|
|
LinkBack | Thread Tools | Display Modes |
|
|
#1 (permalink) |
|
Enthusiast Member
 Join Date: Jun 2013
Location: Huntsville, AL
Posts: 406
Drives: MB 370z
Rep Power: 12      |
Hello everyone! I happen to have an early set of the Finite Element Design front fender vent inserts and thought it might be good to share my experience with the install process. I'm going to assume if you're willing to chop holes in your car you've done a little bit of work on your Z before this so I'm not going to go into super detail with the dissemble of the car. This is my account of the install so I'm sure you'll have better ideas along the way so feel free to add to this post.
Alright, lets get to the small novel that is this install process! My apologies on the photos being in weird orientations... Iphone problems... Tools and Supplies: Cutting Tool: I used a combination of a Dremel and a cordless angle grinder with a cutting disc and later a grinding disc. More on this later. Painter's Tape: I used this to cover the fender so I could draw the pattern on it. Sharpie(s): Trace the pattern onto the car and mark areas that need to be further modified. Flat Head Screwdriver: I use this for the snap clips that hold the fender liners on because I've not gotten around to buying a proper tool #2 Phillips Screwdriver: There are a couple of screws in the fender liner that are only Phillips pattern. 10mm socket and wrench: There are a couple of bolts in the fender liner that are the typical 10mm. Something to Secure the vents: I am using bolts, washers, nylock nuts, and double sided foam tape on mine. If you're a show car you might consider using panel bond and a lot of clamps. If you're just a race car you might also consider rivets. May the force be with you. Optional: Black Spray Paint: I used a Rustoleum black paint to cover the area of the frame rail that was just grey Ecoat. I'm a little OCD so this is just a suggestion. Hand File: I used this to clean up the edges of the cut that can be sharp and have burs. Again OCD... Primer: I (plan to) used some metal primer to coat the cut edges to reduce the likely hood they will rust as the car sees rain and other water. Patience: You'll figure out why. ShopVac: Cause you're gonna make a MESS and this is the easy way to clean it up. Preparations: I chose to do this install on the car as I still daily it and wasn't sure how long it was going to take. I washed the car so the painter's tape will stick well and then pulled it into the garage to work! Before I taped up the fender I checked the 3D template to see where I needed to cover the fender with tape. 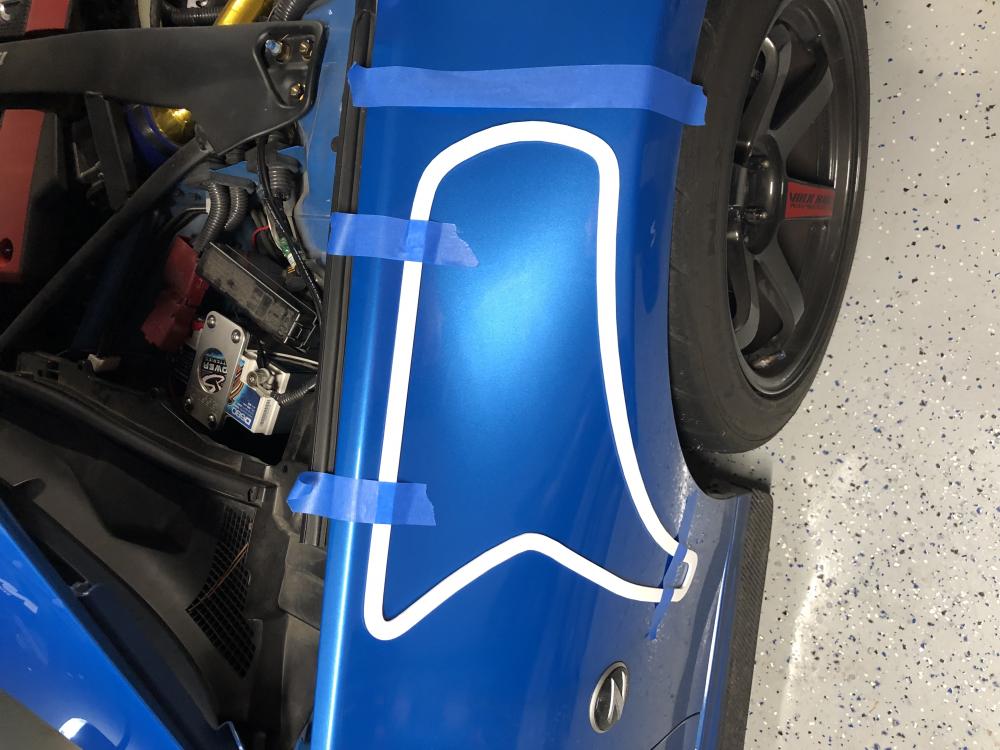 Next I taped up the fender and then aligned the template back on the fender. I had no real reference for positioning so I tired to keep the curve of the vent parallel to the curve of the wheel well. The 3D template only really sits flush in one certain area so it's not as bad as it sounds. Once I was happy with it I traced the template and removed it to keep from damaging the template. You can see where I messed up once before, that's why I taped the fender! 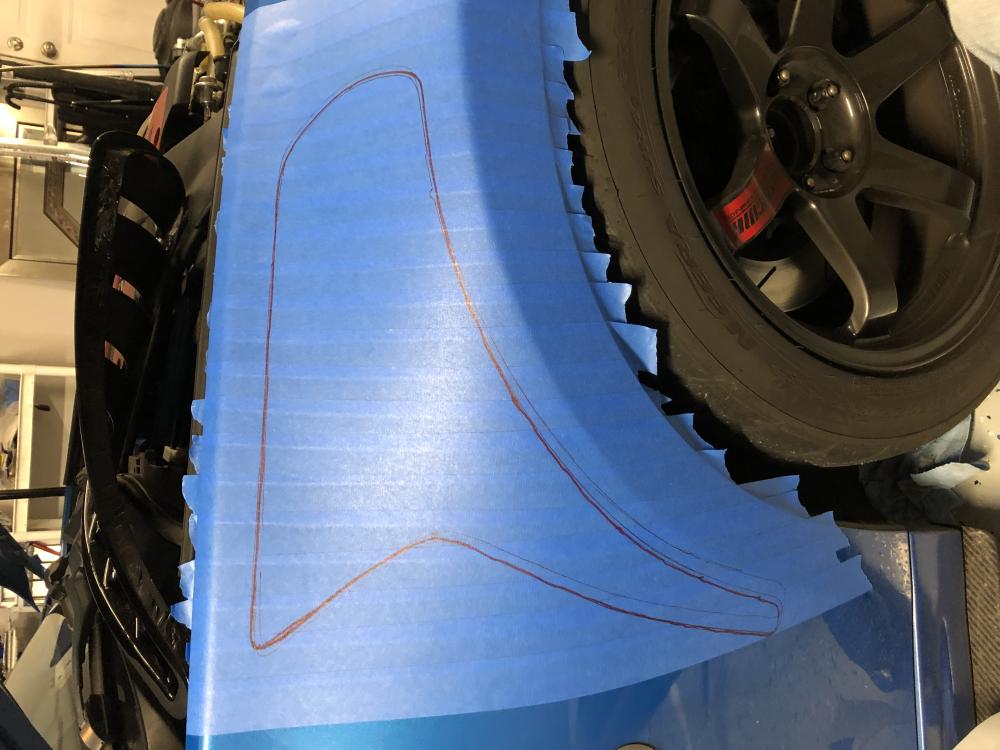 Next comes the really fun (and frustrating) part: Cutting and then making the vent fit. I made the this cut to the inside of the template line thinking I would just need to go to the line for it to fit. That was a poor choice. I chose to attempt this mostly blind so I didn't bother Kevin a lot and I wanted to provide honest feedback of the process. All of that said, having finished this I recommend cutting on the line you draw. You need some extra space to get the vent into the fender but don't go crazy as you need the metal close to the vent to put some sort of fastener or glue on it to secure it. I did this initially with a Dremel and it caught on fire mid way through. I bought a larger Dremel and eventually got tired of the snail's pace I was working at and opted for my angle grinder with a cut off wheel. In hindsight, I would recommend using the cut off wheel to make the larger, straighter cuts then use a Dremel or some smaller tool to make the tighter cuts. Another bit of advice from experience is to cut the bottom smaller area more square than the template shows. If you are using the "metal" cutting discs for a dremel keep many of them on hand. I went through 3-4 discs cutting this fender. That may be a way I was cutting and not the discs but it felt like the dis material was losing vs the steel of the fender. I also had to spend a lot of time on the passenger side grinding on that area for fitment and finally settled on "good enough for now" due to the approaching holidays. For some reason my family doesn't like me hiding in the garage making noise during Christmas. I don't understand why... I'm going back into that side to open it up a bit more once my final hardware arrives from my favorite Ti bolt supplier. Anyway, compare this photo to the driver side later in the post and you can see what I mean about the bottom area. The passenger side I spent about 20 hours over a couple of days slowing grinding away to make the cut out larger enough for the vent. Don't worry though, I think the driver side took 6-8 hours in comparison. 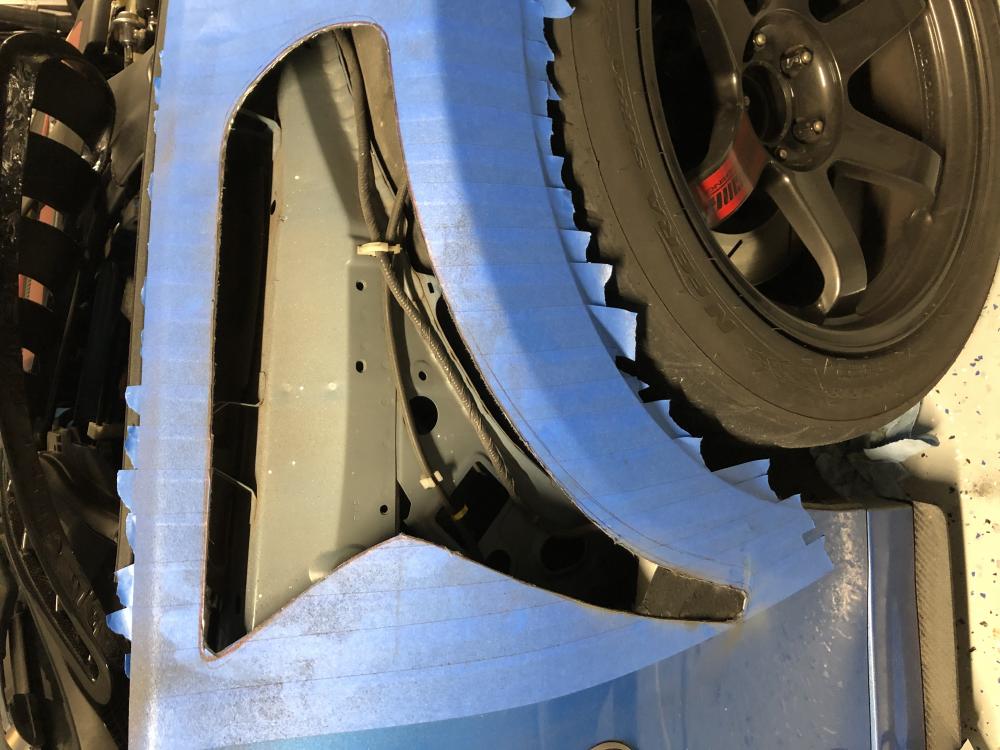 Another view of the large hole. Don't mind the washer hose that is hanging out, I was in the middle of removing it (race car things) when I took this. Also notice I have left the fender liner in up till now. I did this in an effort to keep all that dust and debris out of the fender well and my brakes. You can remove it ahead of time if you want but be prepared for the mess. 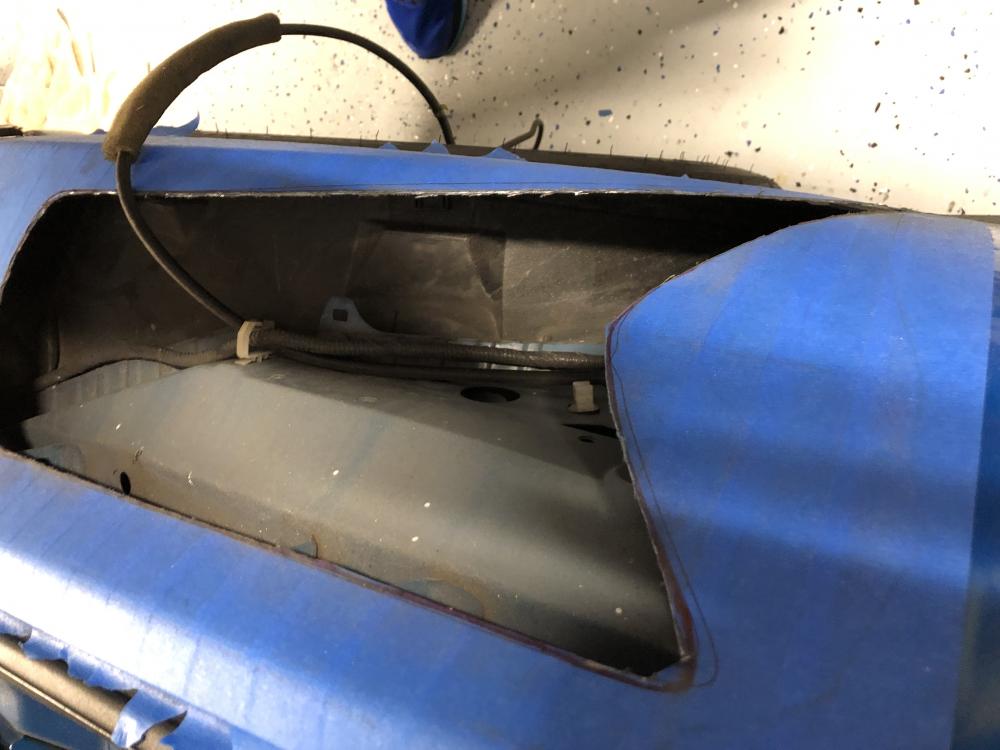 Next you'll want to remove the rear half of the fender liner. There are snap clips and screws in the fender well as well as a couple bolts that come in from the bottom of the car. It'll come out easy once you have them all out. It's a good idea to stop here and clean up all the mess the cutting and grinding has made for sanity reasons. You also may or may not have noticed that the fender is a little flimsy and kinda buckles in toward the car when the cuts are made. Don't be afraid t0 tug on the small section at the wheel well to get the vent to drop in. Once I got the fender vent in the fender where I was happy with it I marked where I wanted bolts and drilled holes through the vent and the fender. I opted for M4 hardware here. I wasn't originally going to paint the frame rail but you can see here why I changed my mind. 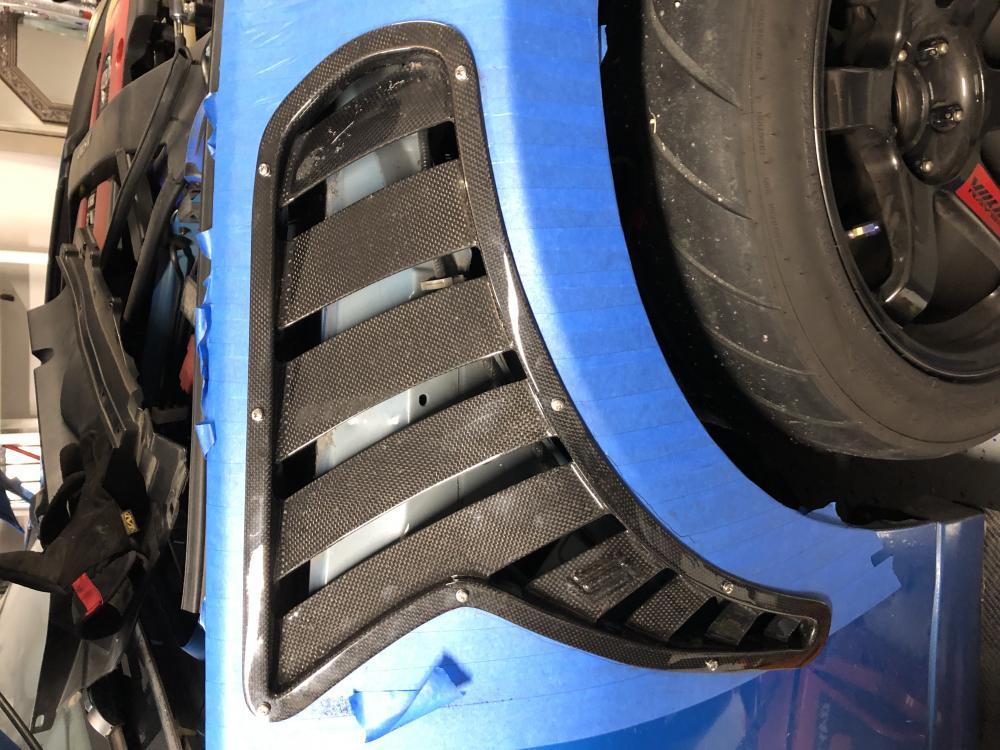 If you choose to paint, here's how I did it. I bought some 2 mil plastic drop cloth from my local home improvement store and then cut a section to lay over the car and cut it to open up the frame rail. I taped the plastic below the frame rail and to the back side of the fender and I haven't found any areas where paint escaped. Here's a two pictures of the process. I just sprayed two coats of Rustoluem paint and let it dry. 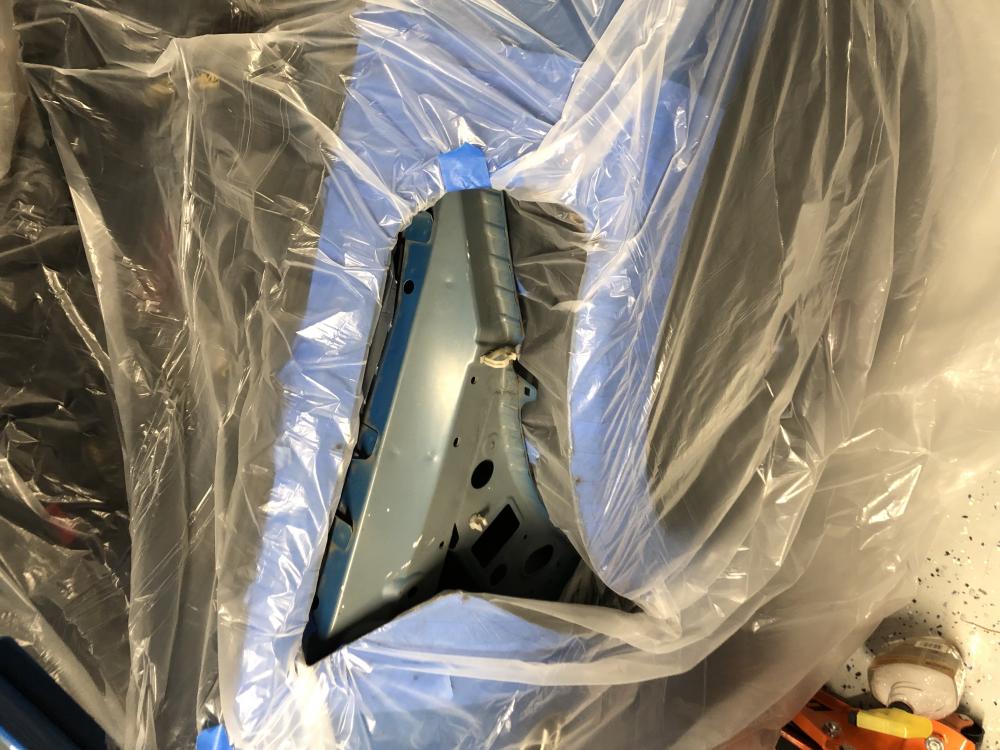 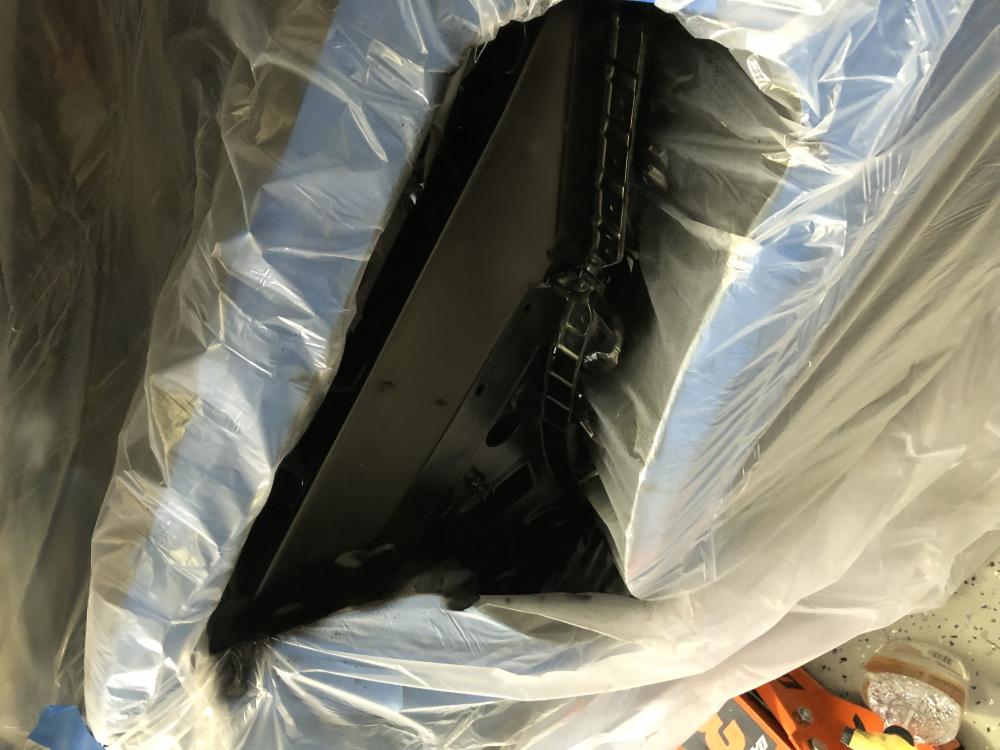 And here's a finished passenger side vent install! At this point I haven't put the fender liner back in but if you aren't using the vents for functional reasons, just install it before putting the wheel back on. If you're after the aero benefit, check the second post here and I'll show you what I did to open the liner and protect the vents. 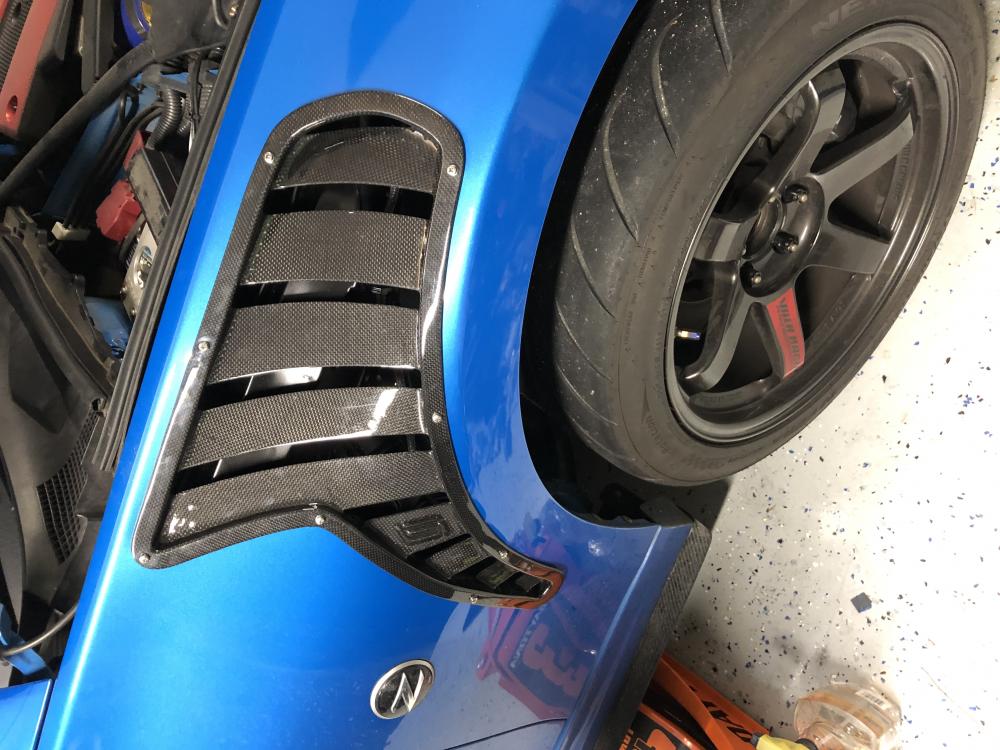 It's at this point the holidays happened which also delayed this initial post. My apologies to those who have been waiting. Now onto the driver side! I'm going to skip photos of the template process on the driver side and focus on a few notes. I took two measurements from the top corners of the fender vent to the corners of the fender by the headlight and the door as a positional reference. My theory was that if I got these two points in the ball park then the 3D nature of the template will align the rest. You also can't see both sides of the car at once so in my case I was not worried about being 'exact' as my car is a track car that I still daily and not a show car. This next photo shows the initial cut on the driver side. Notice where I squared off the bottom and a little bit the top corner closest to the door. This saved me a lot of time. I also cut this side right on my template line. I would guess if you cut just to the outside of your mark by the width of a sharpie line you'd probably save even more time on the fitting process. Do so at your own risk as I have not tried that myself. Cutting on the line made this side go a lot faster paired with the squared off corner cuts. 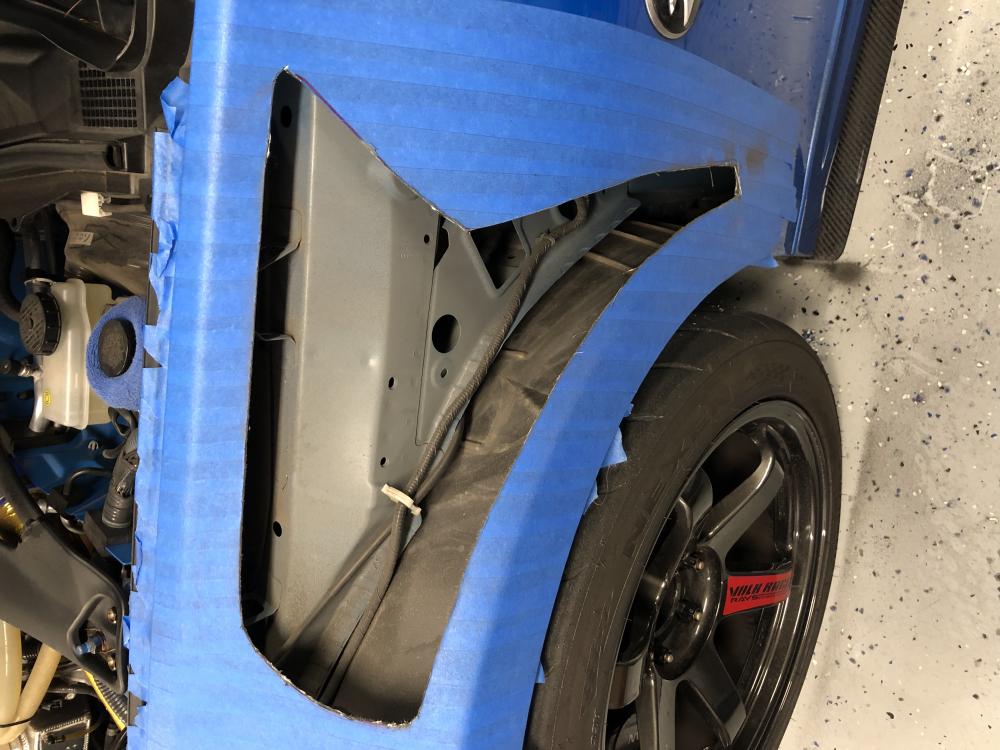 I'm going to spare anyone that's made it this far the details of the fitment and panting process here. It's identical to the passenger side. Here's a photo of the finished driver side. Much nicer fitment. I want to say that the small fitment things you see in my install are my fault and not a fault of the vent. I am pleased with them and I'll update later once I do a little more work and install my final hardware. By the point I finished this exploratory surgery I had about 60 hours of measuring, documenting, sending feedback to Finite Element, and working around my day job. 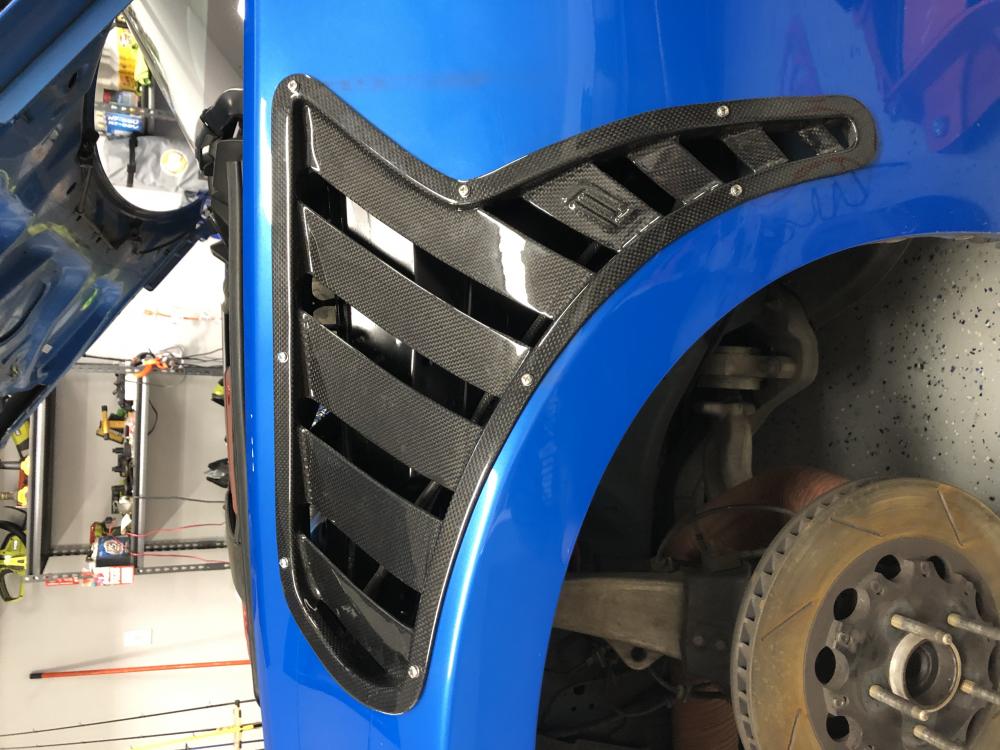 Despite all the frustration and effort, I truly think the end results are worth it. Here's a photo from behind the car. These are super aggressive working and based on my limited driving time in the rain I believe they will make a positive impact on the aerodynamics of the car. I've been watching the mist billow out of them on the highway and the tires toss water out at low speeds. If you want to see more photos of the car and vents from other angles check out my IG: AkumaZ_34. 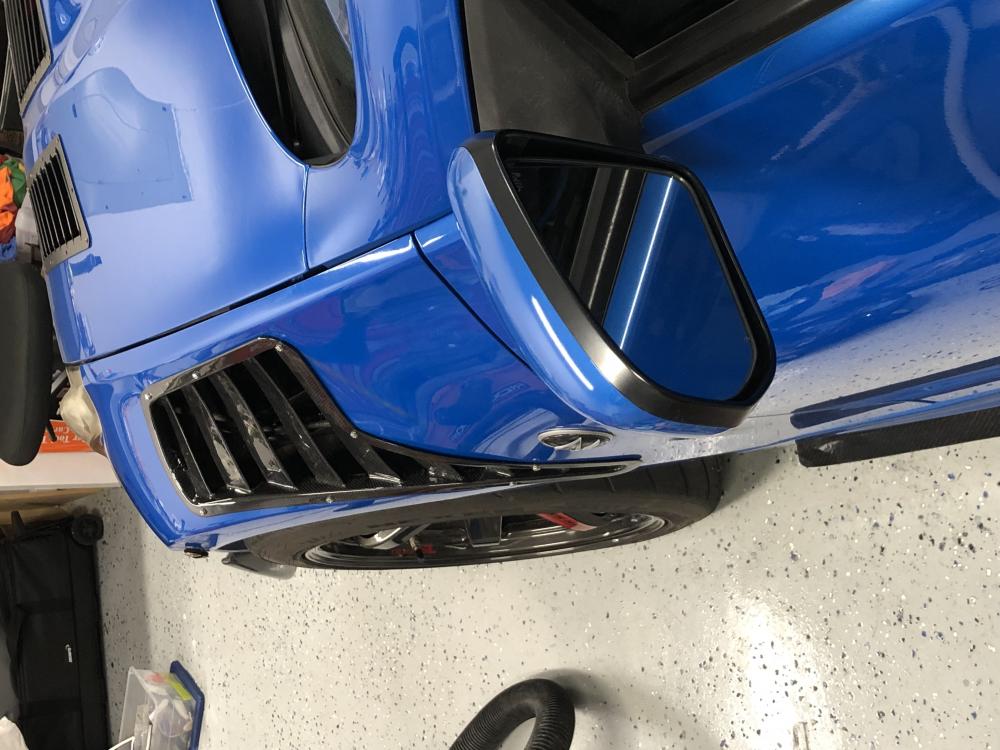 Overall I hope this is helpful to those who are about to receive their vents and anyone else down the road. I may come back and update this if I think of any other hang ups, tips, and tricks later. In the next couple posts I reserved space to show what I'm doing with the fender liners and what the final finished product is once I have my final hardware. Enjoy!
__________________
2010 Monterey Blue 370Z
Last edited by derraj06; 01-03-2019 at 11:10 PM. |
|
|

|
| Bookmarks |
|
|
 Similar Threads
|
||||
| Thread | Thread Starter | Forum | Replies | Last Post |
| Finite Element Design Fender Vents | cv129 | Exterior & Interior | 7 | 06-07-2018 07:17 PM |
| [FOR SALE] 370z finite element design carbon fiber canards | z34felix | Parts for sale (Private Classifieds) | 18 | 02-28-2018 11:07 PM |
| Fender vents - which one... | OldFart | Exterior & Interior | 40 | 12-17-2014 12:48 PM |
| Fender vents?? | synolimit | Exterior & Interior | 14 | 01-04-2014 09:53 PM |
| WHERE can i buy this? front fender vents? | Z11 | Nissan 370Z General Discussions | 6 | 06-27-2012 07:59 PM |