
 |
DISCLAIMER: REMOVE YOUR STOCK SEAT SRS AIRBAG SYSTEM AT YOUR OWN RISK, I AM NOT CONDONING REMOVAL, NOR DO I TAKE RESPONSIBILITY IF YOU DO SO. Okay, some of you
|
|||||||
 |
|
|
LinkBack | Thread Tools | Display Modes |
|
|
|
|
#1 (permalink) |
|
Track Member
Join Date: Jul 2009
Location: Beaumont, TX
Posts: 685
Drives: 06 Porsche Carrera S
Rep Power: 18            |
DISCLAIMER: REMOVE YOUR STOCK SEAT SRS AIRBAG SYSTEM AT YOUR OWN RISK, I AM NOT CONDONING REMOVAL, NOR DO I TAKE RESPONSIBILITY IF YOU DO SO.
Okay, some of you may have put racing seats in your car, and noticed that now you have a flashing airbag light (a stick figure seat belted in, with an airbag in his face) blinking on your dash, or some of you may want racing seats, but do not want to do it because of the flashing light. Well, below is how you get rid of the light without ripping it out the dash. First, the reason why you get the light. Your stock 370z seats have SRS airbags inside the shoulder of the seat. When you wreck, these deploy and basically are like a pillow between you and the door for side impact collisions. If you choose to remove your stock seats, you will have to disconnect a plastic electrical connector under EACH seat. This is the SRS connector. NOTICE: Under the Passenger seat are two connectors, one is the passenger airbag weight sensor pad, the other, the SRS system. I will tackle the weight sensor further down this how to. 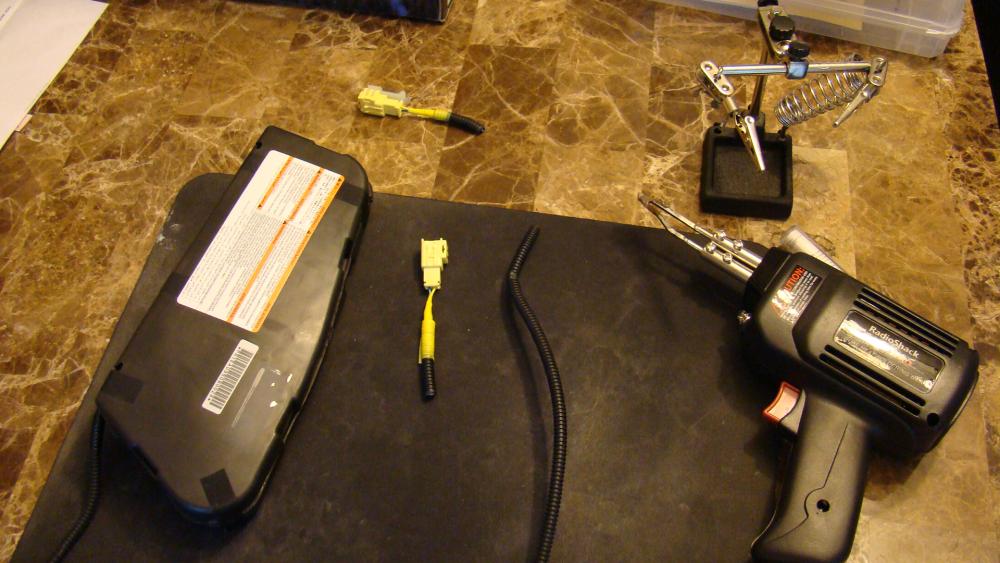 Note, airbag module shown just for reference, as I took it completely out the seat just to see what I was dealing with. You do not need to remove the whole airbag assembly. Second, Supplies you will need for the SRS airbag light removal 'trick' depending on your style. (2) 4.7ohm, 1/2 watt resistor [that's one resistor per seat] (1) Wire Stripper (1) Soldering Iron* (1) Solder* (1) Heatshrink* Suggested (1) Helping Hands, or 'Third Hand' electrical holder *Can be used in lieu of Solder (4) Electrical Butt COnnectors (1) Roll of Electrical Tape (1) Wire Crimper Some may want to use electrical butt connectors or crimp tools, this is fine, I prefer soldering my connections and heatshrinking them. It's all up to you, Now, assuming you still have your stock seat somewhere around - look under the stock seat, and cut off your electrical connector with yellow tape wrapped around it, leaving several inches of wire on the connector for you to strip off. Do this for both seats. Then, Un wrap your yellow tape from the connector, and strip the ends of the wire. 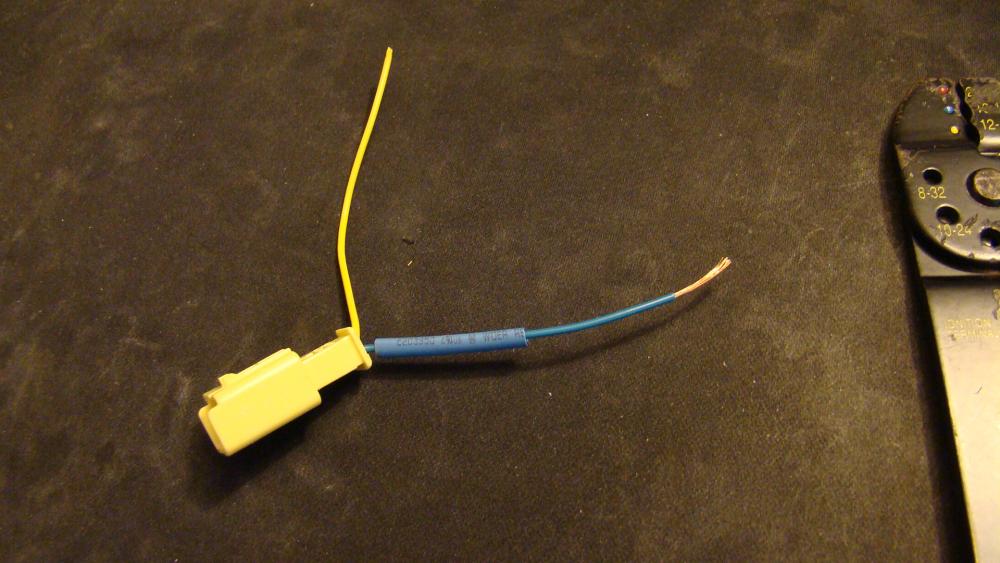 Put your connector into your Third Hand to hold it for you, and wrap one end of your resistor around the exposed wire. Solder this connection together, using your solder gun, heat the connection from below, and press your solder down on the connection from the top. The hot wire will melt the solder and draw it down between the strands of copper, you don't have to heat the solder directly. Ensure you get a shiny finish on the solder, if it looks dull, you have air in the solder connection and need to remelt the metal to get a good connection. 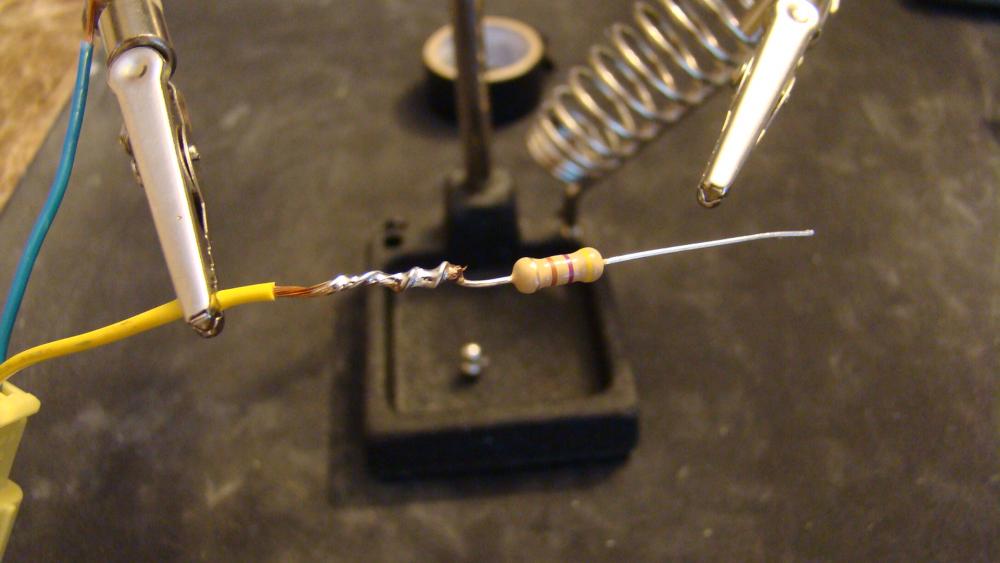 Now, slide come heat shrink down over your soldered connection, and heatshrink that puppy on. Then, slide another peice of sleeve over your now smaller, melted heatshrink, so you can use it for the next connection. Bend the resistor around in a U shape so it can be wrapped around the other wire of the connector, and solder this end together, and neatly heatshrink the connection. You should look something like this. 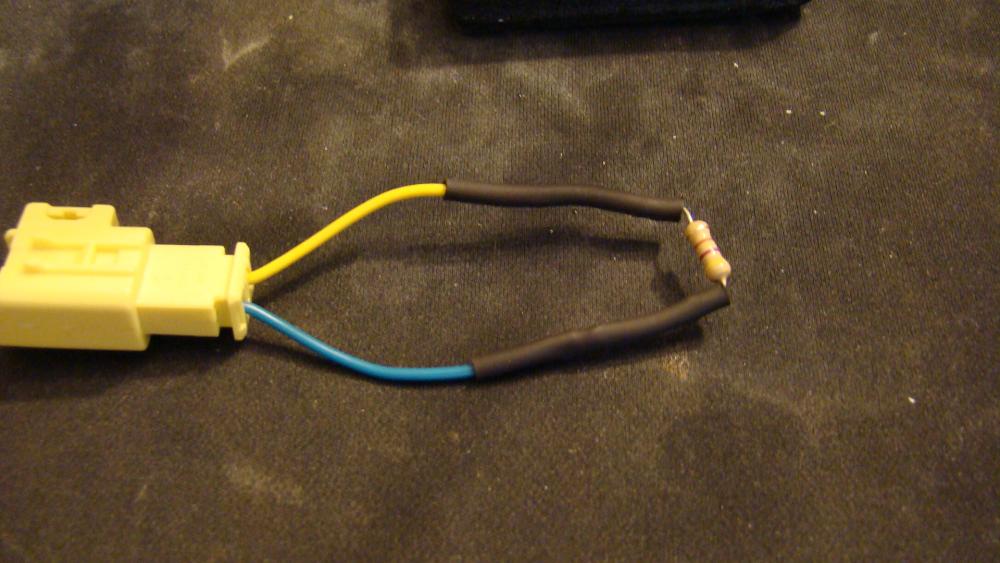 Do the same for the other connector, and you're done with electrical engineering. Just reconnect these suckers in your car under your racing seats. You will need to perform the AIRBAG RESET TRICK in order to remove the airbag light once this is done, and you should be good to go. Now if you want to retain the usage of your stock passenger weight sensor with your racing seats, and still have a passenger airbag, that is covered below. Inside the passenger stock seat, is a thing peice of material that you basically sit on everytime you get in the the side seat. It detects whether or not you are heavier than a certain number, and decides whether or not to arm the passenger airbag in the dash in front of you. I think the weight is something like IF > 80lbs, then arm airbag else disarm airbag. Now I didn't really take pictures on this section with the intentions of making a how-to when I stripped the upholstery, so I apologize for the lack of exact images you might want. I'll try to just do it by memory. What you will need for this project: (1) Ratchet 3/8" drive (1) 12mm socket (1) 6" long extension (15+) Small cable ties (1) Needle Nose pliers or Needle Nose Vice Grips (Pair) Wuevos* *Suggested BELOW: Here is the bottom of the passenger seat, but note this is a picture after I was already done, so there isn't any SRS or Weight Sensor connectors hanging out the bottom of this seat, so don't get disconcerted when your seat has these in the beginning. You will need to remove the lower pad of the seat to get to the weight sensor. This is accomplished by removing four 12mm bolts. 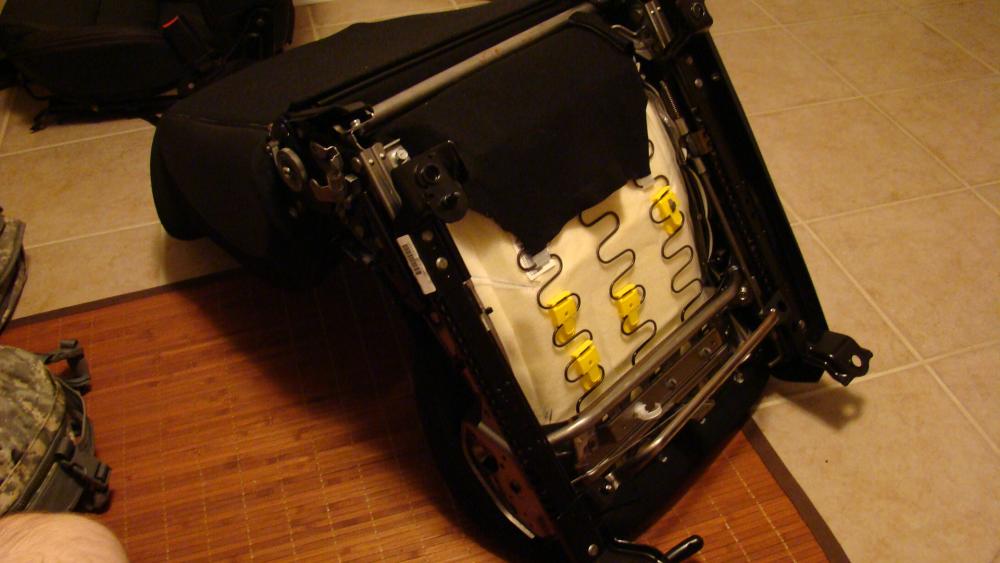 BELOW: Bottom of passenger seat. Remove the four bolts on the bottom of the seat holding the lower pad in. Just these four bolts actually hold the lower pad in. These bolts have a little number '7' on them, and are 12mm. 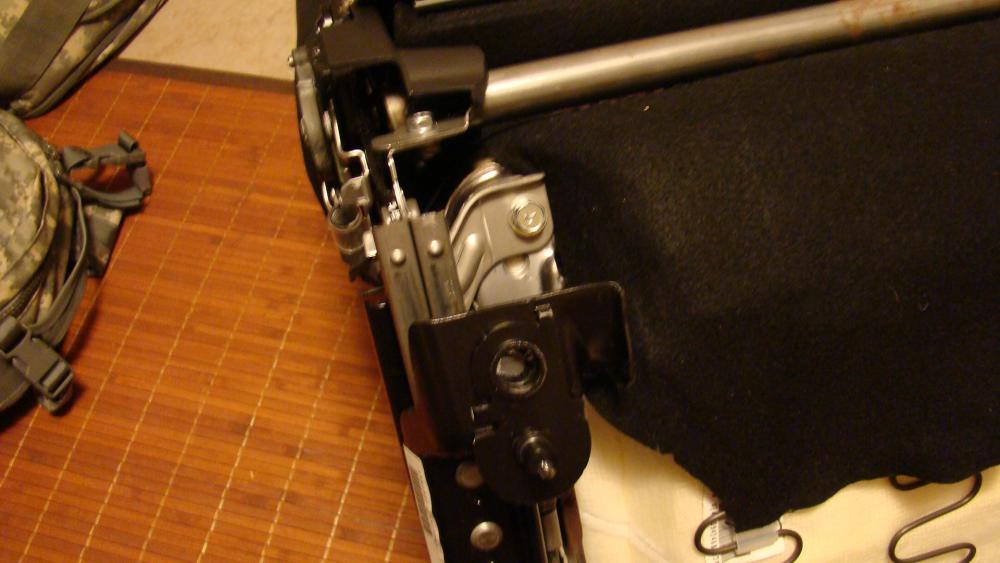 BELOW: Bottom of passenger seat, this time a picture of the bolt closer to the front of the seat. Remove the bolt that is flat into the lower pad, not the one sitting at an angle on the bracket to the side. The bolt is 12mm. 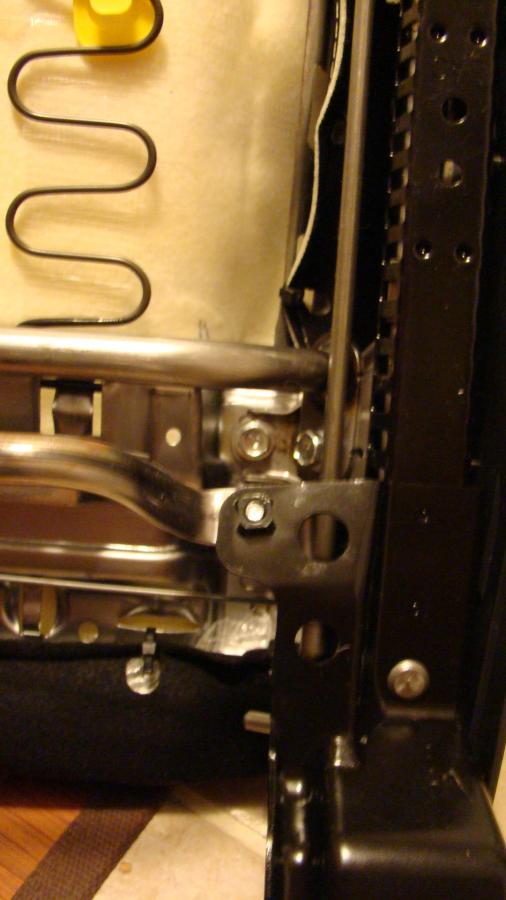 Now that the seat pad is loose from the seat, we will work just on the pad. Starting on the underside of the seat pad, take your needle nose pliers and disconnect the seat pad sensor wire from the plastic clips holding it down. THen, with your pliers again, find the small metal rings that hold the black fabric to the seat foam/frame. Grab each ring and twist it until unwravels, disconnecting the black fabric from the seatpad. The small rings are actually wrapped around a strong metal rod going through the foam seat, so you aren't ripping these rings out, you're just bending them open using your twisting torque and the rod as a wedge. Discard the metal rings, we will replace these with small cable ties. Peel away the fabric as you realease it from the rings, removing all the rings you can find. Once you uncover the whole pad, you will see the weight sensor is fastened to the seat pad in the same way. BELOW: The Passenger Airbag weight sensor. Twist off the metal rings holding the sensor to the seat pad, being careful not to rip the seat pad weight sensor too much. Once you have the weight sensor loose, put it off to the side so we can re-assemble the seat pad. 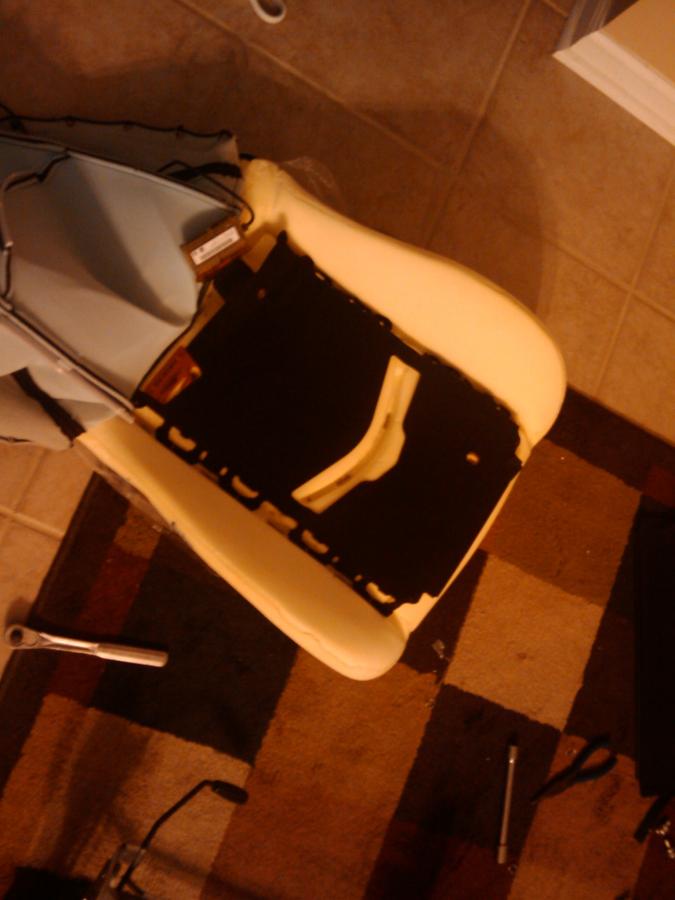 Now to re-assemble/re-upholster the stock lower seat pad, you will take your small cable ties, and run them down and under the metal rods that the rings were attached too, and using the same hole on the fabric that the ring was through, pull the fabric tight to the foam just as it was. If you need to poke a new hole in the excess fabric on the underside, to run cable ties through, feel free, this won't hurt anything. Make sure you trim the cable ties down to size, and twist them so the trimmed point of the cable tie is pointed down into the fabric. Just as a precaution. This is a very simple shaped seat, and is very easy to wrap. Re-bolt your seat bottom back on the seat frame, and your seat should look good as stock once more, now just with not connectors sticking out the bottom (assuming you already cut the SRS airbag connector off, and did the first airbag fix listed). Now, take your passenger weight sensor, and stick it in your racing seat, under the center pad, and fish the electrical tail through the back of the seat. Make sure to connect the weight sensor to the harness below your racing seat in the car. If you do not have a removable center pad in your racing seat, and can't put the sensor under it, you can just just place the weight sensor below your racing seat, and flip it upside down with the white facing up. When upside down, the weight sensor seems to ALWAYS arm, atleast mine did. This way your passenger airbag will just always be on. CAUTION: Ensure if you do this, you DO NOT install a forward facing child seat in the passenger seat. In an accident, the airbag may KILL THE CHILD. (not that I imagine anyone is going to try to mount a child seat into a racing seat, but hey, this IS America.) Below is an image of the stock weight sensor in the Bride seat center, and connected up. NOTE: THE SENSOR IN THIS PICTURE IS UPSIDE DOWN TO SHOW CONTRAST. ENSURE YOU PUT THE BLACK SIDE UP IF YOU WANT IT TO WORK PROPERLY. 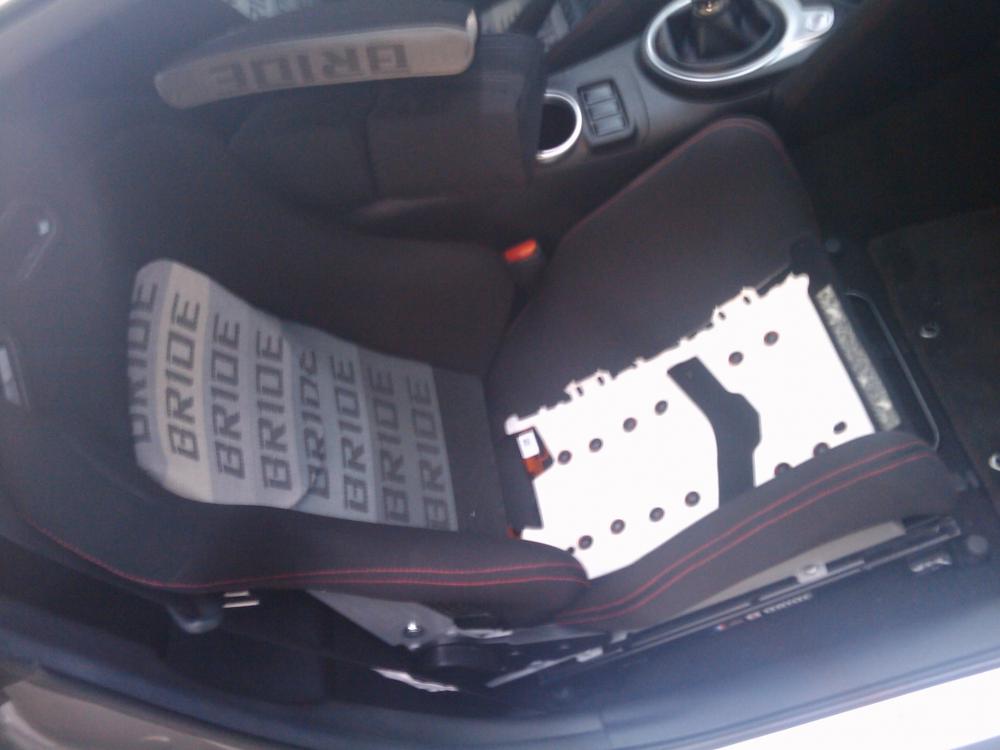 Below is a picture of the seat with the center Bride pad put back down over the passenger weight sensor. 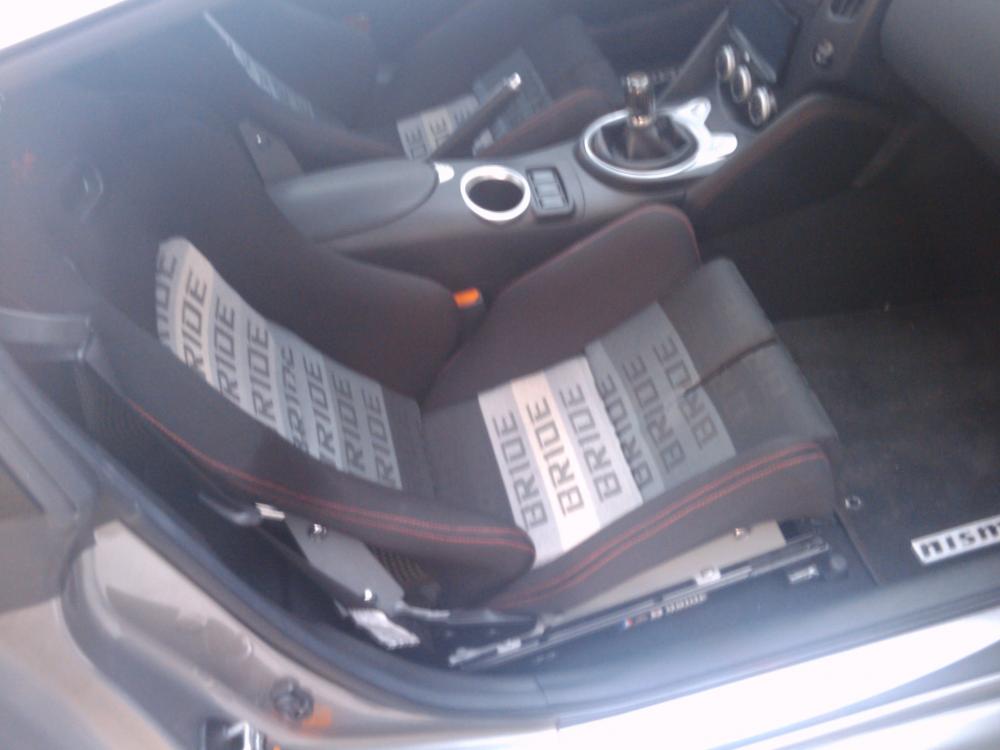
__________________
Check out my Albums '13 Subaru WRX STi | '06 Porsche 911 Carrera S (SOLD) | '96 Mazda RX-7 6.0L V8 RHD (SOLD) | '09 Nissan Nismo #0058 (SOLD) Last edited by Equinox; 10-27-2009 at 11:23 AM. |
|
|

|
|
|
#2 (permalink) |
|
Track Member
Join Date: Jul 2009
Location: Beaumont, TX
Posts: 685
Drives: 06 Porsche Carrera S
Rep Power: 18            |
FROM the 2010 370z Manual regarding the passenger airbag arm light
FRONT PASSENGER AIR BAG STATUS LIGHT This vehicle is equipped with the Nissan Advanced Air Bag System. Under some conditions, depending on the type of occupant or object detected in the front-passenger’s seat by the occupant classification sensor, the front passenger air bag is designed to automatically turn OFF. When the front passenger air bag is OFF, the front passenger air bag status light will illuminate.* For example: When the system detects that the front-passenger’s seat is occupied by a small adult, child or child restraint as outlined in the Owner’s Manual, the will illuminate to indicate that the front passenger air bag is OFF and will not inflate in a crash. When the front-passenger’s seat is occupied and the passenger meets the conditions outlined in the Owner’s Manual, the will not illuminate to indicate that the front passenger air bag is operational. *When the system detects that the front-passenger’s seat is unoccupied, the front passenger air bag status light will not illuminate, even though the front passenger air bag is OFF
__________________
Check out my Albums '13 Subaru WRX STi | '06 Porsche 911 Carrera S (SOLD) | '96 Mazda RX-7 6.0L V8 RHD (SOLD) | '09 Nissan Nismo #0058 (SOLD) |
|
|

|
|
|
#4 (permalink) |
|
Enthusiast Member
Join Date: Jan 2009
Location: Raeford, NC
Posts: 305
Drives: 09 NISMO 370Z
Rep Power: 187            |
Great write up. I'm interested in a pair of bride seats somewhere down the line. One of the main reasons is head clearance (esp with a helmet) on the stock seats. My head rubs the roof. Do these seats provide more clearance (sit lower)?
__________________
When was the last time you did 230MPH in something with 4 seats? |
|
|

|
|
|
#5 (permalink) |
|
Track Member
Join Date: Jul 2009
Location: Beaumont, TX
Posts: 685
Drives: 06 Porsche Carrera S
Rep Power: 18            |
Pretty awesome, I like them. They do have high side bolsters so when you get in and out of the car, you almost have to 'step' over the thigh bolsters to get in and out. People not used to getting in my car will get summarily butt raped when they first try to get in, sitting on the thigh sing, lol.
As far as sitting lower, I'm not sure, since I never really looked at how the stock seats sit. I will say that I'm 5'11" and can wear a helmet with another 2" of room to spare. That's more than my wife's Pontiac G8 sedan. 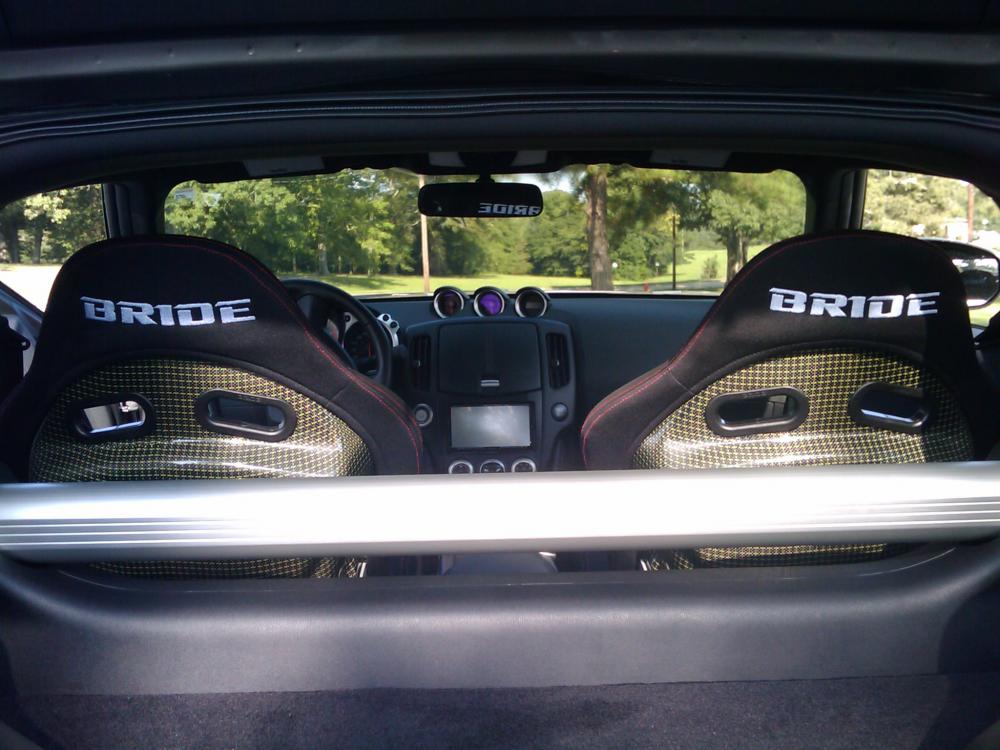
__________________
Check out my Albums '13 Subaru WRX STi | '06 Porsche 911 Carrera S (SOLD) | '96 Mazda RX-7 6.0L V8 RHD (SOLD) | '09 Nissan Nismo #0058 (SOLD) |
|
|

|
|
|
#6 (permalink) |
|
Car Audio Installer
 |
Nice write up! It is just that I would personally never bypass safety features on a car. +1 to you
__________________
Need help with car audio or electronics? Let me know!! Need Help Let Me Know Direct email address reimermatt@gmail.com Owner of: Dynamic Mobile Audio Follow me below https://www.facebook.com/Dynamicmobileaudio/ |
|
|

|
|
|
#7 (permalink) |
|
Enthusiast Member
Join Date: Sep 2009
Location: Hawaii
Posts: 351
Drives: STI, MDX, Titan
Rep Power: 305            |
Just a quick thought,..
But why cut the harness wire and solder the resistor together? Could you not just plug the resistor to either side of the female side of the plug and tape it in/down? |
|
|

|
|
|
#8 (permalink) |
|
Track Member
Join Date: Jul 2009
Location: Beaumont, TX
Posts: 685
Drives: 06 Porsche Carrera S
Rep Power: 18            |
Yes you could, but if I ever want to re-install the stock seats with airbags, I could just as easily solder the connector back on as well. I find this way more secure.
__________________
Check out my Albums '13 Subaru WRX STi | '06 Porsche 911 Carrera S (SOLD) | '96 Mazda RX-7 6.0L V8 RHD (SOLD) | '09 Nissan Nismo #0058 (SOLD) |
|
|

|
|
|
#9 (permalink) |
|
A True Z Fanatic
 Join Date: Apr 2009
Location: SC
Posts: 2,464
Drives: 370Z
Rep Power: 545            |
I don't see why you couldn't just insert a resistor into the end of the plug still in the car, but using the factory plug seems to be cleaner and more secure. Of course airbags are worth a lot of money and if you plan to sell it you don't want to cut anything off of it.
|
|
|

|
|
|
#10 (permalink) |
|
Enthusiast Member
Join Date: Sep 2009
Location: Hawaii
Posts: 351
Drives: STI, MDX, Titan
Rep Power: 305            |
dont mean to be ignorant,..just dont know about this item..
but at radio shack I could only find 4.7K ohm resistors and not 4.7ohm.. (2) 4.7ohm, 1/2 watt resistor [that's one resistor per seat] (1) Wire Stripper (1) Soldering Iron* (1) Solder* (1) Heatshrink* does the "k" make a difference? |
|
|

|
|
|
#11 (permalink) | |
|
Track Member
Join Date: Jul 2009
Location: Beaumont, TX
Posts: 685
Drives: 06 Porsche Carrera S
Rep Power: 18            |
Quote:
http://shop.vetcosurplus.com/catalog...oducts_id=8054
__________________
Check out my Albums '13 Subaru WRX STi | '06 Porsche 911 Carrera S (SOLD) | '96 Mazda RX-7 6.0L V8 RHD (SOLD) | '09 Nissan Nismo #0058 (SOLD) |
|
|
|

|
|
|
#12 (permalink) | |
|
Base Member
Join Date: Dec 2017
Location: Washington DC
Posts: 17
Drives: 2015 370Z Sport
Rep Power: 8  |
Quote:
Where is this resistance value (4.7Ω) being referenced from? |
|
|
|

|
|
|
#14 (permalink) |
|
Enthusiast Member
Join Date: Sep 2009
Location: Hawaii
Posts: 351
Drives: STI, MDX, Titan
Rep Power: 305            |
thanks,..
eh,..cheaper at ebay shipped to my door,...waiting on slider adapters anyways...
__________________
2009 370z PG MODS: 19x9.5 & 19x10.5 Volk GTS Injen CAI, 5k HIDs, FI CF Catback, FI Hi-Flow Cat, Clazzio. Links: CLAZZIO, HID CHANGE Volk GTS Rims, Brembo Last edited by abakja1; 04-27-2010 at 11:46 PM. |
|
|

|
|
|
#15 (permalink) |
|
Premium Member
 Join Date: Nov 2009
Location: Socal
Posts: 996
Drives: Sold!
Rep Power: 52            |
Nice write up. Also I know Nismo made for the 350/G35 the same thing with the factory plug and a nice looking harness/resistor case. Not sure if they are available for 370 or if the old ones work. I'm sure your way is much cheaper too but just wanted to throw that out there for those who may rather throw down the cash and chicken out lol.
__________________
Nismo Suspension: New Owners Check Here! |
|
|

|
 |
| Bookmarks |
|
|
 Similar Threads
|
||||
| Thread | Thread Starter | Forum | Replies | Last Post |
| airbag light? | JAYNO20 | Exterior & Interior | 1 | 05-15-2012 09:19 PM |
| AIRBAG LIGHT ON ! help ! | maurim3 | Exterior & Interior | 0 | 04-10-2012 07:52 PM |
| passenger airbag light | ThreeSeventyZ | Nissan 370Z Warranty / Scheduled Maintenance / Servicing / Repairs | 7 | 07-06-2011 06:59 PM |
| airbag light | fonZie | Audio & Video | 2 | 04-15-2011 04:10 PM |