Sup everyone.. im making this DIY because a couple of you were wondering how its done...

ill walk you through everything
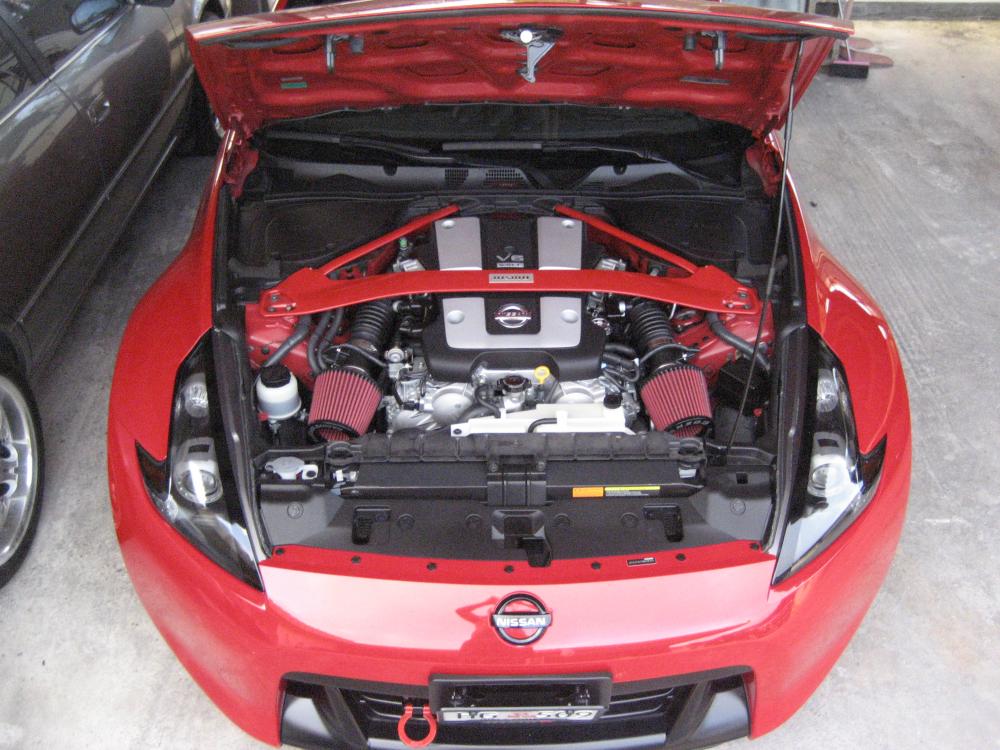
 BEFORE silver engine cover....
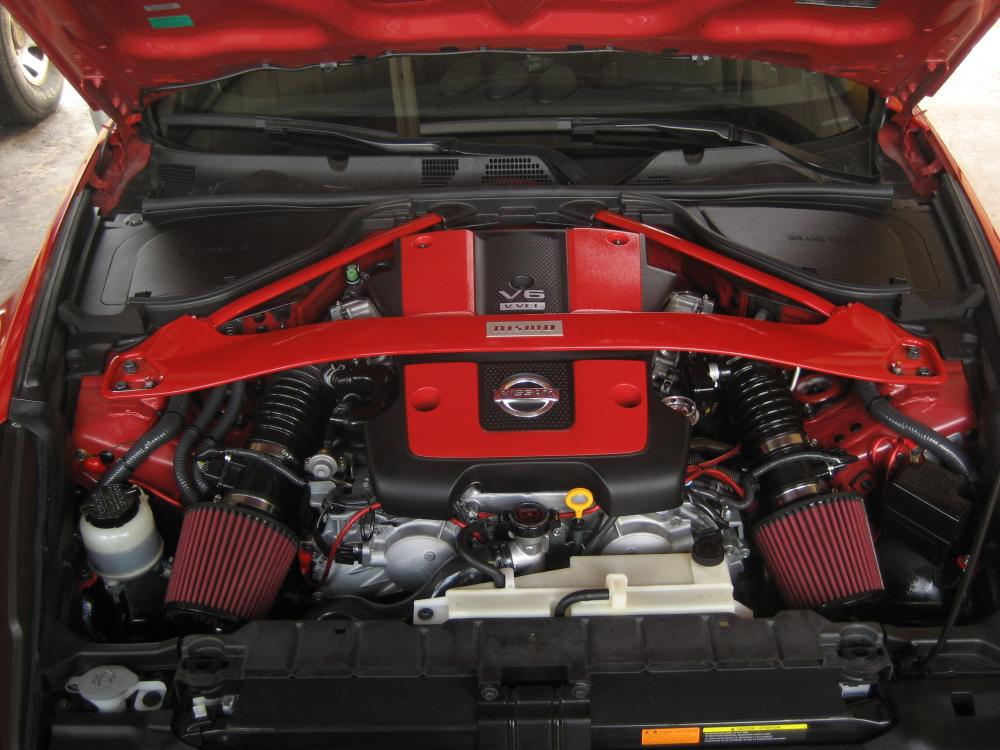
 AFTER red engine cover.....

Things needed...
 PAINTERS TAPE
PREP SOLVE
PLASTIC PROMOTOR
RED KRYLON FUSION
BRITO PAD "scotch brite pad"
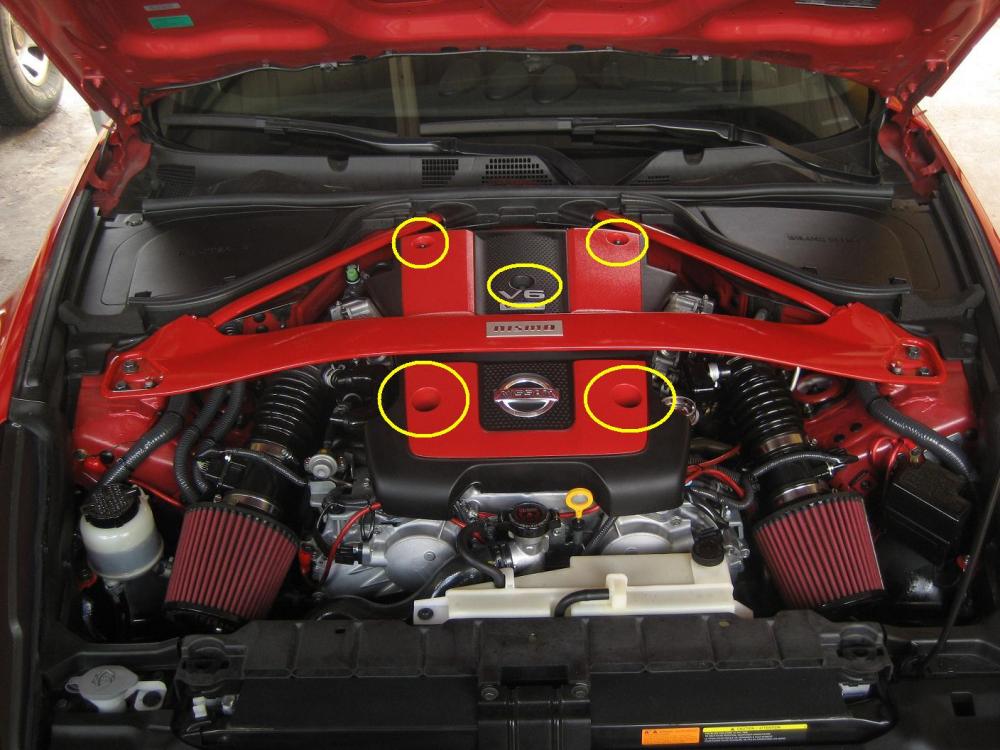
step 1.... really easy just grab your 10mm socket and ratchet and unbolt the five 10mm bolts holding down the engine cover.... the yellow circles are the bolts...

step 2.... once you have unbolted and removed the engine covers from your z... its time to use the painters tape and tape up all the black area of the engine covers leaving the silver part exposed.... please be very tedious in this step make sure you tape really really neat... the neater you tape.. the more nicer the line is.... and the outcome is...
step 3.... once it is all taped up... use your scotch brite brito pad and begin to lightly scuff the silver area.... you dont have to sand super hard... you just wanna create small fine scratches so the paint will grab better....

step4..... wipe down the sanded area with prep solve..... (prep solve is a chemical used by painters to remove all contaminants on the surface that they are going to paint... it insures that all oils, dirts, waxes are stripped from the surface that is going to get painted and provides a lesser risk of the paint reacting.... ie: bubbling, fisheyes, and lizard skin) NOW if you dont have prep solve dont worry

just wash it down with some dish washing soap mixed with warm water and let it air dry...... MAKE SURE you wash it really really good... OIL/any other contaminants= sh!tty paint job... its gonna react or do something really ugly looking sooo please.... make sure the engine cover is washed really well ESPECIALLY if you have applied anything on the plastic to make it shiny.... like armor all.... please note you will most likely have to re tape the whole thing if you have to wash down the valve cover... ALSO ANOTHER NOTE you wanna scuff the silver part while its TAPED UP!!! because if you free hand it you will most likely have small scratches on the black part from accidentally scuffing it

step5.... spray a fine mist and coat the silver area with a plastic promotor... one even coat is good... let it sit for 10-15 mins to dry.... this goes by several names.... "adhesion promotor, flex primer, plastic promotor" this part is necessary since the engine cover will be subjected to hot temperatures this is a reassurance that the paint does not peel

step6..... KRYLON time!!!! start off by spraying a first coat and then second and third... make sure your coats are all thin and EVEN

remember not to rush and be patient.....
step7..... grab a cold brew and chill out for a bit... the pieces should be dry in about an hour.... remount them by installing the 5 10mm you removed and step back and enjoy your hard work

hope you guys have fun doing this mod!!! the best part is that anyone can do it... and its super cheap... ul spend like $20 for the paint and materials....

and ur engine bay will pop when you open the hood with that red engine cover

ON the last note... i am not responsible for anyone if they break something while doing this DIY... i mean its next to impossible for anyone to break anything but yah... just wanna make that clear
