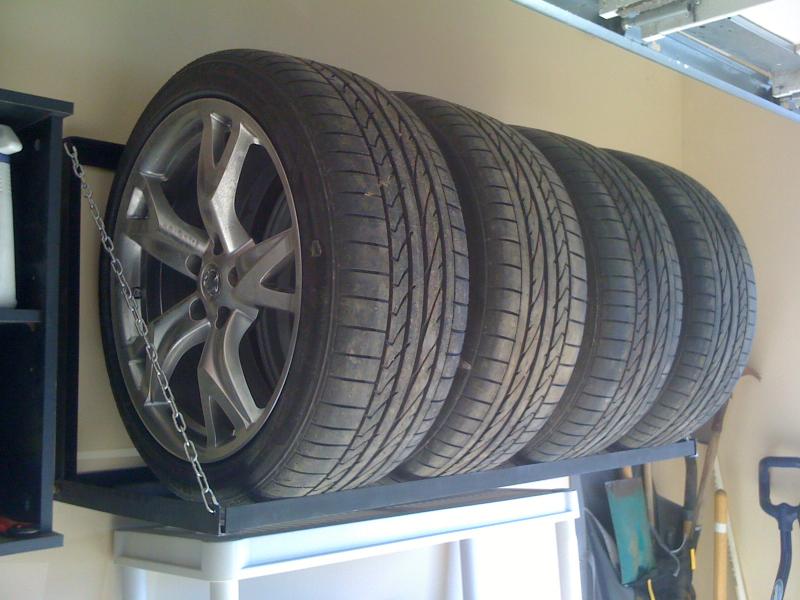
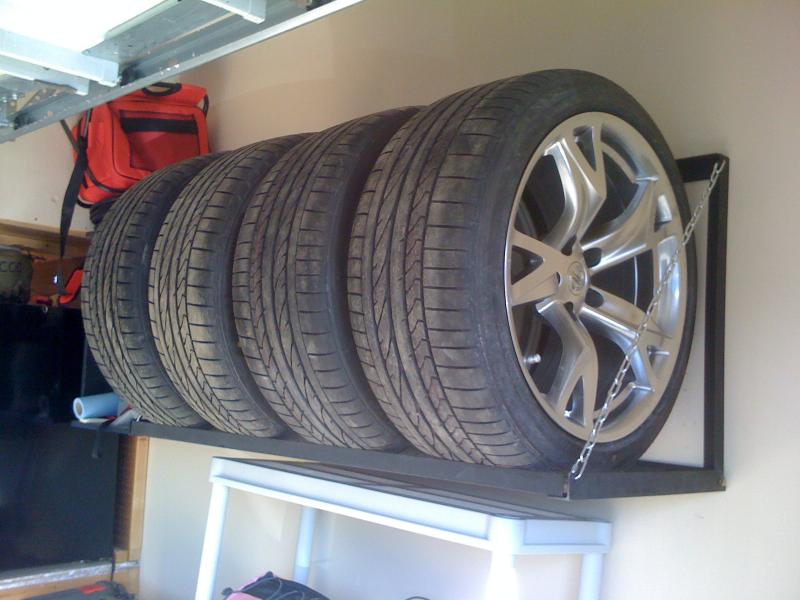
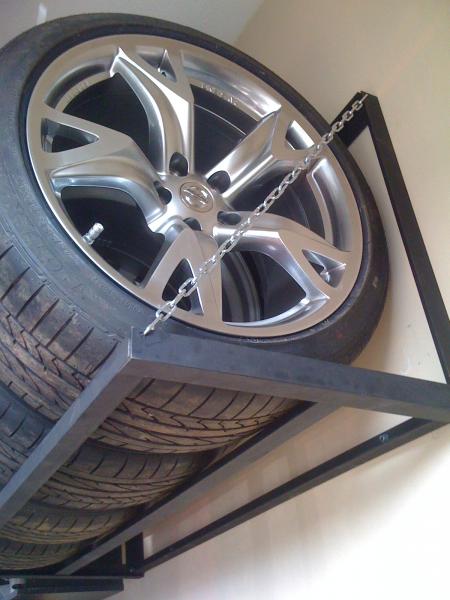
I built a rack for my tires to be stored on during winter. It turned out really good! I welded together some 1/8" angle iron and painted it black. I drilled some holes and used some chain to support the weight. Bolted it onto the stud in the wall with Lag bolts and, voila! Instant tire rack!

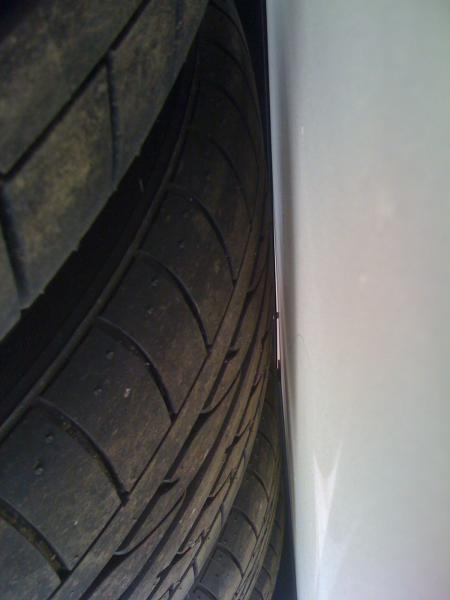
This one shows the small amount of space left between the tire and wall to avoid marking the drywall.
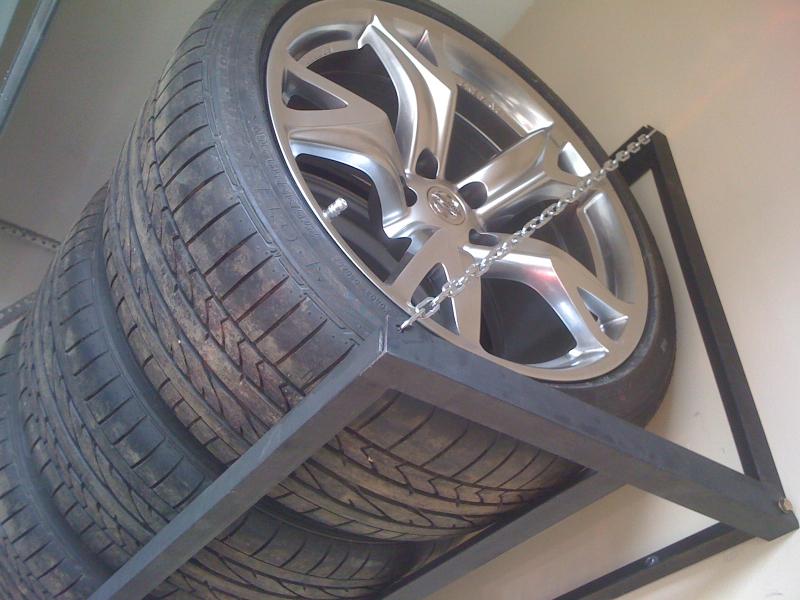
Here is the quick build until I can get a complete DIY up:
You will need:
4 x 4' lengths of 1/8" angle iron (fits sport wheels and tires for width)
2 x 2' lengths of 1/8" angle iron (Vertical setions)
2 x 20" lengths of 1/8" angle iron (extensions from wall)
Approx 5' of chain and 4 chain connectors
2 x 3/8" x 1" bolts with lock nuts
welder and paint
How to:
TOP SECTION
Lay the two vertical wall pieces (2') down first. Place the two horizontal 4' sections on top of these (overlapping) at the top and bottom of the vertical pieces, square up and tack into place.
Drill holes in the top sections for the chain to go thru. Try and be accurate for both sides to make it even.
BOTTOM SECTION
Grind the ends of the 20" pieces that will nestle into the rack so that they can rotate up INTO the vertical section for storage. In other words, round off the square end that will rotate so that it will not interfere with the rotation.
Place the two 20" pieces on the table and lay the 4' sections (that support the tires) over these (overlap). The first piece of angle iron is tacked at 8" from the wall and the second piece is at the end of the 20" section. That leaves a 12" "cup" for the tires to sit in and the tires DO NOT touch the wall. Square them up and tack into place. I made this section SLIGHTLY thinner (width wise) than the top section so it could rotate up and into the top section for storage when not in use. To do this I ground off 1/4 " from one end of the 4' sections on the bottom.
Line up the rounded ends with the top section, clamp into place and drill a hole thru both sections and bolt together at the bottom corner. Ensure you have proper clearance for rotation. Drill holes for chain in corners.
FINISHING
Paint the entire piece to prevent rust and to make it purdy. Add shiny chain with link adapters to top and bottom corner holes, making sure that the bottom assembly is SLIGHTLY tilted toward the wall.
Find the studs in your wall and drill holes thru the angle iron in the appropriate locations and Lag bolt to wall. Ensure assembly is level.
and YOU ARE DONE!
Hope this helps. I built mine in about 4 hours. I know it is not perfect and is far from a commercial item, but it looks good and is very strong and functional. I will redo this as a DIY with photos when time permits.
cheers!