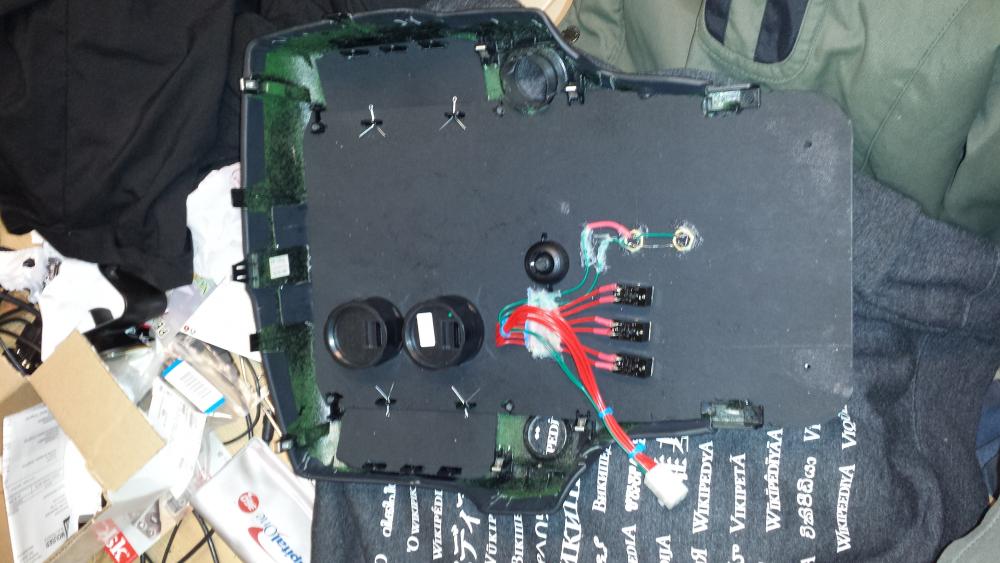
Also, here's a pic of the back side of the center dash panel, which gives some idea how to construct one. Again, thanks to my friend Wence for doing most of the work there on all the plastic cutting and fitting. The main trick was the cotter pins through the holes in the little fins (originally for the vents), which holds the plate to the frame. The rest is just cutting the edges to lock around various other bits, and screw holes at the bottom to attach where the stock center console does.
If you squint, you can kinda see the resistors soldered to the pair of buttons as shown in the diagram above (except my "R3" is on the opposite leg from "R2", inside that red heat-shrink, which doesn't really change the circuit at all). The white junk is epoxy holding the wires to the back of the plate for strain relief (so that pulling on the wiring connector doesn't pull on my solder joints to the switches). The main panel material is part number 8650K12 at mcmaster.com (12x24 panel, 1/8" thick, "Formable Chemical-Resistant Kydex Acrylic/PVC")
